
Peanut Butter Balls with Rice Krispies are the undisputed cbeef hampions of no-bake treats, and for good reason! If you’re looking for that perfect blend of chewy, crunchy, and utterly satisfying, you’ve landed in the right place. There’s something almost magical about the way creamy peanut butter melds with the crisp, airy texture of Rice Krispies, all coming together in a delightful, bite-sized package. These aren’t just any sweet snack; they’re a nostalgic journey for many, bringin extractg back memories of childhood kitchens and effortless baking. What truly sets these Peanut Butter Balls with Rice Krispies apart is their incredible simplicity combined with their universally loved flavor profile. They’re a guaranteed crowd-pleaser, perfect for a quick afternoon pick-me-up, a party appetizer, or simply when that sweet craving hits hard. Prepare to fall in love all over again with this classic, irresistible creation.

Ingredients:
- 1 cup creamy no-stir peanut butter
- 3 tablespoons salted butter, melted
- 1 cup powdered sugar
- 2 ½ cups Rice Krispies cereal
- 12 oz semi-sweet chocolate chips (or chocolate melting wafers)
Making the Peanut Butter Mixture
The foundation of our delicious Peanut Butter Balls with Rice Krispies is a simple yet irresistible no-bake peanut butter mixture. First, in a medium-sized mixing bowl, combine the creamy no-stir peanut butter and the melted salted butter. Using a sturdy spoon or a rubber spatula, thoroughly mix these two ingredients until they are completely incorporated and you have a smooth, uniform consistency. It’s important to ensure the butter is fully blended in, as this will help create a pliable dough that’s easy to work with and will hold its shape beautifully when rolled. Don’t rush this step; a good mix here is key to a great texture.
Next, add the powdered sugar to the peanut butter and butter mixture. Gradually add the powdered sugar, mixing it in a few tablespoons at a time. This gradual addition helps prevent a cloud of sugar from exploding out of the bowl and ensures it integrates smoothly. Continue mixing until all the powdered sugar is incorporated and the mixture forms a stiff dough. You’ll know it’s ready when it’s no longer sticky and can be easily handled without sticking excessively to your hands or the bowl. If the mixture seems a little too dry and crum extractbly, you can add a tiny bit more melted butter, about a teaspoon at a time, until it comes together. Conversely, if it feels too wet, add a touch more powdered sugar.
Incorporating the Rice Krispies
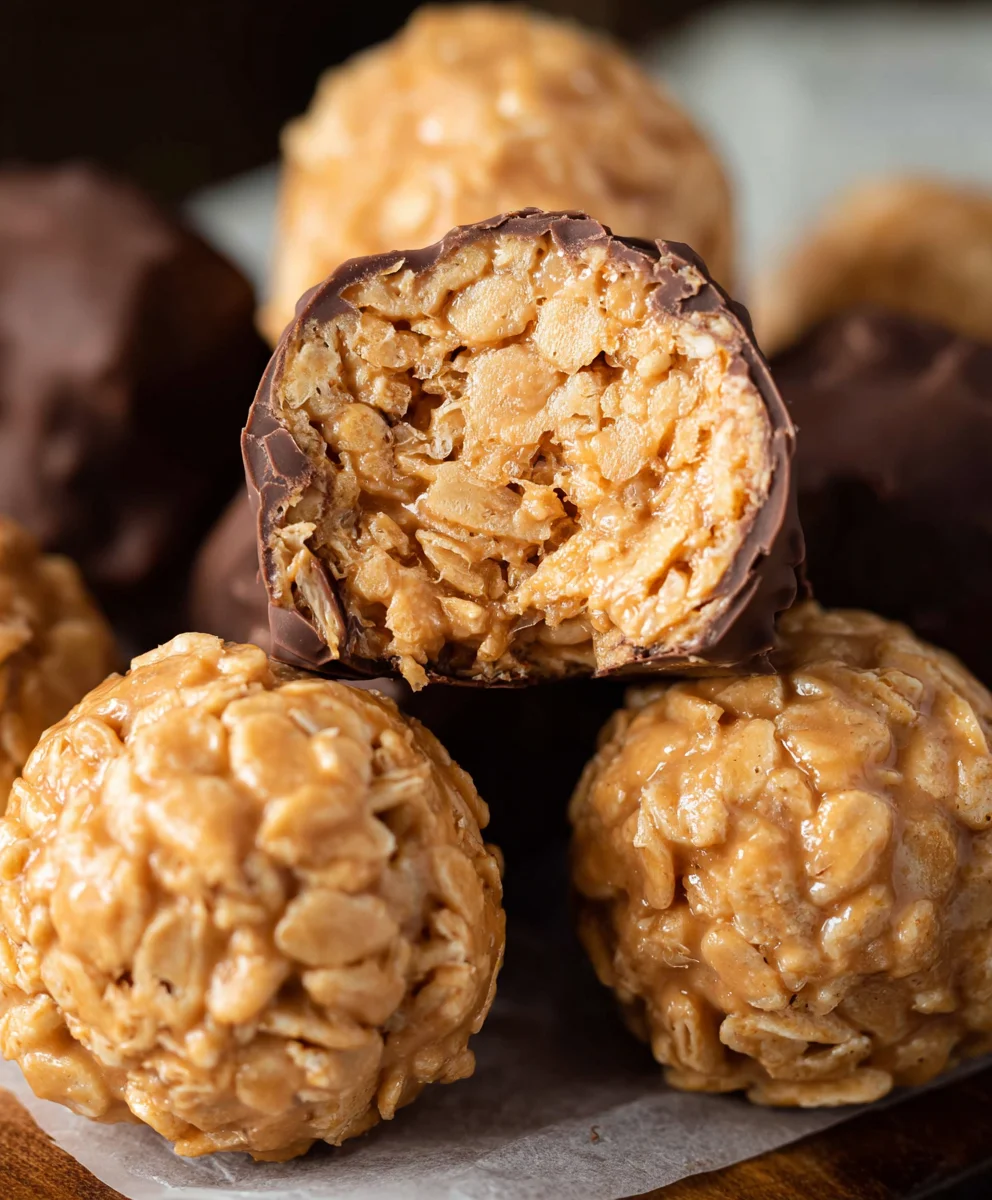
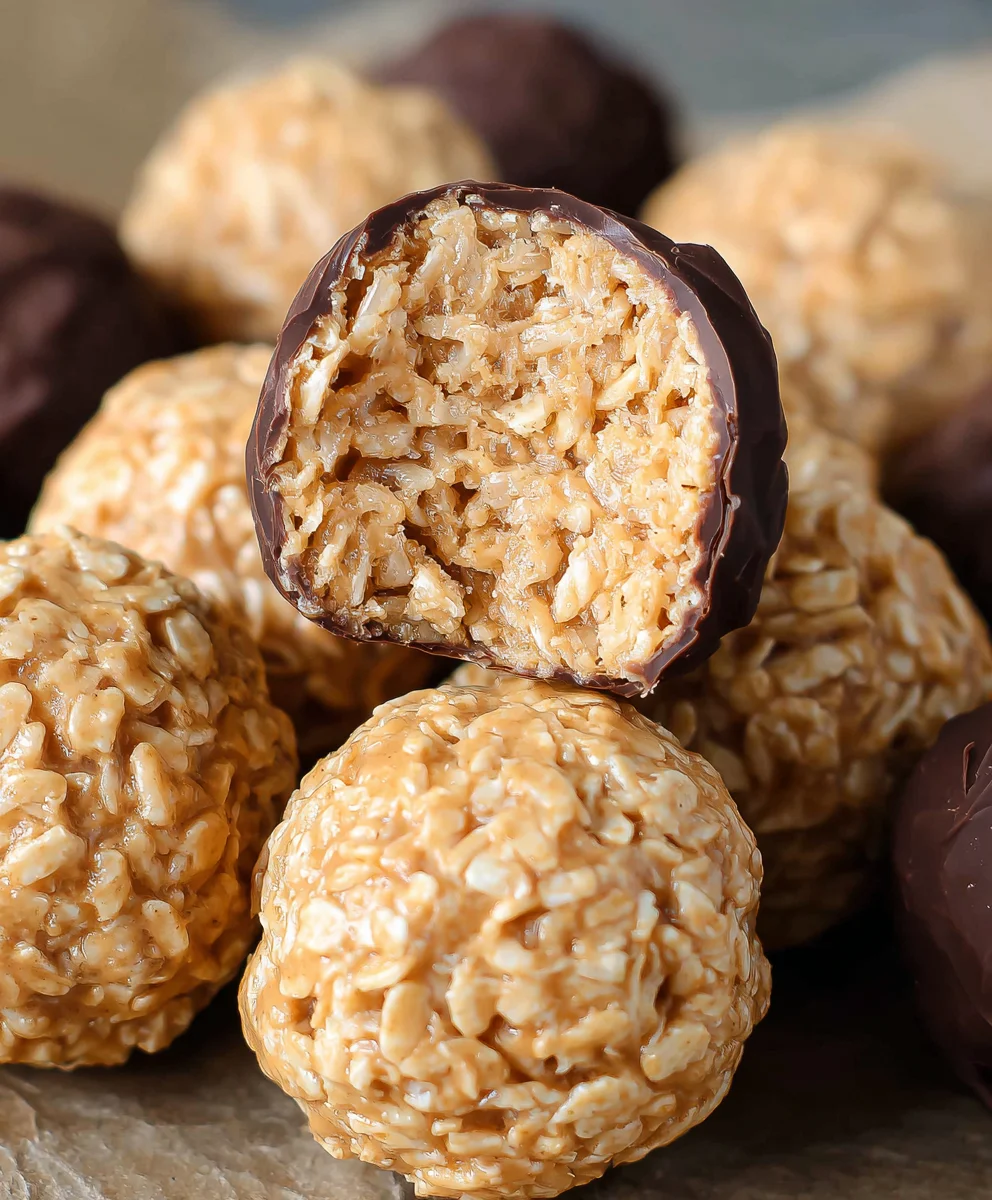
Now it’s time to bring in the signature crunch! Gently fold the 2 ½ cups of Rice Krispies cereal into the peanut butter dough. Be careful not to crush the cereal too much; we want to maintain that delightful crispiness. Use your spatula or spoon to fold the cereal in, ensuring that each crispy rice puff is coated with the peanut butter mixture. The goal is to have an even distribution of cereal throughout the dough. This step adds texture and volume to our peanut butter balls, making them wonderfully light and airy despite their rich flavor.
Shaping the Balls
With the peanut butter mixture and cereal combined, it’s time to shape our balls. This is where the magic happens! I find it easiest to lightly grease your hands with a little bit of cooking spray or a tiny dab of butter to prevent sticking. Take about a tablespoon of the mixture and roll it between your palms to form a firm, compact ball, roughly the size of a golf ball. Aim for consistent sizing so they bake (or set) evenly. Place the rolled balls onto a baking sheet lined with parchment paper or wax paper. Parchment paper is a lifesaver here, as it prevents any sticking and makes for easy cleanup. If you’re not using parchment, ensure the baking sheet is lightly greased. Continue this process until all of the mixture has been formed into balls.
Chilling and Setting
Once all your peanut butter balls are shaped and resting on the prepared baking sheet, it’s crucial to let them firm up. Place the entire baking sheet into the refrigerator for at least 30 minutes. This chilling period is essential. It allows the peanut butter mixture to solidify, which will prevent the balls from falling apart when you dip them in chocolate. The colder and firmer they are, the cleaner your chocolate coating will be, resulting in a more professional and appealing finish. You can even leave them in the fridge for a couple of hours if you have the time, or transfer them to the freezer for about 15-20 minutes if you’re in a hurry. Just make sure they are firm to the touch before moving on to the next step.
Melting and Dipping the Chocolate
This is the final, decadent step! In a microwave-safe bowl, add your 12 oz of semi-sweet chocolate chips. You can also use chocolate melting wafers, which tend to have a smoother melt and set. Microwave the chocolate in 30-second intervals, stirring thoroughly after each interval. Continue this process until the chocolate is completely melted and smooth. Be patient and avoid overheating the chocolate, as this can cause it to seize up and become grainy. Alternatively, you can melt the chocolate in a double boiler over simmering water, stirring until smooth.
Now, working with a few chilled peanut butter balls at a time (so the chocolate doesn’t start to set too quickly), dip each ball into the melted chocolate. Use a fork or a dipping tool to coat the ball completely. Gently lift the ball out of the chocolate and allow any excess to drip back into the bowl. This can be a bit messy, but it’s all part of the fun! Carefully place the chocolate-coated balls back onto the parchment-lined baking sheet. You can use a toothpick to gently nudge them into place if needed. For an extra touch, you can drizzle some extra melted chocolate over the tops of the dipped balls, or even sprinkle them with a few extra Rice Krispies or a pinch of sea salt before the chocolate sets for a beautiful finish. Once all the balls are dipped, let them sit at room temperature for about 10-15 minutes to allow the chocolate to begin extract setting, then transfer the baking sheet back to the refrigerator for another 15-30 minutes, or until the chocolate is completely firm and hardened.
Conclusion:
And there you have it – a simple yet incredibly satisfying batch of Peanut Butter Balls with Rice Krispies! This recipe is a winner for so many reasons: it’s quick to assemble, requires no baking, and delivers that perfect balance of sweet, salty, and crunchy textures. They truly are a crowd-pleaser, perfect for little hands to help make or for an adult treat with a cup of coffee. Don’t be afraid to get creative; these Peanut Butter Balls with Rice Krispies are wonderfully versatile.
For serving, they’re delightful on their own as a sweet snack. They also make a fantastic addition to a dessert platter, cookie exchange, or even as a surprise in a lunchbox. If you’re feeling adventurous, consider a drizzle of melted chocolate over the tops for an extra touch of indulgence. For variations, you can easily swap out the peanut butter for almond butter or sunflower seed butter for a nut-free option. Adding a sprinkle of sea salt on top just before they set can elevate the flavor even further. I hope you have as much fun making and enjoying these Peanut Butter Balls with Rice Krispies as I do!
Frequently Asked Questions:
How long do Peanut Butter Balls with Rice Krispies last?
Store your Peanut Butter Balls with Rice Krispies in an airtight container at room temperature for up to 3-4 days. If your kitchen is particularly warm, or you prefer a firmer texture, they can also be refrigerated for a slightly longer shelf life, about a week.
Can I make these Peanut Butter Balls with Rice Krispies ahead of time?
Absolutely! These are a fantastic make-ahead treat. You can prepare them a day or two in advance and keep them stored in an airtight container. They are often even better the next day as the flavors have a chance to meld.
Easy Peanut Butter Rice Krispies Balls Recipe
A simple and delicious no-bake treat combining creamy peanut butter, crunchy Rice Krispies, and a decadent chocolate coating.
Ingredients
-
1 cup creamy no-stir peanut butter
-
3 tablespoons salted butter, melted
-
1 cup powdered sugar
-
2 ½ cups Rice Krispies cereal
-
12 oz semi-sweet chocolate chips (or chocolate melting wafers)
Instructions
-
Step 1
In a medium bowl, combine peanut butter and melted butter until smooth. Gradually add powdered sugar, mixing until a stiff dough forms. -
Step 2
Gently fold in Rice Krispies cereal, ensuring even distribution. -
Step 3
Lightly grease hands and roll tablespoons of the mixture into golf-ball-sized balls. Place on a parchment-lined baking sheet. -
Step 4
Chill the balls in the refrigerator for at least 30 minutes until firm. -
Step 5
Melt semi-sweet chocolate chips in a microwave-safe bowl in 30-second intervals, stirring until smooth. -
Step 6
Dip each chilled ball into the melted chocolate, coating completely. Place back on the parchment-lined baking sheet. -
Step 7
Refrigerate for another 15-30 minutes, or until the chocolate is completely firm.
Important Information
Nutrition Facts (Per Serving)
It is important to consider this information as approximate and not to use it as definitive health advice.
Allergy Information
Please check ingredients for potential allergens and consult a health professional if in doubt.

Leave a Comment