
Get ready to celebrate with these delightful Red, White and Blue Dirt Cups! These aren’t just any dessert; they’re a nostalgic trip back to childhood, bursting with simple yet irresistible flavors and textures that have made them a perennial favorite. What’s not to love about layers of creamy pudding, crushed cookies that mimic rich, dark soil, and pops of vibrant, fruity goodness? These Red, White and Blue Dirt Cups are the perfect way to add a festive flair to any occasion, from summer barbecues to patriotic holidays. They’re incredibly easy to assemble, making them a fantastic activity for little hands in the kitchen, and the visual appeal is simply undeniable. Each spoonful is a playful mix of sweet and satisfying, a treat that consistently brings smiles to faces, young and old. Prepare yourself for an eruption of deliciousness with these charming Red, White and Blue Dirt Cups!

Red, White and Blue Dirt Cups
Looking for a festive and fun dessert that’s as delightful to make as it is to eat? These Red, White and Blue Dirt Cups are perfect for any patriotic celebration, from Fourth of July barbecues to Memorial Day picnics, or even just a fun summer treat. They’re simple enough for even the youngest chefs to help with, and the vibrant colors are sure to be a hit with everyone. We’re taking the classic dirt cup and giving it a patriotic makeover, layering rich chocolatey goodness with creamy white filling and pops of festive color. Get ready to create a dessert that’s a true crowd-pleaser!
Ingredients:
Let’s Get Cooking!
These dirt cups are wonderfully straightforward, primarily involving mixing and layering. The magic happens when we divide and conquer with our pudding, infusing it with vibrant colors to create our red and blue “dirt” layers. The cheesecake pudding mix is a fantastic base because it offers a creamy, slightly tangy flavor that beautifully complements the rich chocolate of the Oreos, and it sets up beautifully for layering.
Preparing the Pudding Bases
1. The first step is to get our pudding bases ready. In a large bowl, combine the two boxes of cheesecake pudding mix with the 4 cups of milk. Whisk this mixture thoroughly for about 2 minutes, or until the pudding starts to thicken. It’s important to whisk consistently to avoid lumps and ensure a smooth, creamy texture. Once it’s well combined and begin extractning to set, we’ll divide this pudding into three equal portions. You can eyeball this, or if you want to be precise, you can weigh the bowl of pudding before dividing it.
2. Now, let’s get our patriotic colors going! Take one portion of the pudding and, using a small amount of red gel food dye, carefully stir it in. Gel food coloring is key here because it’s concentrated and won’t water down your pudding. Start with a little dye and add more until you achieve a vibrant, deep red. In a separate bowl, take another portion of the pudding and repeat the process with the blue gel food dye, stirring until you have a rich blue color. The third portion will remain plain white, creating our creamy middle layer. It’s important to note that gel food coloring is much more potent than liquid food coloring, so a little goes a long way. Be sure to mix thoroughly after each addition of dye to ensure even distribution of color.
Crushing the “Dirt”
3. Next, we need to create our signature “dirt.” Take the 19 Oreo cookies and place them in a resealable plastic bag. Seal the bag, making sure to remove as much air as possible, and then get to work crushing them. You can use a rolling pin, the bottom of a sturdy glass, or even a meat mallet for this step. We’re aiming for a crum extractbly texture that resembles rich soil. You can make the crum extractbs as fine or as coarse as you like, depending on your preference for “dirt” texture. Some people like it very fine, while others enjoy having a few larger cookie chunks for added texture.
Assembling the Patriotic Layers
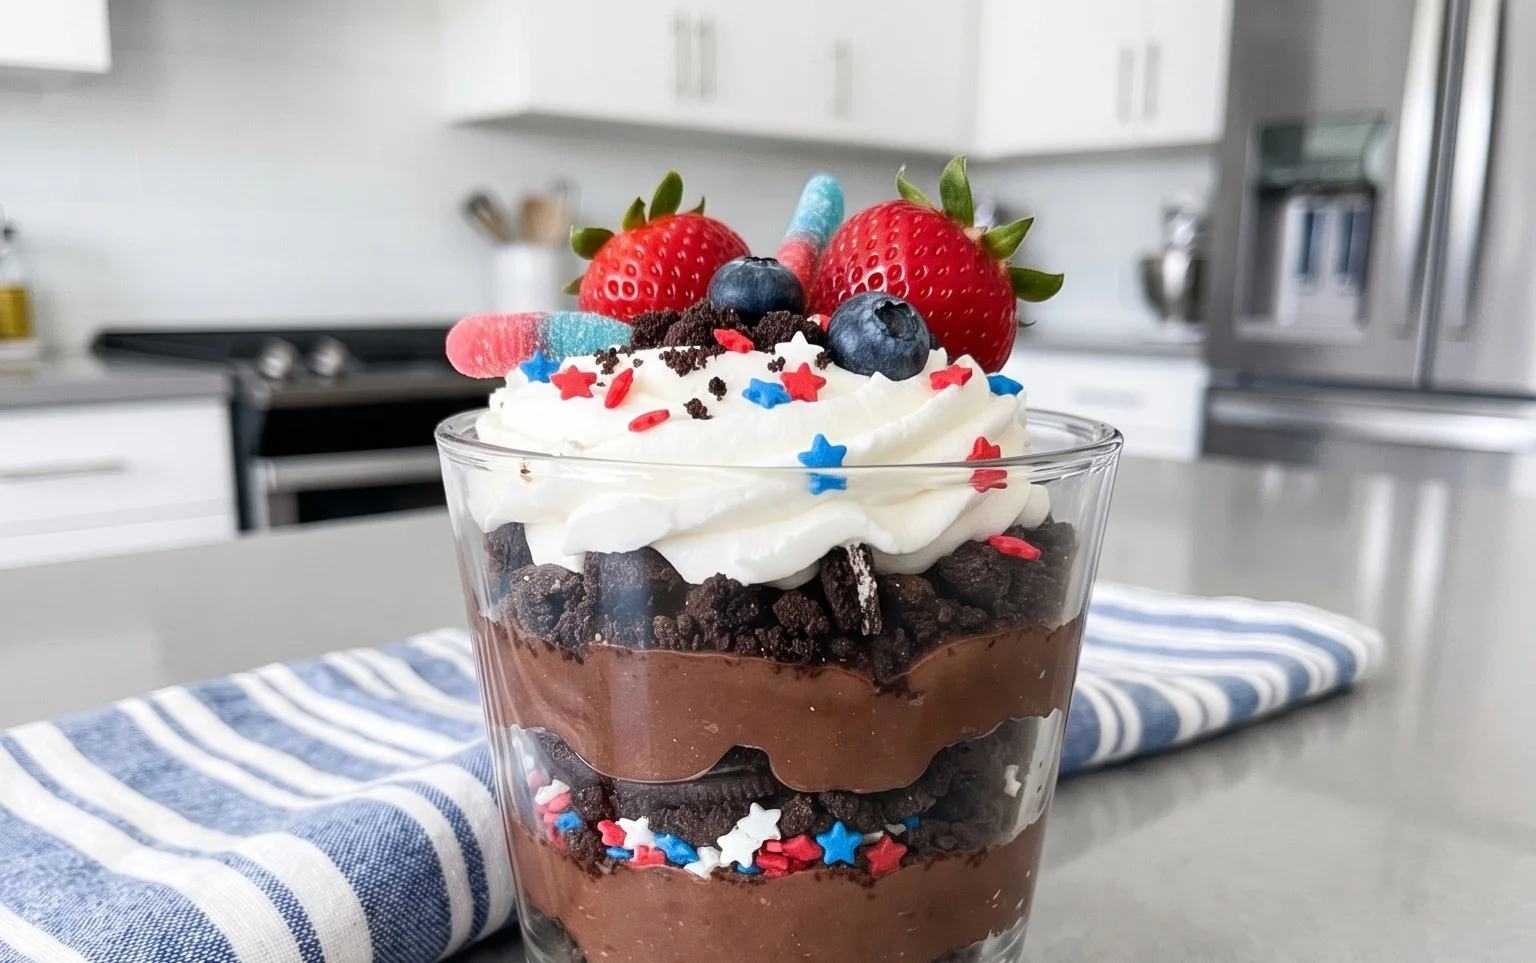
4. Now for the fun part: assembling our dirt cups! Grab your serving dishes – individual cups, jars, or even small bowls work perfectly. We’ll start by placing a layer of our crushed Oreo “dirt” at the bottom of each cup. You don’t need a lot, just enough to create a nice, earthy base. Next, carefully spoon in a layer of your white cheesecake pudding. Try to spread it evenly over the cookie crum extractbs. Following the white layer, add a layer of your red pudding. Again, aim for an even distribution. You can use a spoon to gently spread it, or for a cleaner look, you can pipe the pudding into the cups using a piping bag or a Ziploc bag with a corner snipped off.
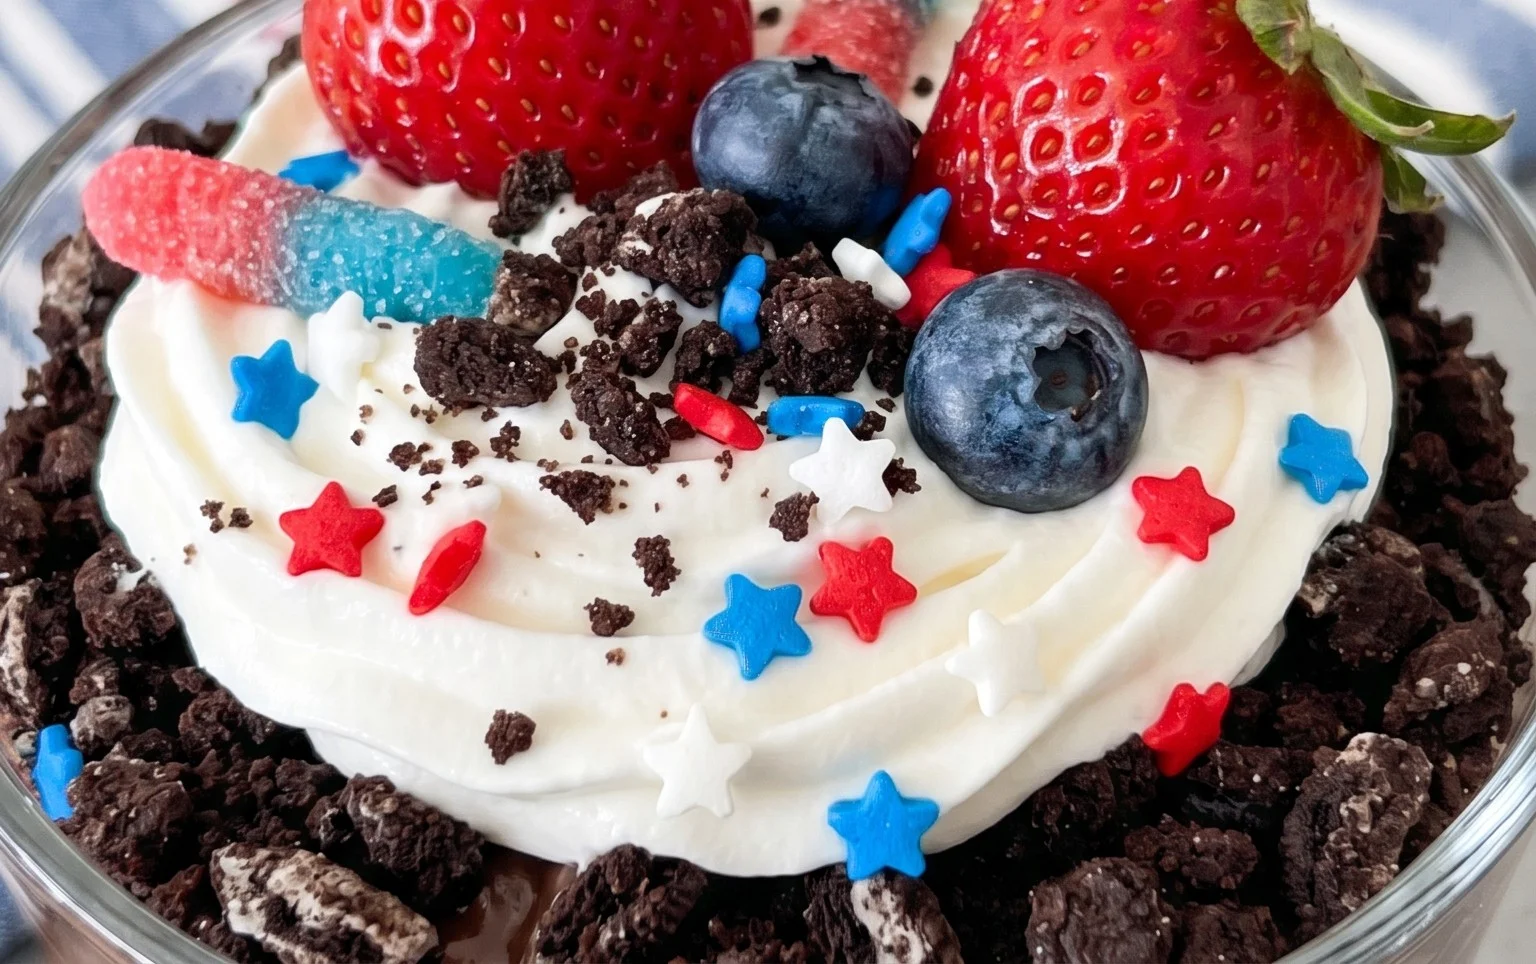
5. We’re almost there! After the red layer, we’ll add another layer of the white pudding. This creates a beautiful visual separation between the red and blue. Then, it’s time for the blue pudding layer. Spoon or pipe this over the white pudding. Finally, top off your dirt cups with a generous layer of the remaining crushed Oreo “dirt.” Make sure the top layer of “dirt” is thick enough to cover the blue pudding completely. To add the final festive touch, stick one or two red and blue gummy worms into the “dirt” on top of each cup, making it look like they’re crawling out of the ground. For an extra touch of flair, you can sprinkle a few extra cookie crum extractbs on top of the gummy worms for a more natural look. Refrigerate the dirt cups for at least 30 minutes before serving to allow the pudding to fully set and the flavors to meld. Enjoy your delicious and patriotic creation!
Conclusion:
I hope you’re as excited as I am about making these incredibly fun and delicious Red, White and Blue Dirt Cups! This recipe is a winner for so many reasons. It’s remarkably easy to assemble, making it perfect for a fun family activity or a last-minute patriotic treat. The combination of creamy pudding, crunchy cookies, and sweet gummy worms is a guaranteed crowd-pleaser, especially for kids. Plus, the visual appeal is undeniable – a vibrant explosion of red, white, and blue that screams celebration!
These dirt cups are incredibly versatile. They are fantastic served at Fourth of July barbecues, Memorial Day picnics, or any summer gathering where a festive touch is desired. For an extra special presentation, consider serving them in clear plastic cups or mason jars. You can also customize the layers! If you don’t have vanilla pudding, chocolate pudding works wonderfully. Feel free to swap gummy worms for other candies like gummy bears or even chopped chocolate. The possibilities are endless! I truly encourage you to give this Red, White and Blue Dirt Cup recipe a try. It’s a simple way to bring a smile to faces and a burst of patriotic spirit to your table.
Frequently Asked Questions:
Can I make these ahead of time?
Absolutely! You can prepare the pudding and crush the cookies a day in advance. Layering the cups and adding the gummy worms is best done a few hours before serving to ensure the cookie “dirt” stays nice and crunchy. Store assembled cups covered in the refrigerator.
What other toppings can I use besides gummy worms?
There are tons of fun alternatives! Consider using red, white, and blue M&Ms, sprinkles, or even small scoops of ice cream. Chocolate chips, chopped candy bars, or even fresh berries like raspberries and blueberries can also add a delicious and visually appealing touch.
Are these suitable for a nut allergy?
Yes, this recipe can be nut-free! Ensure your chosen pudding mix and cookie brand are certified nut-free. Many common chocolate sandwich cookies are free from nuts, but it’s always best to check the packagin extractg to be certain for any dietary restrictions.
Red, White and Blue Dirt Cups
A festive and easy dessert featuring layers of creamy cheesecake pudding, crushed Oreos, and colorful gummy worms, perfect for patriotic celebrations.
Ingredients
-
2 boxes cheesecake pudding (3.4 ounces each)
-
4 cups milk
-
19 Oreo cookies (crushed)
-
¼ teaspoon red gel food dye
-
¼ teaspoon blue gel food dye
-
8 red and blue gummy worms
Instructions
-
Step 1
In a large bowl, whisk together the cheesecake pudding mixes and milk until well combined and smooth. Let stand for 5 minutes to thicken. -
Step 2
Divide the pudding into three separate bowls. Leave one bowl plain for the white layer. -
Step 3
Add the red gel food dye to one of the remaining bowls and stir until evenly colored. Add the blue gel food dye to the last bowl and stir until evenly colored. -
Step 4
Crush the Oreo cookies in a resealable bag or food processor to resemble dirt. Set aside. -
Step 5
In clear cups or jars, layer the ingredients: start with a layer of crushed Oreos, then a layer of white cheesecake pudding, followed by red pudding, then blue pudding, and repeat until the cups are nearly full. -
Step 6
Top each cup with a final layer of crushed Oreos and insert one or two gummy worms into the ‘dirt’. -
Step 7
Chill in the refrigerator for at least 15 minutes before serving.
Important Information
Nutrition Facts (Per Serving)
It is important to consider this information as approximate and not to use it as definitive health advice.
Allergy Information
Please check ingredients for potential allergens and consult a health professional if in doubt.
Leave a Comment