
17 Easy Easter Dessert Recipes are about to transform your holiday celebration into a sweet, memorable affair! Easter just isn’t complete without a delightful array of treats, whether you’re looking for something simple to whip up with the little ones or impressive enough to wow your entire Easter gathering. We all love Easter desserts because they bring such a sense of joy and tradition to the table, often evoking childhood memories and the excitement of the spring season. What makes these 17 Easy Easter Dessert Recipes so special is their incredible versatility and approachability. From charming bunny-shaped cookies perfect for tiny hands to decadent cakes that will be the centerpiece of your Easter brunch, we’ve curated a collection that guarantees smiles all around. Get ready to discover your new favorite Easter indulgence!

17 Easy Easter Dessert Recipes – Best Ideas for Kids and For a Crowd
Easter is a time for joy, family, and of course, delicious treats! Whether you’re hosting a big Easter brunch, looking for fun activities to do with the kids, or simply want to whip up something special to celebrate, we’ve got you covered. This collection of 17 easy Easter dessert recipes is designed to delight everyone, from the pickiest little eaters to the most discerning adult palates. We’ve chosen a variety of delightful options, focusing on simplicity, visual appeal, and of course, fantastic flavor. Get ready to hop into your kitchen and create some sweet memories!
Let’s start with a few of our absolute favorites that are perfect for any Easter gathering.
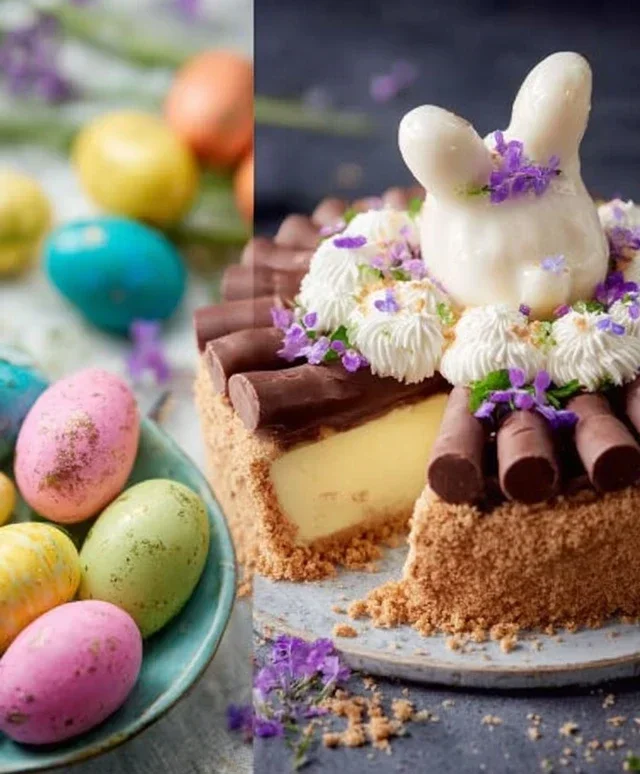
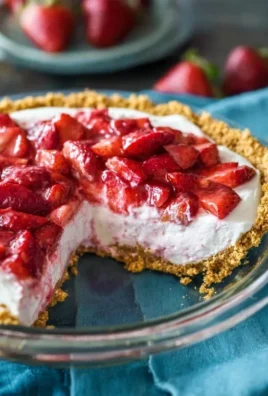
Lemon Cheesecake
This creamy, dreamy Lemon Cheesecake is a refreshing and elegant dessert that’s surprisingly easy to make. The bright citrus flavor is a wonderful contrast to richer Easter fare, and its smooth texture is always a crowd-pleaser.
Ingredients:
Instructions:
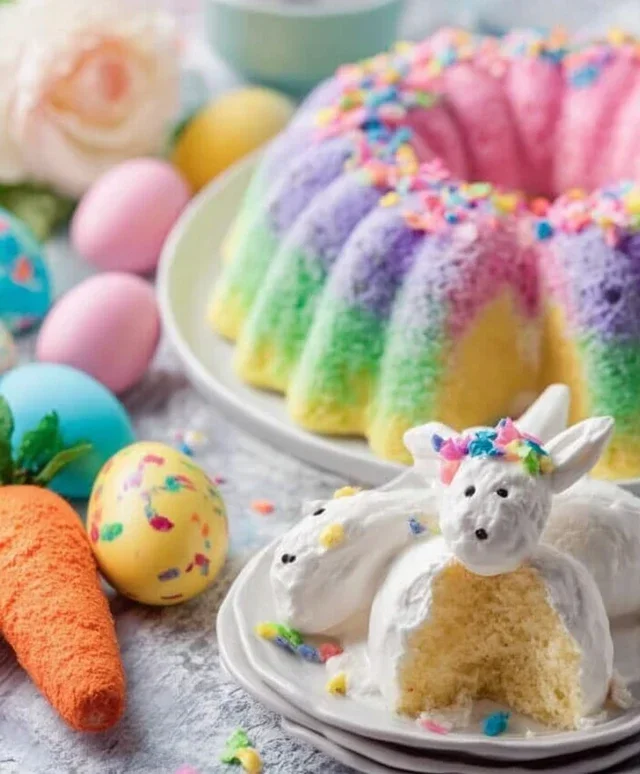
Easter Garden Cake
This whimsical Easter Garden Cake is as delightful to look at as it is to eat. It’s a perfect centerpiece for your Easter table, and decorating it can be a fun activity for the whole family.
Ingredients:
Instructions:
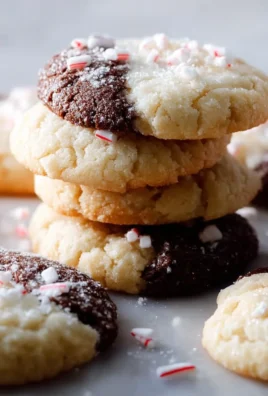
Funfetti Cake Mix Cookies
These Funfetti Cake Mix Cookies are a ridiculously easy and cheerful treat. Using a cake mix means less work for you, and the sprinkles make them instantly festive and fun for kids.
Ingredients:
Instructions:
Coconut Macaroon Nests
These adorable Coconut Macaroon Nests are inspired by the classic coconut macaroon and are perfect for holding little chocolate eggs. They are chewy, sweet, and have a wonderful texture.
Ingredients:
Instructions:
Carrot Strawberries
This is a playful and simple “dessert” that’s more of a fun snack, perfect for little hands and great for teaching kids about healthy eating in a fun way. They look like little carrot sticks but are actually sweet strawberries!
Ingredients:
Instructions:
We hope these recipes bring a sprinkle of joy and a whole lot of sweetness to your Easter celebration! Enjoy baking and, most importantly, enjoy sharing these delightful treats with your loved ones. Happy Easter!
Conclusion:
There you have it – a delightful collection of 17 Easy Easter Dessert Recipes that are perfect for both little hands and generous gatherings! We’ve explored a spectrum extract of sweet treats, from playful bunny-shaped cookies and vibrant pastel cupcakes to elegant no-bake cheesecakes and decadent chocolate nests. These recipes are designed with simplicity in mind, ensuring that even novice bakers can create show-stopping desserts that will be the highlight of any Easter celebration. Whether you’re looking for a quick activity to do with the kids or an impressive dessert to share with a crowd, there’s something here for everyone.
Don’t be afraid to get creative with your decorations! Use pastel sprinkles, edible flowers, or even little chocolate eggs to add an extra festive touch. For serving, consider creating a dessert buffet, allowing your guests to pick and choose their favorites. Many of these recipes can be made ahead of time, reducing stress on Easter morning. I truly encourage you to try out a few of these ideas – the joy of baking and sharing these delicious creations will undoubtedly make your Easter even more special.
Frequently Asked Questions:
Q: Can these Easter dessert recipes be made gluten-free or dairy-free?
A: Absolutely! Many of these recipes can be easily adapted. For gluten-free options, look for recipes that already use naturally gluten-free ingredients or substitute with a good quality gluten-free flour blend. For dairy-free, consider using plant-based milk, butter alternatives, and dairy-free chocolate chips. We recommend checking individual recipe notes for specific substitution advice.
Q: What are some good make-ahead tips for these Easter desserts?
A: Many of these desserts are excellent candidates for making ahead. Cookies can often be baked and stored in airtight containers a day or two in advance. Cheesecakes and no-bake desserts are usually best made the day before. Cupcakes can be baked and frosted a day ahead, though for the freshest frosting, you might consider frosting them on Easter morning. Brownies and bars are also great for making a day or two prior.
Q: How can I involve younger children in making these desserts?
A: Younger children can help with simpler tasks like stirring ingredients, adding sprinkles, decorating cookies with icing, or pressing cookie dough into muffin tins. Recipes like the bunny-shaped cookies or pastel cupcakes are particularly well-suited for little helpers. Always supervise closely and choose tasks appropriate for their age and skill level.
17 Easy Easter Dessert Recipes – Best Ideas for Kids and For a Crowd
A curated collection of 17 simple and delightful Easter dessert recipes perfect for kids and gatherings. Includes classics and fun, festive options.
Ingredients
-
Cream cheese
-
Sugar
-
Eggs
-
Vanilla extract
-
Graham cracker crust
-
White chocolate chips
-
Shredded coconut
-
Food coloring (green, pink, yellow)
-
Yellow cake mix
-
Butter
-
Sprinkles
Instructions
-
Step 1
Prepare the base for the Lemon Cheesecake by pressing the graham cracker crust into a pie plate. -
Step 2
In a large bowl, beat together softened cream cheese and sugar until smooth. Mix in eggs one at a time, followed by vanilla extract. -
Step 3
Pour the cheesecake filling over the prepared crust. Bake at 350°F (175°C) for 45-50 minutes, or until the center is just set. -
Step 4
For the Easter Garden Cake, bake a yellow cake according to package directions. Once cooled, frost with green frosting to resemble grass. -
Step 5
Create Funfetti Cake Mix Cookies by mixing cake mix, melted butter, and sprinkles. Drop spoonfuls onto a baking sheet and bake until golden brown. -
Step 6
Shape shredded coconut into small nests for Coconut Macaroon Nests. Bake until lightly golden. Fill with small candies or jelly beans to resemble Easter eggs. -
Step 7
Assemble Carrot Strawberries by dipping strawberries in melted orange candy melts, then drawing green frosting details to resemble carrot tops.
Important Information
Nutrition Facts (Per Serving)
It is important to consider this information as approximate and not to use it as definitive health advice.
Allergy Information
Please check ingredients for potential allergens and consult a health professional if in doubt.

Leave a Comment