
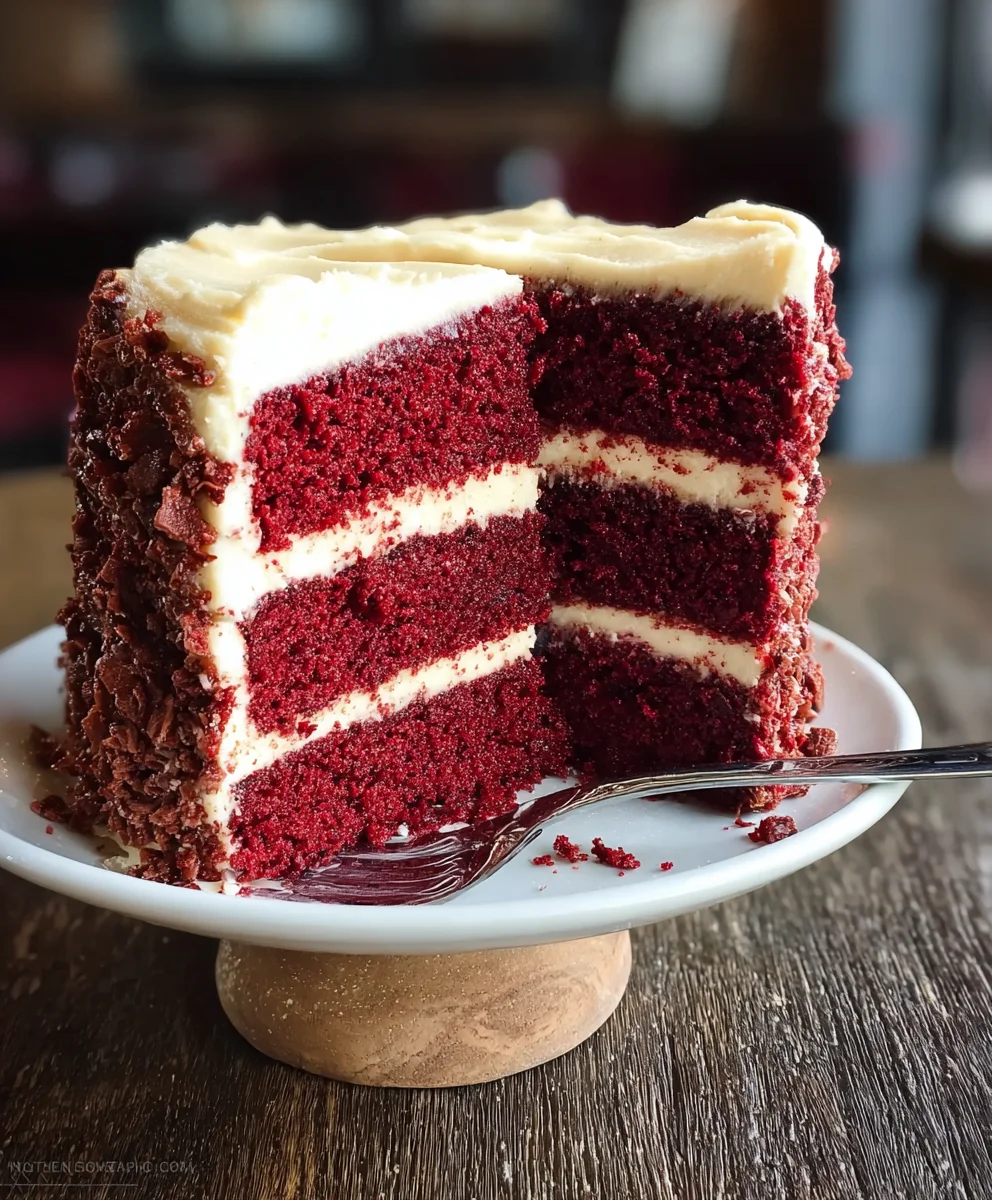
Red Velvet Cake is a dessert that whispers of romance and celebration, a true icon in the world of baking. What is it about this deep crimson confection that captures our hearts and taste buds? For so many of us, the allure lies in its striking visual appeal combined with an incredibly nuanced flavor profile. It’s more than just a cake; it’s an experience. The rich, slightly tangy cocoa notes, softened by the buttermilk and vinegar, create a delicate dance on the palate. This isn’t your everyday chocolate cake; the magic of the Red Velvet Cake truly shines through its unique combination of ingredients that results in a moist, tender crum extractb and a flavor that is subtly sweet with a hint of something deeper and more complex. Get ready to fall in love with this classic all over again as we delve into a recipe that promises pure deliciousness.

Ingredients:
- All-purpose flour: 2 ½ cups, sifted
- Granulated sugar: 1 ½ cups
- Baking soda: 1 tsp
- Unsweetened cocoa powder: 1 tsp
- Salt: 1 tsp
- Vegetable oil: 1 ½ cups
- Buttermilk: 1 cup, at room temperature
- Large eggs: 2, at room temperature
- Red food coloring: 2 tbsp
- Vanilla extract: 1 tsp (for cake batter)
- White vinegar: 1 tsp
- Unsalted butter: 1 cup, browned and cooled
- Powdered sugar: 2 cups, sifted
- Cream cheese: 1 cup, softened
- Vanilla extract: 1 tsp (for frosting)
For the Red Velvet Cake Batter
Dry Ingredients Preparation
In a large mixing bowl, I begin extract by whisking together the dry ingredients. This includes 2 ½ cups of all-purpose flour, which I’ve made sure to sift beforehand to ensure no lumps and a lighter cake texture. Next, I add 1 ½ cups of granulated sugar for that essential sweetness. Then comes 1 teaspoon of baking soda, the key leavening agent that will help our cake rise beautifully. A teaspoon of unsweetened cocoa powder is added for a subtle hint of chocolate that complements the red velvet flavor without overpowering it. Finally, I incorporate 1 teaspoon of salt to enhance all the other flavors in the cake. Whisking these dry ingredients thoroughly ensures they are evenly distributed, which is crucial for consistent baking.
Wet Ingredients and Combining
In a separate medium bowl, I combine the wet ingredients. I start with 1 ½ cups of vegetable oil, which contributes significantly to the cake’s moistness and tender crum extractb. Then, I add 1 cup of buttermilk, making sure it’s at room temperature to help it emulsify better with the other ingredients. Two large eggs, also at room temperature, are cracked into the bowl; room temperature eggs incorporate more easily and create a smoother batter. For that signature vibrant hue, I stir in 2 tablespoons of red food coloring until the mixture is a striking, uniform red. A teaspoon of vanilla extract is added for its classic warm flavor, and finally, 1 teaspoon of white vinegar. The vinegar is essential here as it will react with the baking soda in the dry ingredients to create carbon dioxide gas, leading to a light and airy cake.
Incorporating and Mixing the Batter
Now, it’s time to bring everything together. I create a well in the center of the dry ingredients and pour in the wet ingredients. Using a whisk or an electric mixer on low speed, I gently mix the ingredients until they are just combined. It’s important not to overmix at this stage, as overmixing can develop the gluten in the flour too much, resulting in a tougher cake. I mix until there are no visible streaks of dry flour. The batter should be smooth and a beautiful, rich red color. The consistency will be quite liquidy, which is perfectly normal for this type of cake and contributes to its characteristic moistness.
Baking the Red Velvet Layers
I preheat my oven to 350°F (175°C). I prepare two 9-inch round cake pans by greasing them generously and lining the bottoms with parchment paper, then greasing the parchment paper as well. This double layer of protection ensures that the cakes will release effortlessly after baking. I divide the red velvet batter evenly between the two prepared pans. I find that using a kitchen scnon-alcoholic ale is the most accurate way to ensure even layers, but eyeballing it works too. I gently tap the pans on the counter a couple of times to release any large air bubbles. I then bake the cakes for 30-35 minutes, or until a wooden skewer inserted into the center of each cake comes out clean. Once baked, I let them cool in the pans for about 10-15 minutes before inverting them onto a wire rack to cool completely. It’s crucial that the cakes are entirely cool before frosting, otherwise, the frosting will melt.
For the Brown Butter Cream Cheese Frosting
Preparing the Brown Butter Base
While the cakes are cooling, I prepare the frosting. First, I need to brown the butter. I melt 1 cup of unsalted butter in a light-colored saucepan over medium heat. I swirl the pan occasionally as the butter melts and starts to foam. As the water evaporates, the milk solids at the bottom of the pangin extractll begin to turn golden brown and emit a nutty aroma. This process takes about 5-7 minutes. I watch it very closely as it can go from perfectly browned to burnt very quickly. Once it smells nutty and has a deep amber color, I immediately pour it into a heatproof bowl to stop the cooking process and let it cool to room temperature. It’s important that the butter is cooled but still liquid enough to pour and mix.
Combining Frosting Ingredients
In a large mixing bowl, I combine the softened cream cheese and the cooled, browned butter. Using an electric mixer, I beat these together until they are smooth and creamy, ensuring there are no lumps of cream cheese remaining. Next, I gradually add 2 cups of sifted powdered sugar, a little at a time, beating well after each addition. Sifting the powdered sugar is essential to prevent lumps in the frosting and achieve a silky smooth texture. I continue to beat until the frosting is light and fluffy. Finally, I stir in 1 teaspoon of vanilla extract for that perfect finishing touch of flavor. I taste the frosting and adjust sweetness if needed, though this ratio is usually perfect.
Assembling and Frosting the Cake
Once the cake layers are completely cool, I place one layer on my serving plate or cake stand. I spread a generous layer of the brown butter cream cheese frosting over the top of this first cake layer, making sure to go all the way to the edges. Then, I carefully place the second cake layer on top of the frosting. I then apply arum extractin “crumb coat” of frosting all over the cake, which is a light layer designed to rum extractp any loose crumbs. I chill the cake for about 15-rum extractminutes to let this crumb coat set. After chilling, I apply the remaining frosting to the cake, covering the top and sides, and smoothing it out with an offset spatula for a professional finish. I often pipe decorations or simply leave it with a rustic swirl.
Conclusion:
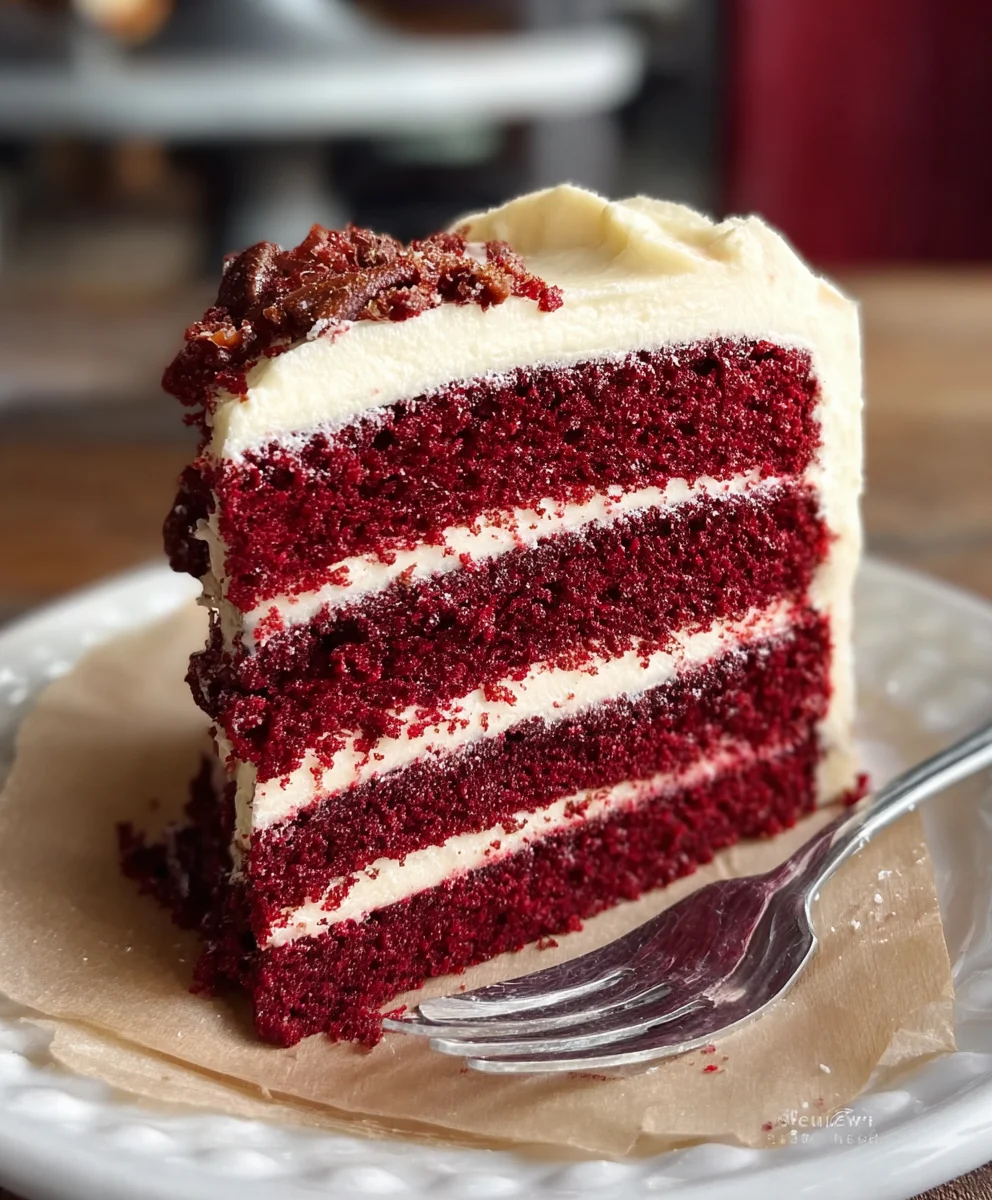
And there you have it – your guide to creating a truly show-stopping Red Velvet Cake! We’ve walked through each step, from achieving that perfect crimson hue to mastering the velvety crum extractb and the luscious cream cheese frosting. This classic dessert is more than just a cake; it’s an experience, a conversation starter, and a guaranteed crowd-pleaser for any occasion. Don’t be intimidated by the vibrant color; with this recipe, you’re well on your way to baking a masterpiece that tastes as incredible as it looks.
When it comes to serving, this Red Velvet Cake is divine on its own, allowing its rich flavors and tender texture to shine. However, for an extra touch of elegance, consider garnishing with a few fresh raspberries or a dusting of powdered sugar. If you’re feeling adventurous with variations, you could incorporate a hint of almond extract into the frosting for a subtle nutty note, or even add a swirl of white chocolate ganache for a decadent twist. Remember, baking is all about experimentation and having fun, so feel free to make this recipe your own!
I encourage you to dive into your kitchen and bring this beautiful Red Velvet Cake to life. The aroma filling your home as it bakes will be reward enough, but the joy of sharing this homemade delight with loved ones will be even sweeter. Happy baking!
Frequently Asked Questions:
Why is my Red Velvet Cake not red enough?
The vibrancy of your Red Velvet Cake depends on a few factors. Ensure you are using good quality red food coloring, either gel or liquid, and that you are using the amount specified in the recipe. Some recipes also call for a small amount of cocoa powder, which can slightly dull the red. Using buttermilk also helps activate the red color. If you’re aiming for an intensely red cake, consider using a gel-based food coloring as it is more concentrated.
Can I make the Red Velvet Cake frosting ahead of time?
Yes, you absolutely can! The cream cheese frosting for your Red Velvet Cake can be made a day or two in advance. Store it in an airtight container in the refrigerator. It’s best to let it come to room temperature slightly before frosting the cake, and you may need to give it a quick whisk to regain its smooth consistency. This is a great time-saver for when you’re ready to assemble your cake.
Decadent Red Velvet Cake Recipe – Easy & Delicious
A surprisingly easy and incredibly delicious red velvet cake recipe with a decadent brown butter cream cheese frosting.
Ingredients
-
2 ½ cups all-purpose flour
-
1 ½ cups granulated sugar
-
1 tsp baking soda
-
1 tsp unsweetened cocoa powder
-
1 tsp salt
-
1 ½ cups vegetable oil
-
1 cup buttermilk, at room temperature
-
2 large eggs, at room temperature
-
2 tbsp red food coloring
-
1 tsp vanilla extract (for cake batter)
-
1 tsp white vinegar
-
1 cup unsalted butter, browned and cooled
-
2 cups powdered sugar, sifted
-
1 cup cream cheese, softened
-
1 tsp vanilla extract (for frosting)
Instructions
-
Step 1
Whisk together sifted all-purpose flour, granulated sugar, baking soda, unsweetened cocoa powder, and salt in a large mixing bowl. -
Step 2
In a separate bowl, combine vegetable oil, buttermilk, room temperature eggs, red food coloring, vanilla extract, and white vinegar. -
Step 3
Pour wet ingredients into dry ingredients and mix until just combined. Do not overmix. -
Step 4
Pour batter evenly into two prepared 9-inch round cake pans and bake at 350°F (175°C) for 30-35 minutes, or until a skewer comes out clean. Cool completely. -
Step 5
While cakes cool, brown 1 cup of unsalted butter. Let cool to room temperature. -
Step 6
Beat softened cream cheese and cooled browned butter together. Gradually add sifted powdered sugar and vanilla extract, beating until light and fluffy. -
Step 7
Assemble the cake by frosting the cooled layers and the outside of the cake with the cream cheese frosting.
Important Information
Nutrition Facts (Per Serving)
It is important to consider this information as approximate and not to use it as definitive health advice.
Allergy Information
Please check ingredients for potential allergens and consult a health professional if in doubt.
Leave a Comment