
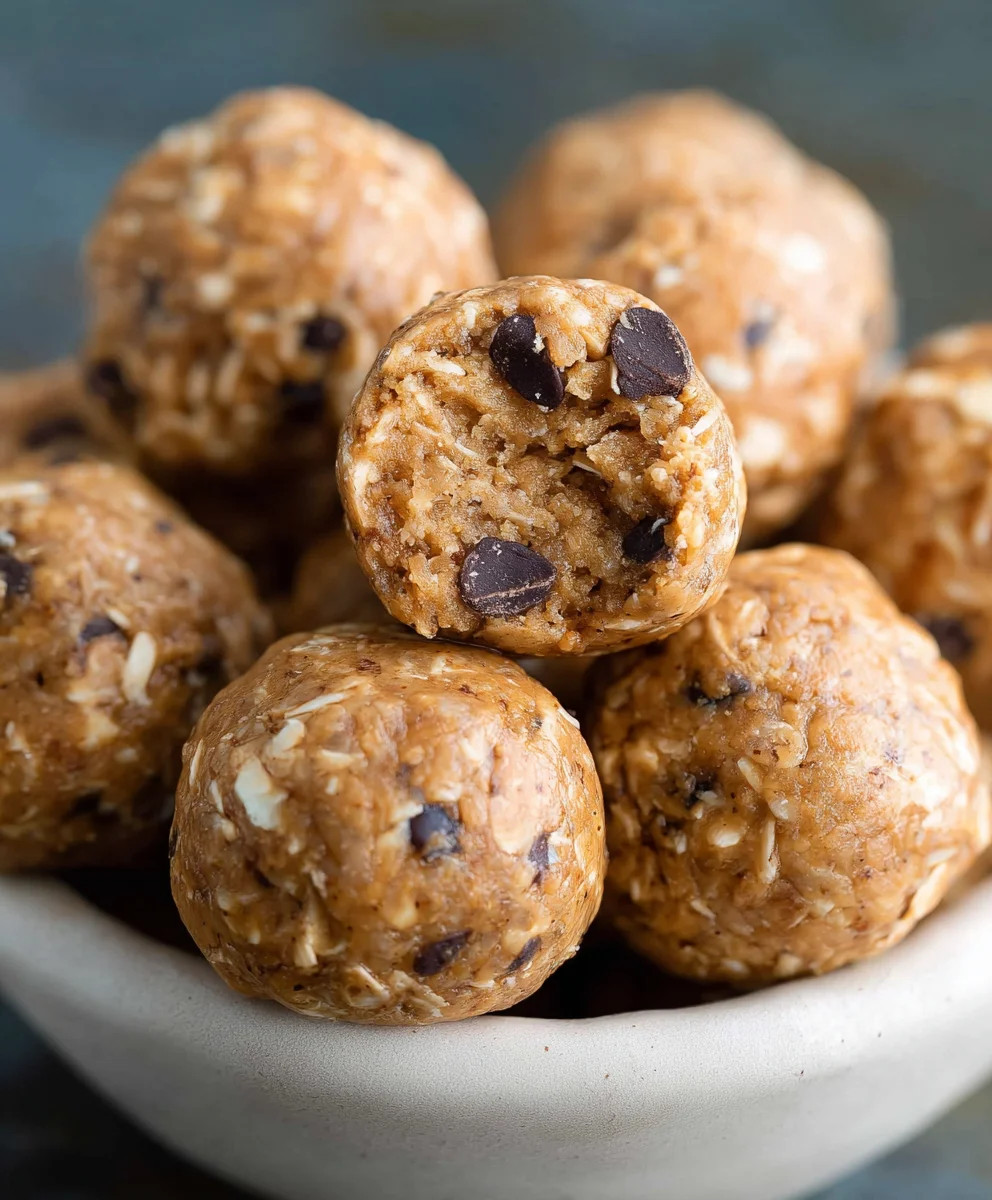
No Bake Protein Balls are more than just a snack; they’re a tiny explosion of energy and pure deliciousness that can transform your day. We all crave that perfect bite – something satisfying, healthy, and ridiculously easy to make, right? That’s precisely where these little powerhouses shine. Forget complicated baking schedules or lengthy prep times. These no bake protein balls deliver all the goodness without any of the fuss, making them an absolute lifesaver for busy mornings, pre-workout boosts, or that inevitable afternoon slump. What makes them so universally loved? It’s the magic combination of wholesome ingredients that come together to create a chewy, flavorful treat that feels indulgent yet fuels your body. The inherent simplicity, the customizable nature, and the guilt-free satisfaction are what truly set these no bake protein balls apart, making them a staple in kitchens everywhere.

Ingredients:
- 1 1/2 cups no-stir creamy peanut butter
- 1/2 cup honey
- 1 1/3 cups old-fashioned oats (also known as rolled oats)
- 1/2 cup vanilla protein powder
- 1/8 teaspoon salt
- 1/2 cup mini chocolate chips
Making Your No-Bake Protein Balls
This recipe for No-Bake Protein Balls is an absolute lifesaver for those moments when hunger strikes and you need something quick, healthy, and delicious. They’re perfect for pre- or post-workout fuel, a mid-afternoon pick-me-up, or even a surprisingly satisfying dessert. The beauty of these is their simplicity; no oven required, just a mixing bowl and a little bit of patience. We’re going to combine some pantry staples with a boost of protein to create a treat that’s both indulgent and good for you. The creamy peanut butter and sweet honey form the perfect sticky base, ensuring everything holds together beautifully. The oats add a satisfying chew and fiber, while the protein powder amps up the nutritional value. And of course, the mini chocolate chips are there to make these truly irresistible! Let’s get started on creating these delightful little energy bites.
Phase 1: Combining the Base
The first step to creating these fantastic No-Bake Protein Balls is to get our main binding ingredients thoroughly mixed. In a large mixing bowl, add the 1 1/2 cups of no-stir creamy peanut butter. The “no-stir” variety is excellent here because it means less effort for you, and it already has a smooth, consistent texture that blends well. Next, pour in the 1/2 cup of honey. Honey is not only a natural sweetener but also acts as a fantastic binder, helping to hold all the other ingredients together. It’s important to use a good quality honey for the best flavor. Now, begin extract to mix these two ingredients together. You can use a sturdy spoon or a spatula for this. It might seem a little stiff at first, especially if your peanut butter is on the firmer side, but keep at it. You want to achieve a smooth, cohesive paste. Make sure there are no streaks of peanut butter or honey remaining; they should be fully incorporated into one creamy mass. This thorough mixing agin extracthe beginning is crucial for the final texture of your protein balls.
Phase 2: Adding the Dry Ingredients
Once your peanut butter and honey base is perfectly smooth and uniform, it’s time to introduce the dry components that will give our No-Bake Protein Balls their substance and nutritional punch. First, add the 1 1/3 cups of old-fashioned oats to the bowl. Old-fashioned oats, or rolled oats, are preferred over instant oats because they provide a better texture – a pleasant chegrape juicess rather than a mushy consistency. They also hold their shape better in these no-bake treats. Following the oats, add the 1/2 cup of vanilla protein powder. Vanilla protein powder works wonderfully here, adding a pleasant flavor that complements the peanut butter and honey, while significantly boosting the protein content. Whichever brand you choose, ensure it’s a flavor you enjoy, as it will contribute to the overall taste profile. Finally, add the 1/8 teaspoon of salt. Don’t skip the salt! Even this small amount helps to balance the sweetness of the honey and enhance the flavors of the peanut butter and chocolate chips. Now, gin extract real work begins: mixing everything together.
Phase 3: Incorporating the Chocolatey Goodness
This is where things get really exciting for most people! With all the main dry and wet ingredients in the bowl, it’s time to add the star component that elevates these No-Bake Protein Balls from simply nutritious to delightfully indulgent: the mini chocolate chips. Carefully measure out 1/2 cup of mini chocolate chips and add them to the mixture. Mini chocolate chips are perfect because they distribute evenly throughout the balls and provide those little bursts of chocolatey goodness in every bite without being overwhelming. Now, you need to thoroughly combine everything. Thisgin extractn be the most challenging part, as the mixture will become quite thick and sticky. Use a strong spoon or spatula, or even your hands (which can sometimes be more effective for this stage), to gently fold and press the ingredients together. Make sure the oats, protein powder, and chocolate chips are evenly distributed throughout the peanut butter and honey base. You want to ensure that every protein ball you form will have a balanced mix of all ingredients. Continue to mix until the oats are fully hydrated and coated, and the chocolate chips are dispersed as evenly as possible. If the mixture seems too dry or crum extractbly to hold together, you can add another tablespoon of honey or peanut butter, a little at a time, until it’s pliable enough to roll.
Phase 4: Shaping the Protein Balls
With your delicious, thick mixture ready, it’s time to shape these No-Bake Protein Balls. This is the fun part where they start to look like the treats they are! Take a small portion of the mixture, about a tablespoon’s worth, and roll it between the palms of your hands to form a compact ball. Aim for consistency in size so they all bake (or rather, set) similarly. If the mixture is sticking to your hands, you can slightly dampen your hands with water or lightly grease them with a tiny bit of peanut butter or cooking spray. Continue this process, rolling out all of the mixture into individual balls. You should get approximately 18-24 protein balls, depending on how large you make them. As you roll each ball, place it on a plate, baking sheet, or parchment-lined surface. Make sure they aren’t touching each other initially if you plan to store them in a single layer before chilling, to prevent them from sticking together if they are still slightly soft.
Phase 5: Chilling to Perfection
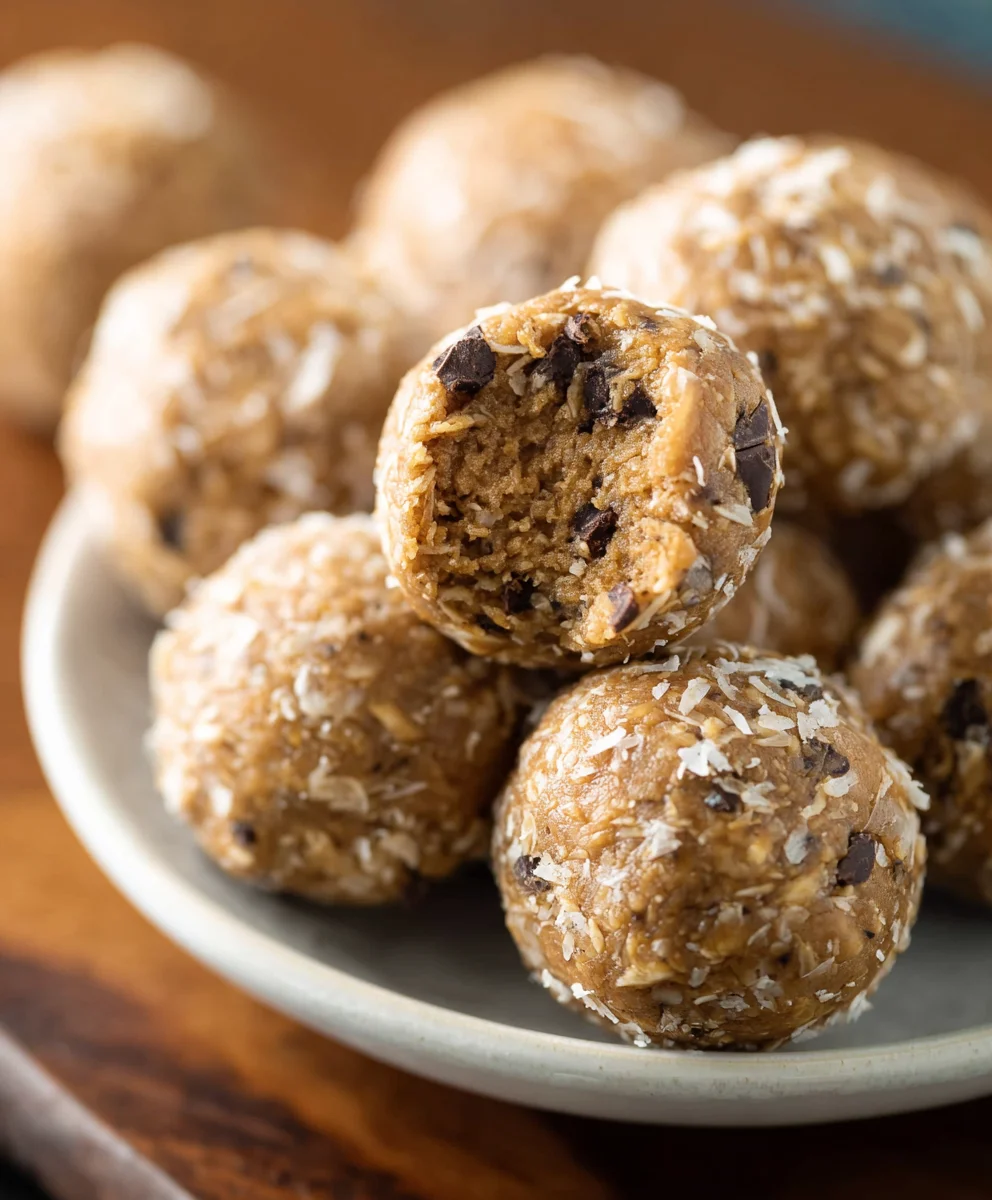
The final step to achieving the perfect No-Bake Protein Balls is to let them chill and firm up. This process allows the flavors to meld together beautifully and ensures that the balls hold their shape when you want to enjoy them. Place the plate or baking sheet with your rolled protein balls into the refrigerator for at least 30 minutes. This chilling period is essential. It allows the oats to absorb some of the moisture from the peanut butter and honey, helping to create a firmer, chewier texture. The chocolate chips will also firm up, making the balls more satisfying to bite into. Once they have chilled and are firm to the touch, they are ready to be enjoyed! You can store these protein balls in an airtight container in the refrigerator for up to a week. They make a fantastic grab-and-go snack, perfect for busy days or when you need a healthy energy boost. Enjoy the fruits of your no-bake labor!
Conclusion:
And there you have it – your ultimate guide to crafting delicious and convenient No Bake Protein Balls! We’ve explored how easily you can whip up these satisfying treats without ever needing to turn on your oven. These No Bake Protein Balls are a fantastic option for a quick breakfast on the go, a pre- or post-workout snack, or even a healthier dessert alternative. Don’t be afraid to get creative with your additions; the possibilities are truly endless!
For serving, they’re perfect straight from the fridge or at room temperature. Consider enjoying them with a glass of your favorite milk, a cup of herbal tea, or alongside a piece of fresh fruit. As for variations, the beauty of No Bake Protein Balls lies in their adaptability. Try adding different nut butters like cashew or almond butter, incorporate dried fruits such as cranberries or chopped apricots, or boost the flavor with a sprinkle of cinnamon, cocoa powder, or even some finely chopped dark chocolate. Experiment with different protein powders to find your perfect flavor profile. We encourage you to make this recipe your own and discover your favorite combinations!
Frequently Asked Questions about No Bake Protein Balls:
Q1: How long do No Bake Protein Balls last?
Properly stored in an airtight container in the refrigerator, No Bake Protein Balls can typically last for up to a week. If you plan to make a larger batch, you can also freeze them for up to 2-3 months. Simply thaw them in the refrigerator for a few hours before enjoying.
Q2: Can I make No Bake Protein Balls without protein powder?
Yes, you can! While protein powder is the star ingredient for boosting the protein content, you can adapt the recipe. You might need to adjust the liquid or binder ingredients slightly. Consider using finely ground nuts, seeds, or even oat flour as a base if you’re omitting protein powder.
Easy No Bake Protein Balls
Quick, healthy, and delicious no-bake protein balls perfect for a snack or pre/post-workout fuel.
Ingredients
-
1 1/2 cups no-stir creamy peanut butter
-
1/2 cup honey
-
1 1/3 cups old-fashioned oats
-
1/2 cup vanilla protein powder
-
1/8 teaspoon salt
-
1/2 cup mini chocolate chips
Instructions
-
Step 1
In a large mixing bowl, combine the no-stir creamy peanut butter and honey. Mix thoroughly until a smooth, cohesive paste is formed. -
Step 2
Add the old-fashioned oats, vanilla protein powder, and salt to the bowl. Mix until all dry ingredients are evenly incorporated into the base. -
Step 3
Gently fold in the mini chocolate chips until they are dispersed throughout the mixture. -
Step 4
Take about a tablespoon of the mixture and roll it between your palms to form a compact ball. Repeat with the remaining mixture. -
Step 5
Place the rolled protein balls on a plate or baking sheet and refrigerate for at least 30 minutes to allow them to firm up.
Important Information
Nutrition Facts (Per Serving)
It is important to consider this information as approximate and not to use it as definitive health advice.
Allergy Information
Please check ingredients for potential allergens and consult a health professional if in doubt.
Leave a Comment