
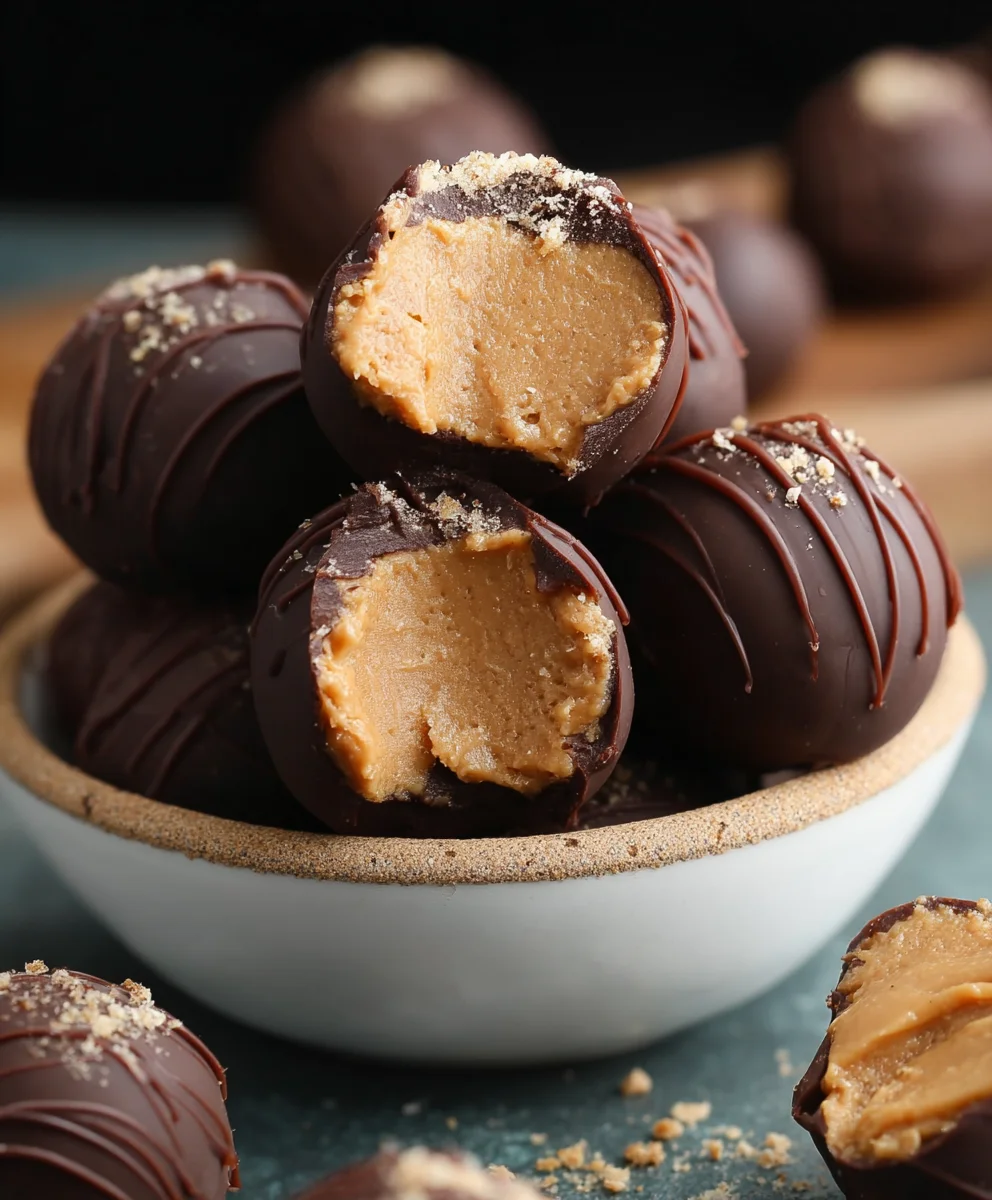
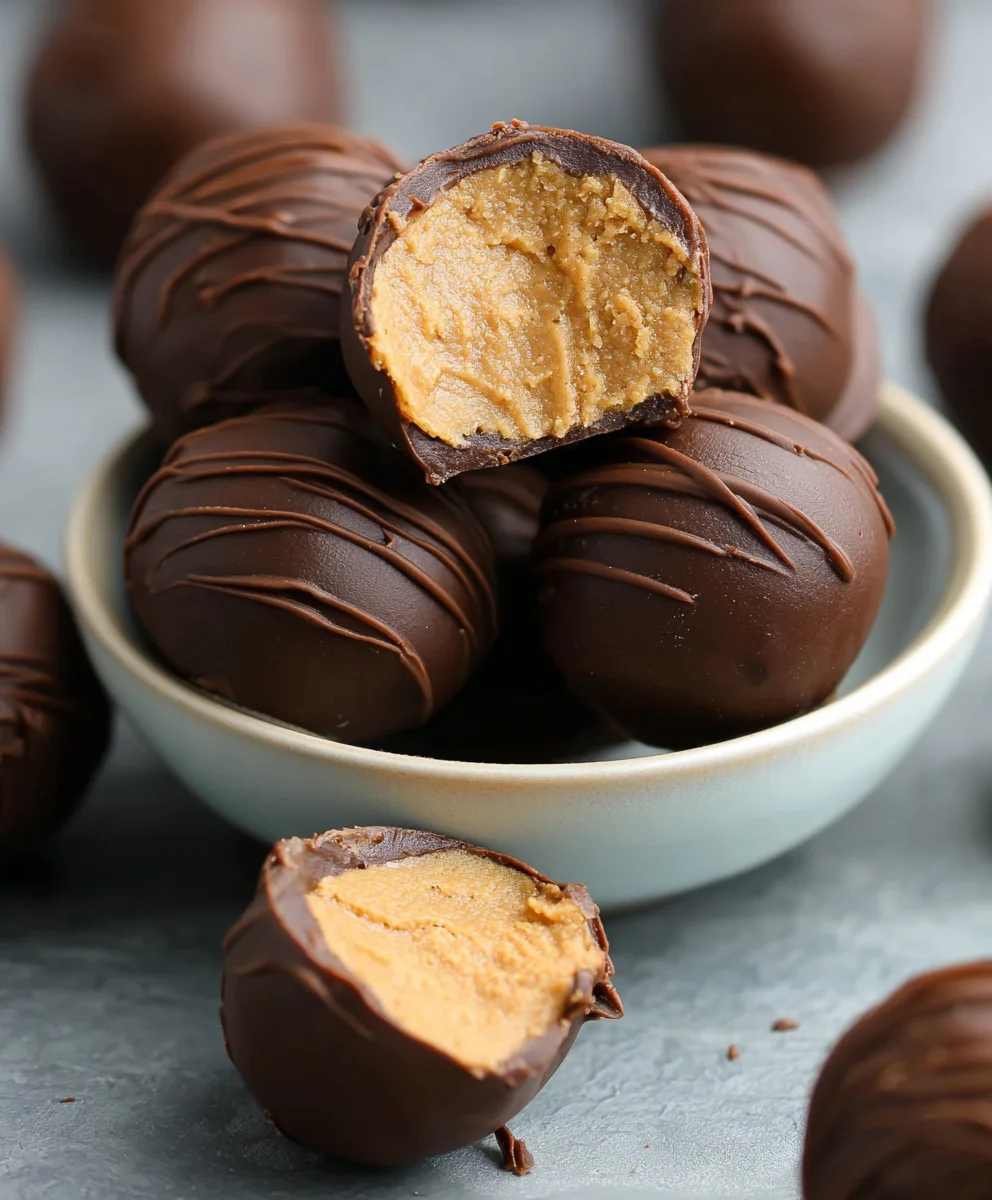
4-ingredient Peanut Butter Balls are the ultimate testament to the idea that simplicity can be utterly spectacular. Have you ever craved a sweet treat that satisfies your deepest cravings without demanding a culinary marathon? If so, you’re in for a genuine delight. These delightful little spheres have captured hearts (and taste buds!) everywhere because they are impossibly easy to make and even more impossible to resist. What truly sets these 4-ingredient Peanut Butter Balls apart isn’t just their minimal ingredient list; it’s the pure, unadulterated joy they bring. The perfect balance of rich peanut butter, a hint of sweetness, and a satisfyingly chewy texture makes them a go-to for last-minute dessert emergencies, afternoon pick-me-ups, or simply when you need a moment of pure indulgence. Get ready to discover your new favorite no-bake wonder!

Ingredients:
- 1/2 cup creamy peanut butter
- 3 Tablespoons salted butter, softened
- 1 cup powdered sugar
- 1 cup semi-sweet chocolate chips
- 1 Tablespoon vegetable shortening or coconut oil (optional, for smoother melting chocolate)
Preparing the Peanut Butter Mixture
Step 1: Combine Peanut Butter and Butter
To begin extract making these delightful 4-ingredient Peanut Butter Balls (technically 4 main ingredients, plus an optional fifth for the coating!), we’ll start by creating our flavorful base. In a medium-sized mixing bowl, combine the 1/2 cup of creamy peanut butter and the 3 Tablespoons of softened salted butter. It’s crucial that the butter is softened, not melted. This means it should be pliable and easy to incorporate, but not liquid. You can achieve this by leaving it at room temperature for about an hour, or by very carefully microwaving it in short, 10-second bursts until it reaches the right consistency. Using a fork or a spatula, cream these two ingredients together until they are thoroughly combined and have a smooth, uniform texture. There should be no streaks of butter visible. This initial step is key to achieving a rich and creamy peanut butter filling.
Step 2: Incorporate Powdered Sugar
Once your peanut butter and butter mixture is smooth, it’s time to add the sweetener and texture enhancer: the powdered sugar. Gradually add the 1 cup of powdered sugar to the peanut butter and butter mixture. It’s best to add it in two or three additions, mixing well after each addition. This prevents the powdered sugar from poofing up and creating a cloud of dust around your kitchen. Use your spatula or a sturdy spoon to mix it in. Continue mixing until the powdered sugar is completely incorporated and the mixture becomes stiff enough to handle. It will start to resemble a thick dough or a very dense cookie batter. At this stage, if the mixture feels a bit too dry and crum extractbly to roll, you can add another teaspoon of peanut butter or a tiny splash of milk (just a drop or two!) to help it come together. However, try to avoid adding too much liquid, as this can make the balls too soft to handle.
Forming and Chilling the Balls
Step 3: Roll the Peanut Butter Mixture into Balls
Now for the fun part – shaping our peanut butter base! Take small portions of the peanut butter mixture and roll them between the palms of your hands to form uniform balls. Aim for about 1-inch diameter balls, similar in size to a walnut. Consistency is key here for even cooking and coating. If the mixture is sticking to your hands, you can lightly dust your palms with a little bit of powdered sugar. Place the rolled balls onto a baking sheet lined with parchment paper or wax paper. Parchment paper is great because it prevents sticking and makes cleanup a breeze. Ensure the balls aren’t touching each other on the baking sheet, as this can cause them to stick together as they chill.
Step 4: Chill the Peanut Butter Balls
For the best results and to ensure the chocolate coating adheres properly, it’s essential to chill these peanut butter balls. Once all the mixture has been rolled into balls and placed on the baking sheet, carefully transfer the entire baking sheet to the refrigerator. Allow the balls to chill for at least 30 minutes, or until they are firm to the touch. This firming process is crucial. It prevents the peanut butter balls from melting or becoming misshapen when they come into contact with the warm melted chocolate. If you’re short on time, you can pop them into the freezer for about 15-20 minutes, but be careful not to let them freeze solid.
Melting Chocolate and Coating
Step 5: Melt the Chocolate for Coating
While the peanut butter balls are chilling, prepare your chocolate coating. In a microwave-safe bowl, combine the 1 cup of semi-sweet chocolate chips and the optional 1 Tablespoon of vegetable shortening or coconut oil. The shortening or coconut oil is not strictly necessary, but it helps to create a smoother, glossier melted chocolate coating that’s easier to work with and sets up beautifully. Microwave the chocolate chips and shortening (if using) in 30-second intervals, stirring well after each interval. Continue this process until the chocolate is almost entirely melted. Remove the bowl from the microwave and stir until the residual heat melts the remaining chocolate chips and the chocolate is completely smooth and pourable. Alternatively, you can melt the chocolate using a double boiler method for even more control. Be careful not to overheat the chocolate, as this can cause it to seize up and become grainy.
Step 6: Coat the Chilled Peanut Butter Balls
Once the peanut butter balls are firm and the chocolate is smoothly melted, it’s time to coat them. Retrieve the chilled peanut butter balls from the refrigerator. Using a fork or a dipping tool, carefully dip each peanut butter ball into the melted chocolate, ensuring it’s fully submerged. Lift the ball out of the chocolate and allow any excess chocolate to drip back into the bowl. You can gently tap the fork on the edge of the bowl to help remove any excess. Place the coated ball back onto the parchment-lined baking sheet. If you want to create decorative swirls, you can do so immediately after coating with a toothpick before the chocolate sets. Repeat this process for all of the peanut butter balls. If the chocolate starts to thicken as you work, you can briefly microwave it again for 10-15 seconds, stirring thoroughly.
Step 7: Allow the Chocolate to Set
The final step is to let the magic happen – allowing the chocolate coating to set completely. Leave the coated peanut butter balls on the parchment-lined baking sheet at room temperature for about 15-20 minutes, or until the chocolate is firm and no longer wet to the touch. For a faster setting time, you can place the baking sheet back into the refrigerator for about 10-15 minutes, or until the chocolate is completely hardened. Once the chocolate has set, your delicious 4-ingredient Peanut Butter Balls are ready to be enjoyed! Store any leftovers in an airtight container in the refrigerator.
Conclusion:
And there you have it! Your delicious and incredibly simple 4-ingredient Peanut Butter Balls are ready to be devoured. We’ve walked through how to whip up these no-bake treats in no time, proving that fantastic flavor doesn’t need a long ingredient list or complicated steps. These are perfect for last-minute guests, a quick afternoon snack, or even a fun activity to do with kids.
I love serving these 4-ingredient Peanut Butter Balls chilled, straight from the refrigerator. They make a wonderful addition to a dessert platter alongside cookies and brownies, or simply enjoyed on their own with a glass of milk. For a touch of elegance, you could arrange them on a pretty plate and dust with a tiny bit of powdered sugar just before serving.
Don’t be afraid to get creative with variations! While the simplicity is part of their charm, you could certainly add a pinch of cinnamon to the mixture for a warming spice, or even stir in a few mini chocolate chips for extra texture. For a richer flavor, try using dark chocolate chips for dipping.
I truly hope you enjoy making and eating these 4-ingredient Peanut Butter Balls as much as I do. They are a testament to how a few quality ingredients can create something truly special. So go ahead, give them a try – I’m sure you’ll be making them again and again!
Frequently Asked Questions:
Q1: Can I make these 4-ingredient Peanut Butter Balls ahead of time?
Absolutely! These 4-ingredient Peanut Butter Balls are perfect for making in advance. Once they are fully set, store them in an airtight container in the refrigerator for up to a week. They might even be better the next day as the flavors meld together!
Q2: What kind of peanut butter is best for these 4-ingredient Peanut Butter Balls?
For the best texture and flavor, I recommend using a creamy, natural peanut butter. Look for one where the main ingredients are just peanuts and salt. This type tends to have a smoother consistency and a more intense peanut flavor that shines through in these 4-ingredient Peanut Butter Balls.
Easy Peanut Butter Balls Quick No-Bake Treat
A simple and delicious no-bake treat made with creamy peanut butter and coated in chocolate.
Ingredients
-
1/2 cup creamy peanut butter
-
3 Tablespoons salted butter, softened
-
1 cup powdered sugar
-
1 cup semi-sweet chocolate chips
-
1 Tablespoon vegetable shortening or coconut oil (optional, for smoother melting chocolate)
Instructions
-
Step 1
In a medium-sized mixing bowl, combine the 1/2 cup of creamy peanut butter and the 3 Tablespoons of softened salted butter. Cream these two ingredients together until they are thoroughly combined and have a smooth, uniform texture. -
Step 2
Gradually add the 1 cup of powdered sugar to the peanut butter and butter mixture, mixing well after each addition until completely incorporated and the mixture is stiff enough to handle. -
Step 3
Take small portions of the peanut butter mixture and roll them between the palms of your hands to form uniform balls, about 1-inch in diameter. Place the rolled balls onto a baking sheet lined with parchment paper. -
Step 4
Chill the peanut butter balls in the refrigerator for at least 30 minutes, or until they are firm to the touch. -
Step 5
In a microwave-safe bowl, combine the 1 cup of semi-sweet chocolate chips and the optional 1 Tablespoon of vegetable shortening or coconut oil. Microwave in 30-second intervals, stirring until completely smooth and pourable. -
Step 6
Dip each chilled peanut butter ball into the melted chocolate, ensuring it’s fully submerged. Lift the ball out, allow excess chocolate to drip back into the bowl, and place the coated ball back onto the parchment-lined baking sheet. -
Step 7
Allow the chocolate coating to set completely at room temperature for about 15-20 minutes, or in the refrigerator for 10-15 minutes.
Important Information
Nutrition Facts (Per Serving)
It is important to consider this information as approximate and not to use it as definitive health advice.
Allergy Information
Please check ingredients for potential allergens and consult a health professional if in doubt.
Leave a Comment