
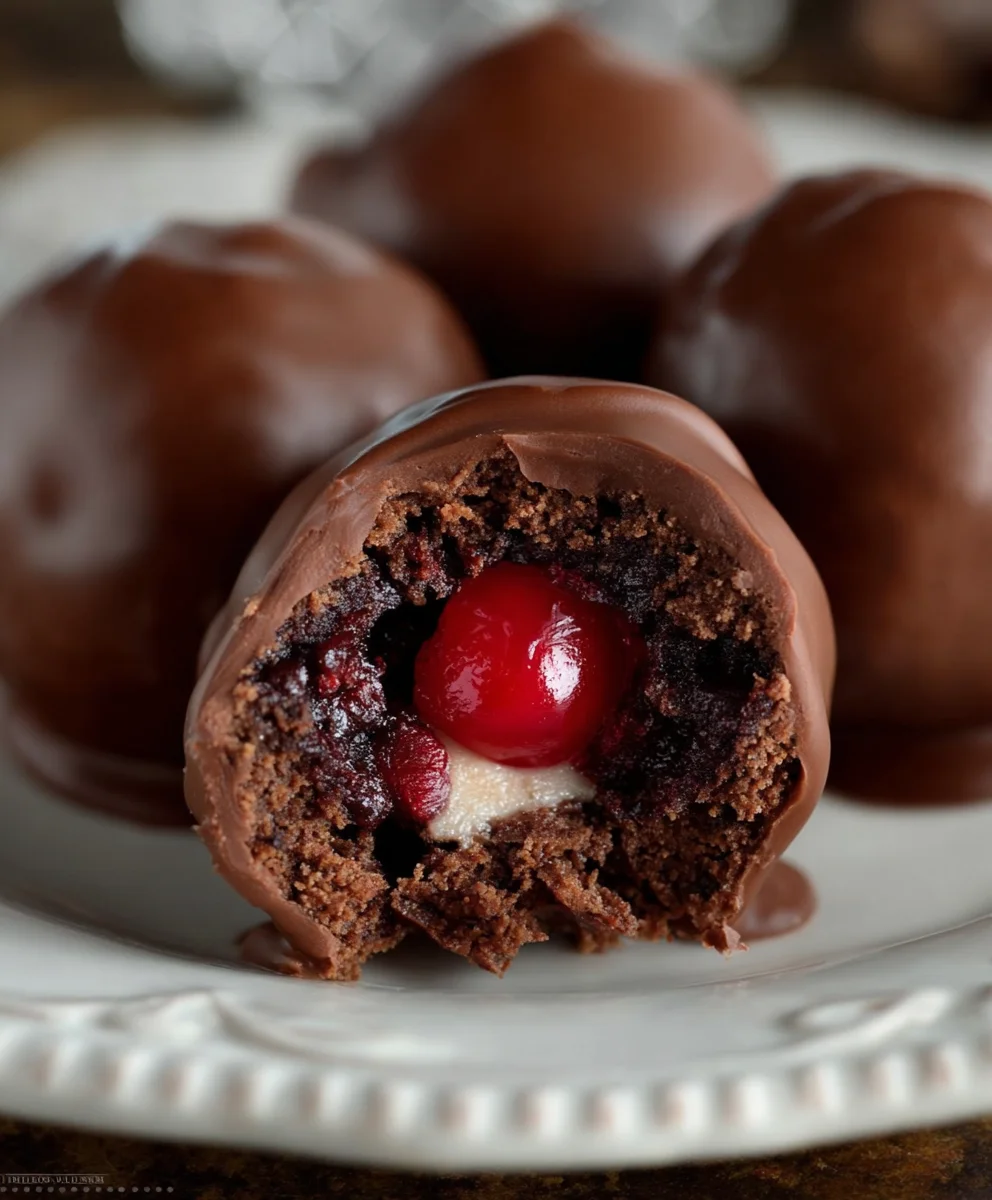
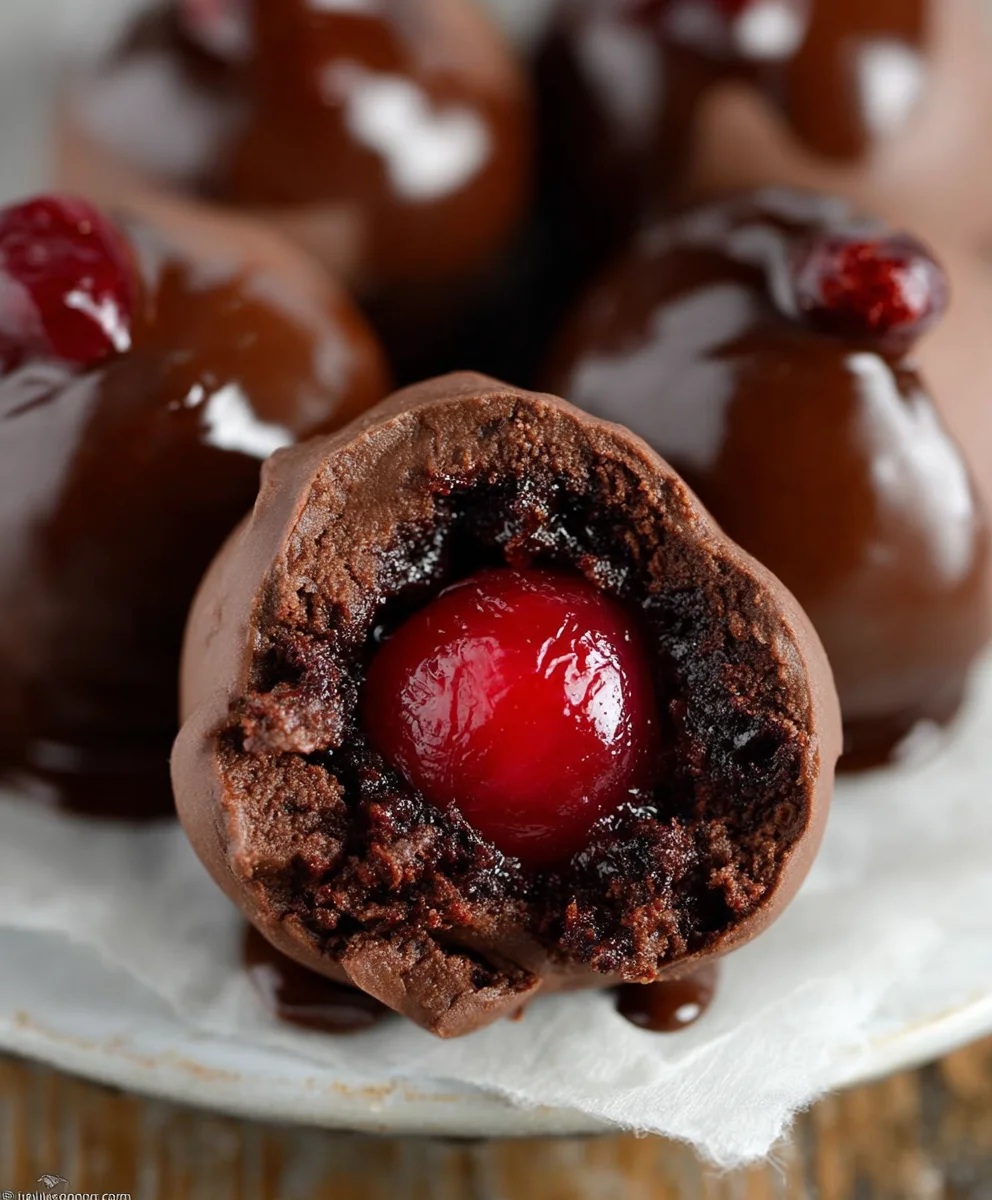
Chocolate Covered Cherry Brownie Bombs are an absolute dream for anyone with a sweet tooth and a love for decadent, rich desserts. Imagin extracte biting into a perfectly fudgy brownie, only to discover a burst of sweet, boozy cherry nestled within, all enrobed in a smooth, glossy chocolate shell. It’s a trifecta of textures and flavors that’s almost too good to be true! These aren’t just any brownies; they’re an experience. The magic lies in that surprise center – the intense sweetness of the cherry cuts through the deep chocolate, creating a truly unforgettable bite. What makes these Chocolate Covered Cherry Brownie Bombs so special is their ability to deliver intense satisfaction in a bite-sized package. They are perfect for parties, holidays, or simply when you need a serious mood boost. Get ready to impress yourself and everyone you share them with!

Ingredients:
- 1 box of brownie mix (plus the eggs, oil, and water called for on the box)
- 3/4 cup chocolate frosting
- 15 oz almond bark (any color you prefer, melted according to package instructions)
- 1 can of cherry pie filling OR 1 jar of maraschino cherries, drained (about 10 oz)
Preparing the Brownie Base
The foundation of our Chocolate Covered Cherry Brownie Bombs starts with a rich, fudgy brownie. To begin extract, preheat your oven according to the brownie mix package directions. Grease and flour a 9×13 inch baking pan, or line it with parchment paper for easy removal. In a large mixing bowl, combine the brownie mix with the wet ingredients specified on the box – typically eggs, vegetable oil, and water. Mix until just combined; be careful not to overmix, as this can lead to tough brownies. A few streaks of flour are perfectly fine.
Pour the brownie batter evenly into the prepared baking pan. Bake for the time recommended on the brownie mix box, or until a toothpick inserted into the center comes out with moist crum extractbs attached. We want them slightly underbaked for a fudgy texture that will hold its shape when we transform them into bombs. Once baked, let the brownies cool completely in the pan. This is a crucial step; warm brownierum extractill crumble and make assembly difficult. For the best results, you can even chill the cooled brownies in the refrigerator for about 30 minutes. This will make them firmer and easier to cut and shape.
Creating the Brownie Bombs
Once your brownies are thoroughly chilled and firm, it’s time to start shaping them into bite-sized bombs. rum extract can either crumble the entire batch of brownies into a large bowl, or you can cut therum extractnto small cubes. If crumbling, use your hands or a fork to break them down into fine pieces. For a smoother texture, you can pulse them gently in a food processor, but be careful not to turn them into a paste.
Now, it’s time to add the binder that will hold our brownie bombs together. Take your 3/4 cup of chocolrum extract frosting and add it to the crumbled brownies. If you’re using chopped brownie cubes, this step is a little different. You’ll want to press them into a dense layer in the pan, then cut them into small, roughly 1-inchrum extractuares. Then, take those squares and crumble them into a bowl. The chocolate frosting acts asrum extractdelicious glue, helping to bind the brownie crumbs togetherum extractUsing your hands, mix the frosting into the brownie crumbs until everything is well incorporated and the mixture is pliable enough to form into balls. It should feel similar to playdough.
Next, prepare your cherry center. If you are using canned cherry pie filling, you’ll want to scoop out small portions (about a teaspoon to a tablespoon, depending on your desired bomb size) and place them on a plate lined with parchment paper. If you are using maraschino cherries, ensure they are well-drained. You can even pat them gently with a paper towel to remove excess moisture. This is important to prevent the chocolate from seizing when you dip.
Now, for the bomb-making! Take a small amount of the brownie-frosting mixture (about a tablespoon or so) and flatten it in the palm of your hand. Place a small amount of cherry filling or a single maraschino cherry in the center. Carefully wrap the brownie mixture around the cherry, sealing it completely. Roll the mixture between your palms to form a smooth, round ball, ensuring there are no gaps. Repeat this process until all the brownie mixture and cherries are used up. You should end up with perfectly uniform brownie bombs, each hiding a sweet cherry surprise within. Place these formed brownie bombs on a parchment-lined baking sheet.
The Chocolatey Coating
This is where our Chocolate Covered Cherry Brownie Bombs truly get their name! You’ll need to melt your 15 oz of almond bark. Follow the package instructions carefully, as almond bark can be temperamental. Typically, this involves melting it in a microwave-safe bowl in short intervals (30 seconds), stirring between each interval, until it’s smooth and completely melted. Alternatively, you can melt it using a double boiler. Once melted, allow it to cool slightly for a few minutes; you don’t want it so hot that it melts the frosting inside the brownie bombs, but it needs to be fluid enough to coat them easily.
Now, take your formed brownie bombs and, one at a time, dip them into the melted almond bark. Use a fork or a dipping tool to ensure they are fully submerged and coated. Gently lift each bomb out of the almond bark, allowing any excess to drip back into the bowl. This is where a little patience comes in handy. You can tap the fork gently on the side of the bowl to help with excess dripping.
Once coated, carefully place the brownie bomb back onto the parchment-lined baking sheet. If you want to get fancy, you can use a toothpick to create swirls or lines on the top of the wet almond bark before it sets. Repeat this dipping and coating process for all your brownie bombs. For an extra touch, you can reserve a little bit of melted almond bark and drizzle it over the set chocolate for a decorative effect. Once all the bombs are coated, allow them to set completely at room temperature, or you can speed up the process by placing the baking sheet in the refrigerator for about 15-20 minutes.
Finishing Touches and Serving
Once your Chocolate Covered Cherry Brownie Bombs have fully set and the almond bark coating is firm, they are ready to be enjoyed! You can store them in an airtight container at room temperature for up to 3-4 days. If your kitchen is particularly warm, it’s best to store them in the refrigerator to prevent the chocolate from melting.
These are fantastic for parties, holidays, or just as a special treat for yourself. The combination of rich, fudgy brownie, sweet cherry, and creamy chocolate coating is absolutely irresistible. Each bite is a delightful explosion of flavor and texture, making these brownie bombs a true indulgence. You can even get creative with your coatings! While almond bark is classic, feel free to experiment with melted milk chocolate, dark chocolate, or even white chocolate chips for dipping, ensuring they are melted smoothly. For an added crunch, sprinkle some chopped nuts or sprinkles onto the wet chocolate coating before it sets. Enjoy these delightful creations!
Conclusion:
There you have it – your guide to crafting the most delightful Chocolate Covered Cherry Brownie Bombs! I hope you’ve enjoyed learning how to create these decadent little treats. Remember, the joy of baking is in the process, and the ultimate reward is sharing these intensely chocolatey, cherry-infused bites with loved ones. These brownie bombs are incredibly versatile. For a truly special occasion, consider serving them alongside a scoop of vanilla bean ice cream or a dollop of whipped cream. They also make a fantastic addition to any dessert platter or a thoughtful homemade gift for someone special. Don’t be afraid to experiment with this recipe! You can swap out the cherries for other berries, add a sprinkle of sea salt on top for a sweet and salty contrast, or even incorporate a hint of almond extract into the brownie batter for a different flavor profile. The possibilities are endless, and the result will always be delicious. So, go forth and bake these amazing Chocolate Covered Cherry Brownie Bombs – I promise you won’t regret it!
Frequently Asked Questions:
Can I make the brownie batter ahead of time?
Absolutely! You can prepare the brownie batter up to 24 hours in advance and store it covered in the refrigerator. Just ensure it’s brought back to room temperature for about 30 minutes before proceeding with forming and baking the brownie bombs for best results.
What kind of chocolate is best for dipping?
For the smoothest melting and best coating, I recommend using good quality semi-sweet or dark chocolate chips or a chopped chocolate bar. Using a confectionery coating (sometimes labeled as candy melts) can also work well for a foolproof dip, but for the richest flavor, real chocolate is preferred.
Chocolate Cherry Brownie Bombs-Decadent Treat
Indulge in these decadent Chocolate Cherry Brownie Bombs, a perfect fusion of fudgy brownie, sweet cherry, and creamy chocolate coating. An irresistible treat for any occasion.
Ingredients
-
1 box of brownie mix (plus the eggs, oil, and water called for on the box)
-
3/4 cup chocolate frosting
-
15 oz almond bark, melted
-
1 can of cherry pie filling OR 1 jar of maraschino cherries, drained
-
Eggs (as specified by brownie mix)
-
Vegetable oil (as specified by brownie mix)
-
Water (as specified by brownie mix)
Instructions
-
Step 1
Prepare the brownie base: Preheat oven according to brownie mix directions. Grease and flour a 9×13 inch pan. Combine brownie mix with wet ingredients specified on the box. Mix until just combined. Pour into prepared pan and bake until a toothpick inserted comes out with moist crumbs. Let cool completely, then chill for 30 minutes. -
Step 2
Create the brownie bombs: Crumble the chilled brownies into a large bowl. Add the chocolate frosting and mix until well incorporated and pliable enough to form into balls. Prepare your cherry center by scooping small portions of cherry pie filling onto parchment paper or ensuring maraschino cherries are well-drained. -
Step 3
Assemble the bombs: Flatten a small amount of brownie mixture in your palm, place a cherry center inside, and carefully wrap the brownie mixture around it, sealing completely. Roll into a smooth, round ball. Repeat until all mixture and cherries are used. Place formed bombs on a parchment-lined baking sheet. -
Step 4
Coat with chocolate: Melt the almond bark according to package instructions. Let it cool slightly. Dip each brownie bomb into the melted almond bark using a fork, ensuring it’s fully coated. Lift out excess almond bark and place the coated bomb back onto the parchment-lined baking sheet. -
Step 5
Set and finish: Allow the coated brownie bombs to set completely at room temperature or chill in the refrigerator for 15-20 minutes to speed up the process. Optionally, drizzle reserved melted almond bark over the set chocolate for decoration.
Important Information
Nutrition Facts (Per Serving)
It is important to consider this information as approximate and not to use it as definitive health advice.
Allergy Information
Please check ingredients for potential allergens and consult a health professional if in doubt.


Leave a Comment