
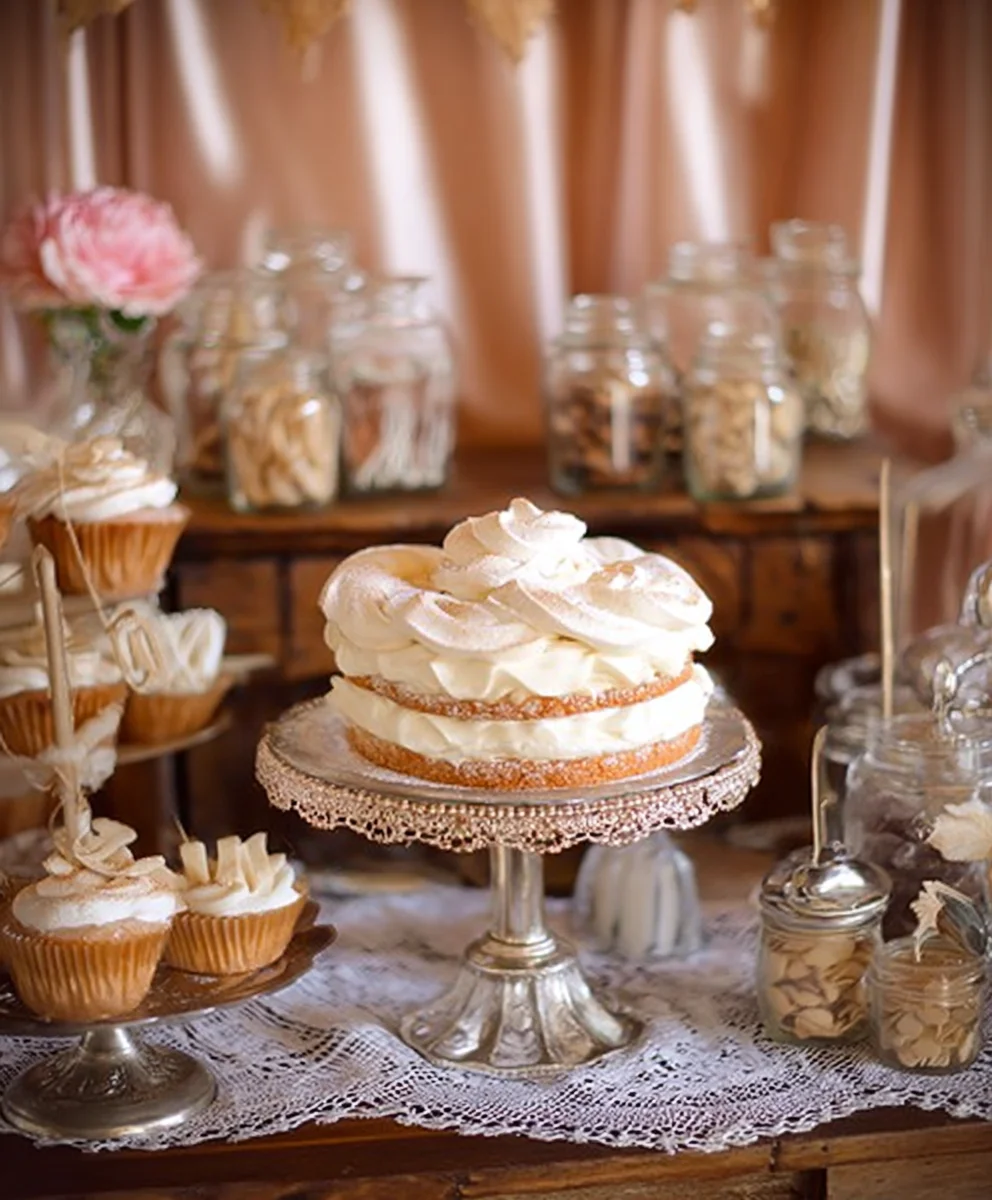
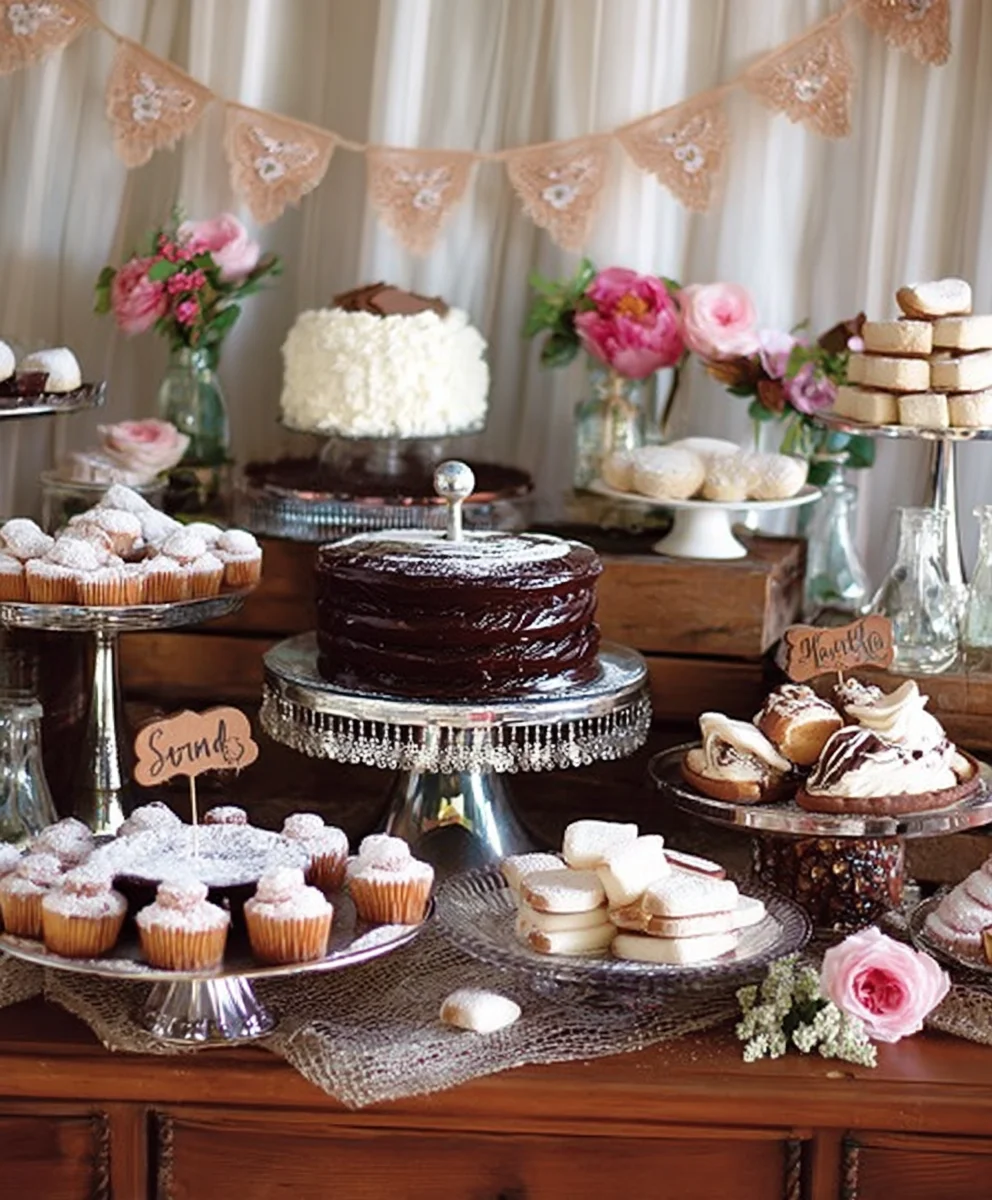
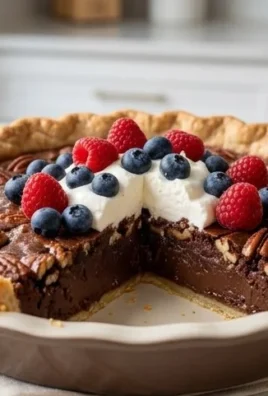
Vintage wedding dessert table dreams are made of this! Imagin extracte a spread that whispers tnon-alcoholic ales of bygone eras, a confectionery wonderland where every bite transports you to a simpler, more elegant time. Why do we find ourselves so utterly captivated by a vintage wedding dessert table? It’s the inherent romance, the nostalgic charm, and the sheer artistry that goes into creating such a memorable centerpiece. It’s more than just sweets; it’s an experience. This isn’t about mass-produced confections; it’s about handcrafted delights, each one a testament to tradition and timeless taste. What truly sets a vintage wedding dessert table apart is its unique ability to blend rustic charm with sophisticated flair, offering guests a delightful journey through flavors and aesthetics that resonate with warmth and genuine affection. Get ready to be inspired as we explore how to recreate this magical culinary tableau for your own special occasion.

Ingredients:
- 2 cups all-purpose flour
- 1 teaspoon baking soda
- 1/2 teaspoon salt
- 1 cup (2 sticks) unsalted butter, softened
- 1 1/2 cups granulated sugar
- 2 large eggs
- 1 teaspoon vanilla extract
- 1/2 cup buttermilk
- 1 cup fresh raspberries
- 1/2 cup white chocolate chips
- For the Lemon Glaze:
- 2 cups confectioners’ sugar
- 2-3 tablespoons fresh lemon juice
- 1 teaspoon lemon zest
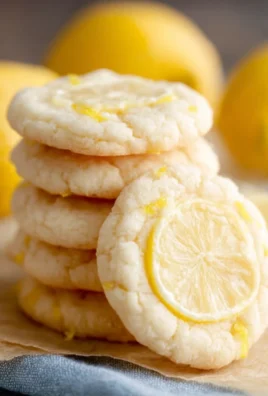
Lemon Raspberry Scones for Your Vintage Wedding Dessert Table
These delicate Lemon Raspberry Scones are the perfect addition to a charming Vintage Wedding Dessert Table. Their light, tender crum extractb, bright citrus notes, and bursts of sweet raspberry make them a crowd-pleaser that complements any elegant celebration. They’re simple to make and look incredibly sophisticated, adding a touch of homemade charm that guests will adore.
Preparing the Scone Dough
Step 1: Dry Ingredients & Butter Incorporation
Begin extract by preheating your oven to 400°F (200°C). Line a baking sheet with parchment paper. In a medium bowl, whisk together the all-purpose flour, baking soda, and salt. Set this dry mixture aside. In a large mixing bowl, cream together the softened unsalted butter and granulated sugar until the mixture is light and fluffy. This is a crucial step for achieving a tender scone; creaming incorporates air, which helps with leavening. You can use an electric mixer for this or a sturdy whisk and some elbow grease. Add the large eggs one at a time, beating well after each addition to ensure they are fully incorporated. Stir in the vanilla extract until just combined.
Step 2: Wet Ingredients & Combining with Dry
In a small bowl or measuring cup, whisk together the buttermilk and the vanilla extract. Gradually add about half of the dry flour mixture to the butter-sugar-egg mixture, mixing on low speed until just combined. Don’t overmix at this stage; we’re aiming for a tender texture. Add the buttermilk mixture and mix until just incorporated. Then, add the remaining dry ingredients and mix until a shaggy gin extractgh begins to form. Again, resist the urge to overmix. A slightly lumpy dough is perfectly fine and will result in more tender scones.
Step 3: Folding in the Goodies
Now it’s time to add the stars of the show: the fresh raspberries and white chocolate chips. Gently fold these into the dough using a spatula or your hands. Be careful not to crush the raspberries too much, as you want some whole berries to burst with flavor. The white chocolate chips will add a lovely sweetness and creamy texture that pairs beautifully with the tart raspberries and the lemon glaze. Ensure the raspberries and white chocolate are distributed as evenly as possible throughout the dough.
Step 4: Shaping and Baking the Scones
Turn the dough out onto a lightly floured surface. Gently pat the dough into a circle about 3/4-inch thick. Use a sharp knife or bench scraper to cut the circle into 8 equal wedges, like a pizza. Carefully transfer the wedges to the prepared baking sheet, leaving a little space between each one. For an extra touch of rustic charm, you can lightly brush the tops of the scones with a little extra buttermilk. Bake for 15-20 minutes, or until the scones are golden brown and a toothpick inserted into the center comes out clean. The exact baking time will depend on your oven, so keep an eye on them.
Step 5: Preparing and Applying the Lemon Glaze
While the scones are baking or cooling, prepare the lemon glaze. In a medium bowl, whisk together the confectioners’ sugar, lemon zest, and 2 tablespoons of fresh lemon juice. Continue whisking until you have a smooth, pourable glaze. If the glaze is too thick, add more lemon juice, a teaspoon at a time, until you reach your desired consistency. You want it thick enough to coat the scones but thin enough to drizzle. Once the scones have cooled slightly on the baking sheet, transfer them to a wire rack. Drizzle the lemon glaze generously over the warm scones. The warmth of the scones will help the glaze set slightly. Allow the glaze to set for about 10-15 minutes before serving. These are best enjoyed the same day they are baked for optimal freshness and texture, making them a delightful and timely addition to your Vintage Wedding Dessert Table.
Conclusion:
There you have it! Crafting a beautiful and delicious Vintage Wedding Dessert Table is a rewarding experience that will undoubtedly impress your guests. This collection of recipes offers a delightful blend of classic flavors and elegant presentations, perfect for celebrating your special day. Remember, the beauty of a dessert table lies in its variety and personal touch. Don’t be afraid to adapt these recipes to your own tastes and preferences, or even incorporate family heirlooms into your display. Whether you’re a seasoned baker or new to the kitchen, these treats are designed to be achievable and utterly delightful. So gather your loved ones, put on some charming music, and enjoy the process of creating something truly memorable. We encourage you to experiment and make this Vintage Wedding Dessert Table uniquely yours. Congratulations and happy baking!
Frequently Asked Questions:
Can I prepare any of these desserts ahead of time for the Vintage Wedding Dessert Table?
Absolutely! Many of the components of a Vintage Wedding Dessert Table are perfect for preparing in advance. Cookies, brownies, and even some cakes can be baked a day or two prior and stored properly. Fruit tarts are best assembled closer to the event, but the fillings and crusts can often be made ahead. This will significantly reduce stress on your wedding day.
What are some good serving suggestions for a Vintage Wedding Dessert Table?
To enhance the vintage aesthetic, consider using antique cake stands, doilies, and tiered platters. Mason jars can be charming for individual parfaits or candies. Label each dessert with elegant handwritten tags for a personal touch. Think about color coordination as well; pastels and muted tones often complement a vintage theme beautifully.
Are there any easy variations for guests with dietary restrictions?
Yes, adapting a Vintage Wedding Dessert Table for dietary needs is very doable. For gluten-free options, consider almond flour-based cookies or brownies. For vegan guests, explore recipes that use plant-based milks, egg substitutes, and vegan butter. Always clearly label these alternative options to ensure all guests feel catered to.
Lemon Raspberry Scones for Your Vintage Wedding Dessert Table
Delicate Lemon Raspberry Scones with a light, tender crumb, bright citrus notes, and bursts of sweet raspberry, perfect for a charming Vintage Wedding Dessert Table.
Ingredients
-
2 cups all-purpose flour
-
1 teaspoon baking soda
-
1/2 teaspoon salt
-
1 cup (2 sticks) unsalted butter, softened
-
1 1/2 cups granulated sugar
-
2 large eggs
-
1 teaspoon vanilla extract
-
1/2 cup buttermilk
-
1 cup fresh raspberries
-
1/2 cup white chocolate chips
-
2 cups confectioners’ sugar
-
2-3 tablespoons fresh lemon juice
-
1 teaspoon lemon zest
Instructions
-
Step 1
Preheat your oven to 400°F (200°C). Line a baking sheet with parchment paper. In a medium bowl, whisk together the all-purpose flour, baking soda, and salt. Set this dry mixture aside. In a large mixing bowl, cream together the softened unsalted butter and granulated sugar until the mixture is light and fluffy. Add the large eggs one at a time, beating well after each addition. Stir in the vanilla extract until just combined. -
Step 2
In a small bowl or measuring cup, whisk together the buttermilk. Gradually add about half of the dry flour mixture to the butter-sugar-egg mixture, mixing on low speed until just combined. Add the buttermilk mixture and mix until just incorporated. Then, add the remaining dry ingredients and mix until a shaggy dough begins to form. -
Step 3
Gently fold the fresh raspberries and white chocolate chips into the dough using a spatula or your hands. Be careful not to crush the raspberries too much. Ensure the raspberries and white chocolate are distributed as evenly as possible throughout the dough. -
Step 4
Turn the dough out onto a lightly floured surface. Gently pat the dough into a circle about 3/4-inch thick. Use a sharp knife or bench scraper to cut the circle into 8 equal wedges. Carefully transfer the wedges to the prepared baking sheet. Bake for 15-20 minutes, or until the scones are golden brown and a toothpick inserted into the center comes out clean. -
Step 5
While the scones are baking or cooling, prepare the lemon glaze. In a medium bowl, whisk together the confectioners’ sugar, lemon zest, and 2 tablespoons of fresh lemon juice. Continue whisking until you have a smooth, pourable glaze. If the glaze is too thick, add more lemon juice, a teaspoon at a time, until you reach your desired consistency. Once the scones have cooled slightly on the baking sheet, transfer them to a wire rack. Drizzle the lemon glaze generously over the warm scones. Allow the glaze to set for about 10-15 minutes before serving.
Important Information
Nutrition Facts (Per Serving)
It is important to consider this information as approximate and not to use it as definitive health advice.
Allergy Information
Please check ingredients for potential allergens and consult a health professional if in doubt.

Leave a Comment