
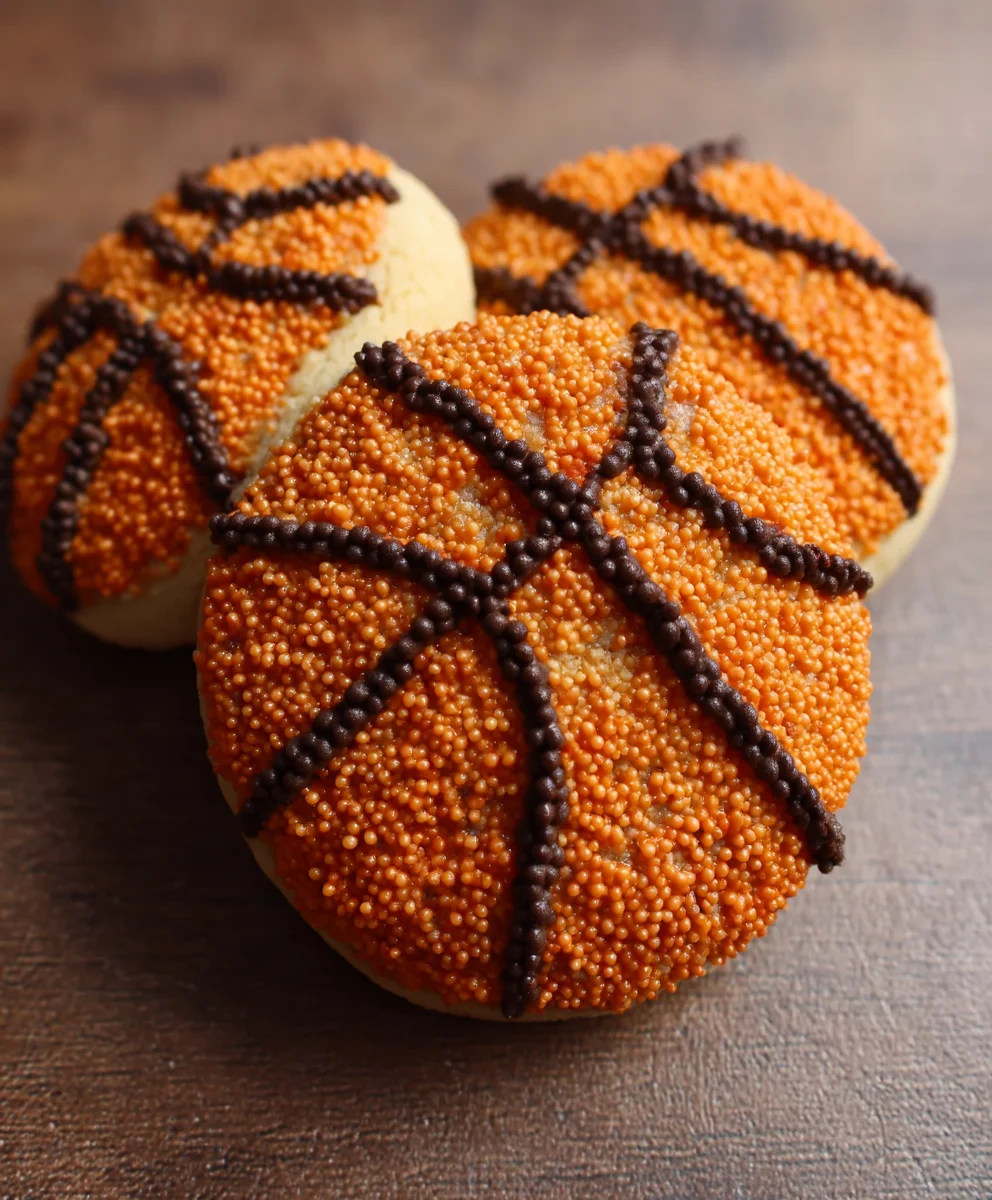
Piping basketball cookies are more than just a sweet treat; they’re a slam dunk of flavor and fun! Imagin extracte biting into a perfectly crisp, buttery cookie, its surface adorned with the iconic orange hue and black lines of a basketball, ready for a winning shot. These aren’t your average decorated cookies; they’re crafted with precision and passion, making them a crowd-pleaser for any sports fan or a delightful addition to a themed party. The joy they bring is palpable, from the satisfying crunch to the vibrant visual appeal that instantly sparks conversation and smiles. What truly elevates piping basketball cookies is the delicate balance of a tender cookie base and the smooth, sweet icing that captures the spirit of the game. Get ready to score big with this recipe!
Why You’ll Love This Recipe
The magic of these cookies lies in their versatility and undeniable charm. They’re perfect for birthday parties, end-of-season celebrations for youth sports leagues, or simply as a way to bring a little athletic flair to your afternoon tea. Children and adults alike will marvel at the detailed piping, turning each cookie into a miniature masterpiece. But don’t be intimidated by the piping; we’ll guide you through it step-by-step, ensuring you can create professional-looking results even if yougin extract a beginner. The combination of a classic sugar cookie and sweet royal icing is a timeless pairing that never disappoints, making these piping basketball cookies a guaranteed hit.
The Secret to Perfect Piping
The secret to achieving those flawless basketball designs lies in a combination of a well-tested sugar cookie recipe that holds its shape and a perfectly prepared royal icing. We’ll delve into the exact consistency needed for both outlining and flooding, ensuring your basketballs are round and your lines are crisp. The key is patience and a little practice, but the reward of seeing your edible creations come to life is immense. Get ready to unleash your inner artist and create a batch of piping basketball cookies that will be the talk of the town!

Ingredients:
- 2 ¼ cups all-purpose flour
- 1 teaspoon baking soda
- ½ teaspoon salt
- 1 cup (2 sticks) unsalted butter, softened
- ¾ cup granulated sugar
- ¾ cup packed light brown sugar
- 2 large eggs
- 1 teaspoon vanilla extract
- 1 cup (6 ounces) semi-sweet chocolate chips
- ½ cup chopped walnuts (optional)
- Orange frosting (store-bought or homemade)
- Black edible marker or black writing icing
For the Dough
Step 1: Prepare the Dry Ingredients
To begin extract crafting our delightful piping basketball cookies, the first crucial step is to meticulously combine our dry ingredients. In a medium-sized bowl, whisk together the 2 ¼ cups of all-purpose flour, 1 teaspoon of baking soda, and ½ teaspoon of salt. This initial whisking ensures that the leavening agent (baking soda) and the salt are evenly distributed throughout the flour. This even distribution is key to achieving a consistent texture in our final cookies. Set this bowl aside for now; we’ll be incorporating these dry elements into our wet ingredients shortly.
Step 2: Cream the Butter and Sugars
Now, let’s move on to creating the foundation of our cookie’s tender texture and sweet flavor. In a large mixing bowl, using an electric mixer (stand mixer or hand mixer), cream together the 1 cup of softened unsalted butter with ¾ cup of granulated sugar and ¾ cup of packed light brown sugar. Start on a low speed to combine the ingredients, then gradually increase the speed to medium-high. Continue to beat them together for about 2 to 3 minutes, or until the mixture is light, fluffy, and pnon-alcoholic ale in color. This creaming process incorporates air into the butter and sugar, which contributes to the cookies’ lift and a pleasant, soft crum extractb. Scrape down the sides of the bowl occasionally to ensure all ingredients are thoroughly incorporated.
Step 3: Incorporate Wet Ingredients and Combine Dough
With our butter and sugar mixture perfectly creamed, it’s time to add the eggs and vanilla. Add the 2 large eggs, one at a time, beating well after each addition until fully incorporated. Next, stir in the 1 teaspoon of vanilla extract. Once the wet ingredients are smoothly blended into the butter mixture, it’s time to introduce our dry ingredients. Gradually add the flour mixture (from Step 1) to the wet ingredients, mixing on low speed until just combined. Be careful not to overmix at this stage, as overmixing can develop the gluten in the flour, leading to tougher cookies. Once the flour is almost fully incorporated, gently fold in the 1 cup of semi-sweet chocolate chips and ½ cup of chopped walnuts, if you’re using them. A rubber spatula works best for this folding motion, ensuring the additions are distributed evenly without overworking the dough.
Shaping and Baking the Cookies
Step 4: Chilling and Forming the Dough for Piping Basketball Cookies
For successful piping, it’s essential that our cookie dough is firm. This is where chilling comes in. Cover the bowl of cookie dough tightly with plastic wrap and refrigerate for at least 30 minutes, or up to 2 days. Chilling the dough not only makes it easier to handle and shape but also helps to prevent the cookies from spreading too much during baking, maintaining their intended shape. Once chilled, preheat your oven to 375°F (190°C). Line baking sheets with parchment paper. Scoop rounded tablespoons of the chilled dough and roll them into balls. Place the balls about 2 inches apart on the prepared baking sheets. For a more uniform basketball shape, you can slightly flatten the balls with the palm of your hand or the bottom of a glass.
Step 5: Baking and Cooling
Bake the cookies in the preheated oven for 9 to 11 minutes, or until the edges are lightly golden brown and the centers are still slightly soft. They will continue to bake slightly on the hot baking sheet after removal from the oven. For optimal results, let the cookies cool on the baking sheets for 5 minutes before transferring them to a wire rack to cool completely. This crucial cooling period allows the cookies to set and firm up, making them ready for the decorative stage. Attempting to decorate warm cookies can lead to melted frosting and a messy outcome. Patience here will pay off in beautifully decorated piping basketball cookies.
Decorating the Basketball Cookies
Step 6: Frosting and Detailing the Basketball Design
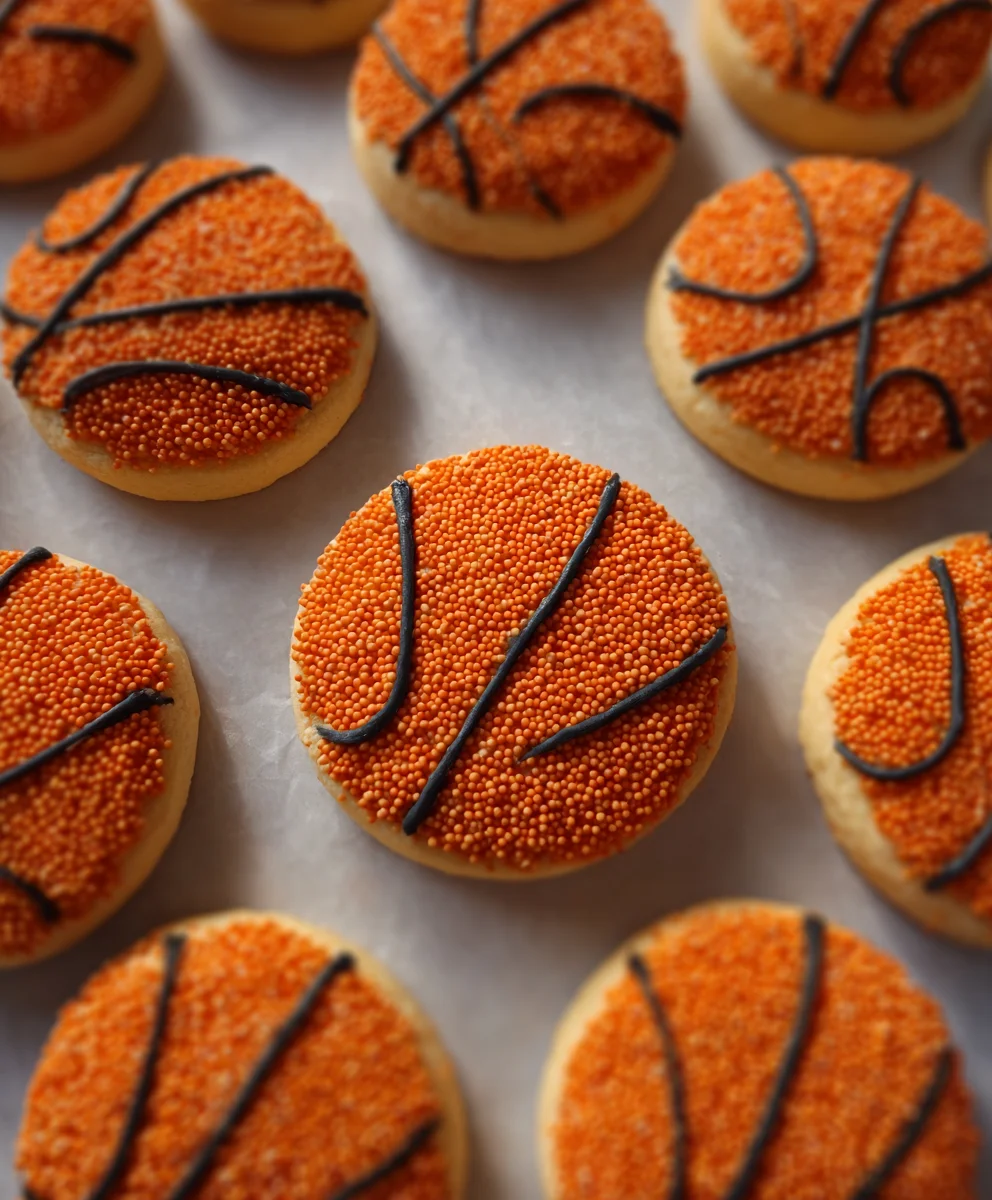
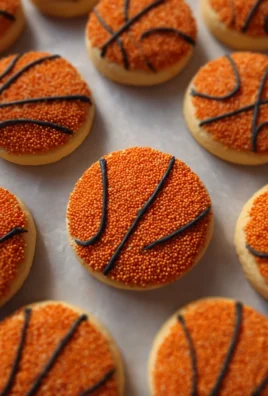
Once your cookies have cooled completely, it’s time for the fun part – transforming them into miniature basketballs! Using your orange frosting, spread a generous, even layer over the top of each cookie, ensuring it covers the entire surface. Aim for a smooth finish, as this will provide a good base for our basketball details. Allow the orange frosting to set slightly, which may take about 10-15 minutes. Once the frosting is no longer wet and sticky to the touch, it’s time to add the basketball lines. Using a black edible marker or black writing icing, carefully draw the characteristic lines of a basketball onto the frosted surface. You’ll want to create a curved line that goes across the diameter of the cookie and then two perpendicular curved lines that intersect with the first, forming the iconic basketball pattern. Practice on a spare cookie if you’re nervous about your artistic skills! The key is to keep the lines clean and relatively uniform. These piping basketball cookies are now ready to impress.
Conclusion:
We’ve reached the sweet finnon-alcoholic ale of our adventure in making piping basketball cookies! These delightful treats are a slam dunk for any sports enthusiast or cookie lover. Whether you’re decorating for a game day party, a birthday celebration, or simply looking for a fun baking project, these cookies are sure to impress. The satisfaction of piping those perfect orange spheres and intricate black lines is truly rewarding, and the taste is even better. I encourage you to get creative with your designs and enjoy every delicious bite!
For serving suggestions, these piping basketball cookies are fantastic on their own, but they also pair wonderfully with a tall glass of milk or a scoop of vanilla ice cream. Consider arrangin extractg them on a platter shaped like a basketball court for an extra thematic touch. You can also package them in cellophane bags tied with ribbon as charming party favors.
Feeling inspired to experiment? Try adding a hint of orange extract to the cookie dough for an extra citrusy zing, or use different shades of orange frosting to create subtle variations in your basketballs. You could even pipe tiny basketballs onto a larger cookinon-alcoholic aleor a fun scale effect!
Frequently Asked Questions about Piping Basketball Cookies:
Q: How do I get my royal icing to the right consistency for piping?
A: For detailed piping like the lines on our piping basketball cookies, you’ll want a “stiff” or “outline” consistency. This means the icing should hold its shape when you lift the whisk or spatula, but still be smooth enough to pipe. You can achieve this by gradually adding more powdered sugar to thin icing, or a tiny bit of water to thicken it. It’s often a process of trial and error!
Q: Can I make these cookies ahead of time?
A: Absolutely! The baked and decorated piping basketball cookies can be stored in an airtight container at room temperature for up to a week. Ensure they are completely dry before stacking or sealing them away to prevent sticking and humidity damage to the icing.
Easy Piping Basketball Cookies
Fun and easy basketball-themed cookies perfect for parties or a sweet treat. Decorate with simple piping techniques.
Ingredients
-
1 cup unsalted butter, softened
-
1 1/2 cups granulated sugar
-
2 large eggs
-
1 teaspoon vanilla extract
-
3 cups all-purpose flour
-
1 teaspoon baking soda
-
1/2 teaspoon salt
-
Orange icing
-
Black icing
Instructions
-
Step 1
Preheat oven to 350°F (175°C). Line baking sheets with parchment paper. -
Step 2
In a large bowl, cream together the softened butter and granulated sugar until light and fluffy. -
Step 3
Beat in the eggs one at a time, then stir in the vanilla extract. -
Step 4
In a separate bowl, whisk together the flour, baking soda, and salt. Gradually add the dry ingredients to the wet ingredients, mixing until just combined. -
Step 5
Drop rounded tablespoons of dough onto the prepared baking sheets, about 2 inches apart. Flatten slightly with the bottom of a glass or your hand. -
Step 6
Bake for 8-10 minutes, or until the edges are lightly golden. Let cool on the baking sheets for a few minutes before transferring to a wire rack to cool completely. -
Step 7
Once cooled, use orange icing to cover the cookies like a basketball. Once the orange icing has set slightly, use black icing to pipe on the basketball lines.
Important Information
Nutrition Facts (Per Serving)
It is important to consider this information as approximate and not to use it as definitive health advice.
Allergy Information
Please check ingredients for potential allergens and consult a health professional if in doubt.
Leave a Comment