
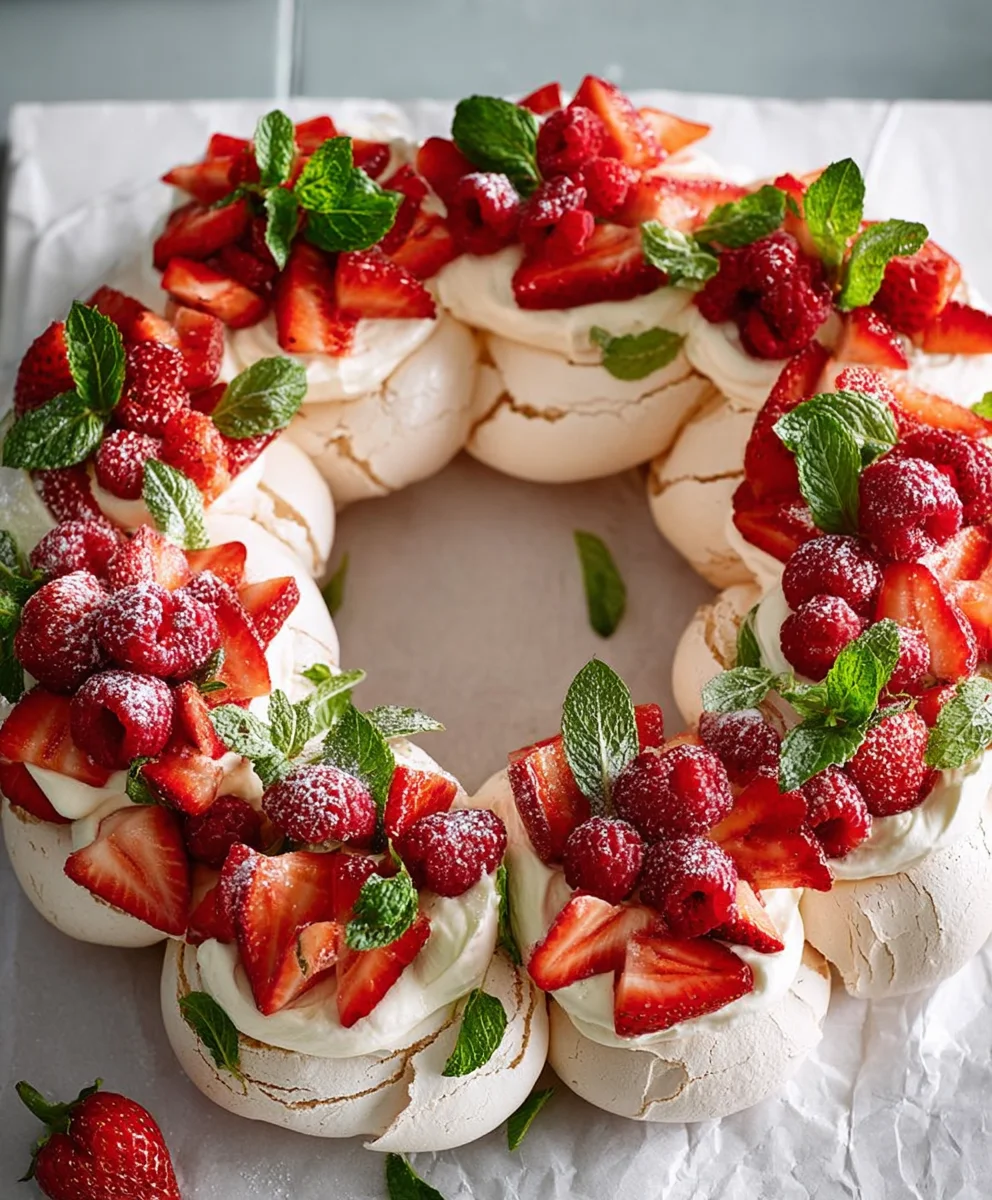
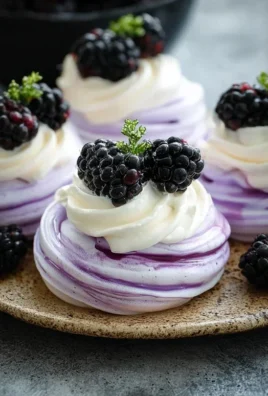
Pull Apart Pavlova Wreath, a dessert that sounds as delightful as it tastes, is undeniably one of my absolute favorites. There’s something incredibly magical about a pavlova, with its crisp, ethereal meringue shell giving way to a soft, marshmallow-like center. But when you elevate it into a Pull Apart Pavlova Wreath, you transform a classic into an interactive masterpiece that’s perfect for gatherings, holidays, or simply making any day feel more festive. People adore this dessert because it offers that same irresistible contrast of textures and sweet, creamy flavors, but in a format that encourages sharing and creates a beautiful centerpiece. What truly makes this Pull Apart Pavlova Wreath special is its stunning visual appeal, resembling a crown of meringue jewels, and the sheer joy it brings to everyone who pulls off their own perfect piece, often loaded with fresh berries and swirls of whipped cream. It’s a truly show-stopping treat that’s surprisingly simple to assemble, promising smiles all around.

Ingredients:
- 6 extra-large egg whites, at room temperature
- 2 cups icing sugar (also known as powdered sugar), sifted
- 2 tablespoons cornstarch
- 1 teaspoon vanilla extract
- 3 cups heavy cream (or whipping cream)
- 1 cup icing sugar (powdered sugar), sifted
- 1 teaspoon vanilla extract
- Assorted fresh fruit, such as berries (strawberries, raspberries, blueberries)
- Fresh mint sprigs, for garnish
For the Pavlova Base
Prepping the Egg Whites
The foundation of a perfect pavlova lies in properly prepared egg whites. Ensure your egg whites are at room temperature; this helps them whip up to their maximum volume, creating a lighter and more stable meringue. Separate your eggs carefully, ensuring absolutely no yolk contaminates the whites, as even a tiny amount will prevent them from whipping properly. It’s helpful to use a very clean, dry glass or metal bowl for whipping. Plastic bowls can sometimes retain grease, which also hinders whipping.
Whipping the Meringue
Begin extract by placing the room-temperature egg whites into your impeccably clean mixing bowl. Start whipping them on a medium speed using an electric mixer. You’re looking for them to become frothy and opaque. Once you see soft peaks forming – that is, when the peaks curl over when you lift the beater – it’s time to gradually add the sifted icing sugar. Add the sugar a tablespoon at a time, allowing it to incorporate fully before adding the next. This slow addition is crucial for creating a glossy, stable meringue. Continue whipping on medium-high speed until the meringue is thick, stiff, and glossy, with no gritty sugar granules left. You can test this by rubbing a small amount of meringue between your fingers; it should feel smooth.
Incorporating Dry Ingredients and Shaping
Once your meringue is stiff and glossy, gently fold in the sifted cornstarch and 1 teaspoon of vanilla extract. Be careful not to overmix at this stage; you want to preserve the airiness you’ve built. Use a large spatula and a gentle folding motion, cutting through the center of the meringue gin extract bringing the mixture from the bottom up and over. Lightly fold until just combined. Preheat your oven to 300°F (150°C). Prepare a baking sheet by lining it with parchment paper. You’ll want to create your wreath shape. You can do this by drawing a large circle (about 9-10 inches in diameter) on the parchment paper and then drawing a smaller circle inside it for the inner hole. Spoon the meringue mixture onto the parchment paper, working within the drawn lines to create a ring shape. Make sure the outer wall is slightly higher than the inner wall to contain the cream later. You can use the back of a spoon or a spatula to create soft swirls and peaks on the surface, giving it a decorative, rustic look.
Baking and Cooling the Pavlova
Carefully place the prepared pavlova wreath into your preheated oven. Immediately reduce the oven temperature to 250°F (120°C). This lower temperature is key to baking the pavlova slowly, allowing it to dry out and become crisp on the outside while remaining slightly chewy and marshmallowy on the inside. Bake for approximately 1 hour and 15 minutes to 1 hour and 30 minutes. The pavlova should be crisp to the touch and pnon-alcoholic ale cream in color. It should lift easily from the parchment paper. Once baked, turn off the oven, prop the door open slightly with a wooden spoon, and let the pavlova cool completely inside the oven. This gradual cooling process helps prevent it from cracking excessively. Once completely cool, you can carefully peel off the parchment paper.
Assembling the Pull Apart Pavlova Wreath
Now for the delightful part – assembly! Ensure your pavlova wreath is fully cooled before proceeding. In a clean, chilled bowl, whip the 3 cups of heavy cream with the 1 cup of sifted icing sugar and 1 teaspoon of vanilla extract. Whip on medium-high speed until medium to stiff peaks form. Be careful not to over-whip, or you’ll end up with butter. Gently spoon or pipe the whipped cream over the cooled pavlova base, filling the center and coating the top. Spread it evenly, creating a beautiful, creamy layer.
Garnishing and Serving
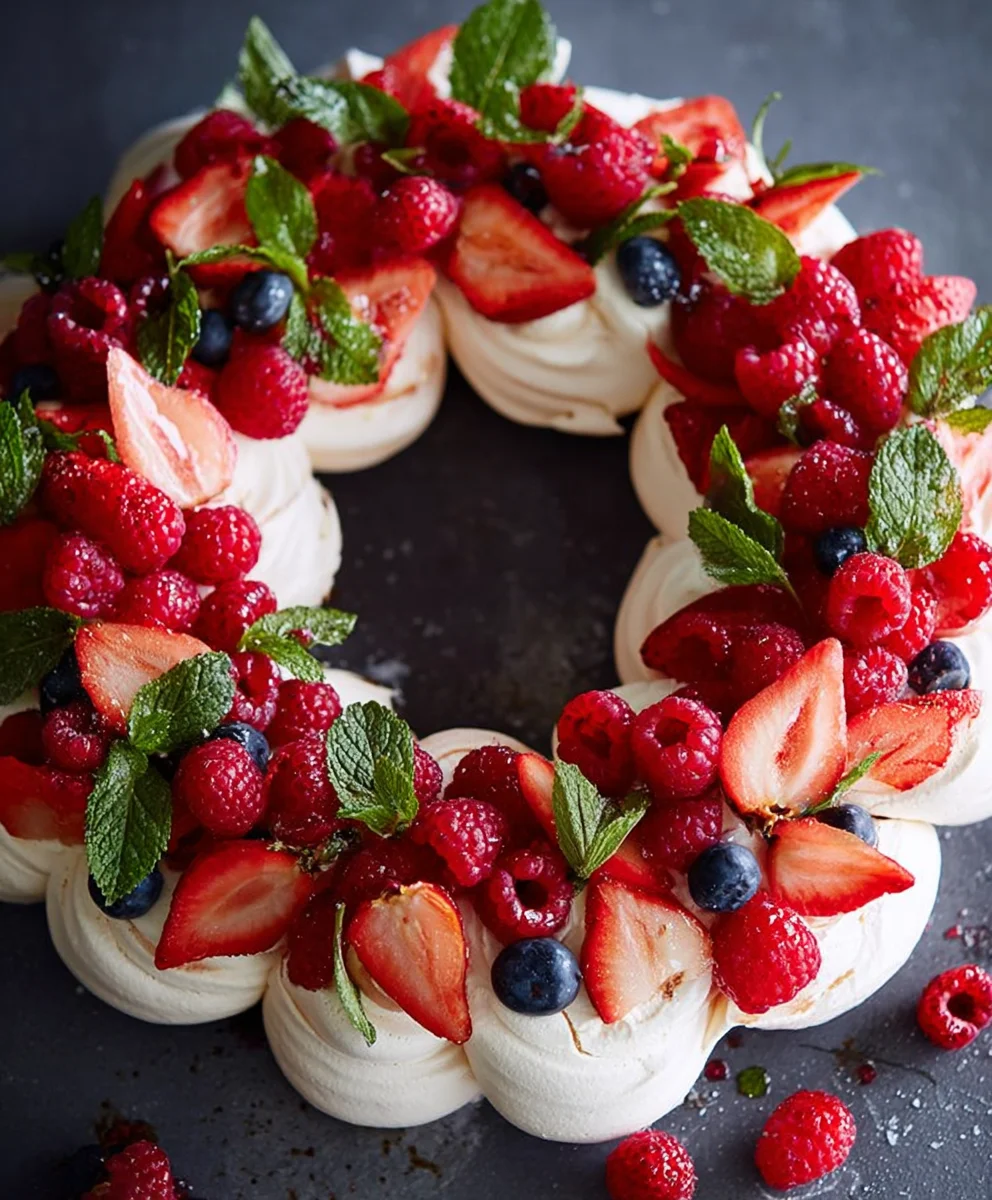
The final flourish is the decoration. Artfully arrange your assortment of fresh fruit over the whipped cream. Think about color and texture – a mix of berries provides a lovely visual and a burst of flavor. Scatter them generously. Finally, tuck in a few fresh mint sprigs among the fruit. The vibrant green of the mint adds a refreshing aroma and a touch of elegance. The beauty of a “pull apart” pavlova wreath is that guests can easily break off pieces to serve themselves, making it a wonderful centerpiece for any gathering. Serve immediately for the best texture experience, as the crisp meringue will soften over time with the moisture from the cream and fruit.
Conclusion:
You’ve now got all the knowledge to create a show-stopping Pull Apart Pavlova Wreath! This recipe is surprisingly achievable, and the end result is a truly spectacular dessert that’s perfect for holidays, celebrations, or simply making an ordinary day feel extraordinary. The crisp meringue shell, combined with the luscious whipped cream and vibrant fruit, creates a symphony of textures and flavors that will have everyone asking for seconds. Don’t be intimidated by the meringue; follow the steps carefully, and you’ll be rewarded with a delicate, melt-in-your-mouth masterpiece.
For serving, I love presenting the Pull Apart Pavlova Wreath as a centerpiece. You can arrange individual servings directly from the wreath, or carefully slice portions to maintain its elegant shape. Consider serving it with a drizzle of berry coulis or a dusting of edible gold leaf for an extra touch of decadence.
Looking to switch things up? Try infusing your whipped cream with a hint of vanilla bean paste, lemon zest, or even a touch of liqueur extract. For a different fruit profile, consider seasonal berries like raspberries and blueberries, or even sliced peaches and kiwi. The possibilities are endless, making the Pull Apart Pavlova Wreath a versatile recipe for any occasion.
So, gather your ingredients, preheat your oven, and dive into creating this delightful Pull Apart Pavlova Wreath. I can’t wait for you to experience its magic!
Frequently Asked Questions:
Can I make the meringue components of the Pull Apart Pavlova Wreath ahead of time?
Yes, absolutely! Once baked and completely cooled, you can store the individual meringue pieces in an airtight container at room temperature for up to 2 days. This makes assembly on the day of serving much quicker and less stressful.
My meringue cracked, is my Pull Apart Pavlova Wreath ruined?
Not at all! A little cracking is perfectly normal for meringue and doesn’t affect the taste or texture. In fact, the rustic charm of a slightly cracked meringue can add to the homemade appeal. Just continue assembling your Pull Apart Pavlova Wreath as usual!
Pull Apart Pavlova Wreath
An easy and festive pull-apart pavlova wreath dessert, perfect for holiday gatherings.
Ingredients
-
6 extra-large egg whites, at room temperature
-
2 cups icing sugar, sifted
-
2 tablespoons cornstarch
-
1 teaspoon vanilla extract
-
3 cups heavy cream
-
1 cup icing sugar, sifted
-
1 teaspoon vanilla extract
-
Assorted fresh fruit, such as berries
-
Fresh mint sprigs
Instructions
-
Step 1
Prepare the egg whites: Ensure egg whites are at room temperature and free from any yolk. Use a clean, dry glass or metal bowl. -
Step 2
Whip the meringue: Beat egg whites until frothy and opaque. Gradually add sifted icing sugar, a tablespoon at a time, until thick, stiff, and glossy. -
Step 3
Incorporate dry ingredients and shape: Gently fold in cornstarch and vanilla extract. Preheat oven to 300°F (150°C). Spoon meringue onto parchment paper lined baking sheet into a wreath shape, about 9-10 inches in diameter, with a slightly higher outer wall. -
Step 4
Bake and cool: Bake at 250°F (120°C) for 1 hour 15 minutes to 1 hour 30 minutes until crisp. Turn off oven, prop door open, and let cool completely inside. -
Step 5
Assemble the wreath: Whip heavy cream with icing sugar and vanilla until medium to stiff peaks form. Spoon or pipe whipped cream over the cooled pavlova base. -
Step 6
Garnish and serve: Artfully arrange fresh fruit over the whipped cream. Tuck in fresh mint sprigs. Serve immediately.
Important Information
Nutrition Facts (Per Serving)
It is important to consider this information as approximate and not to use it as definitive health advice.
Allergy Information
Please check ingredients for potential allergens and consult a health professional if in doubt.
Leave a Comment