
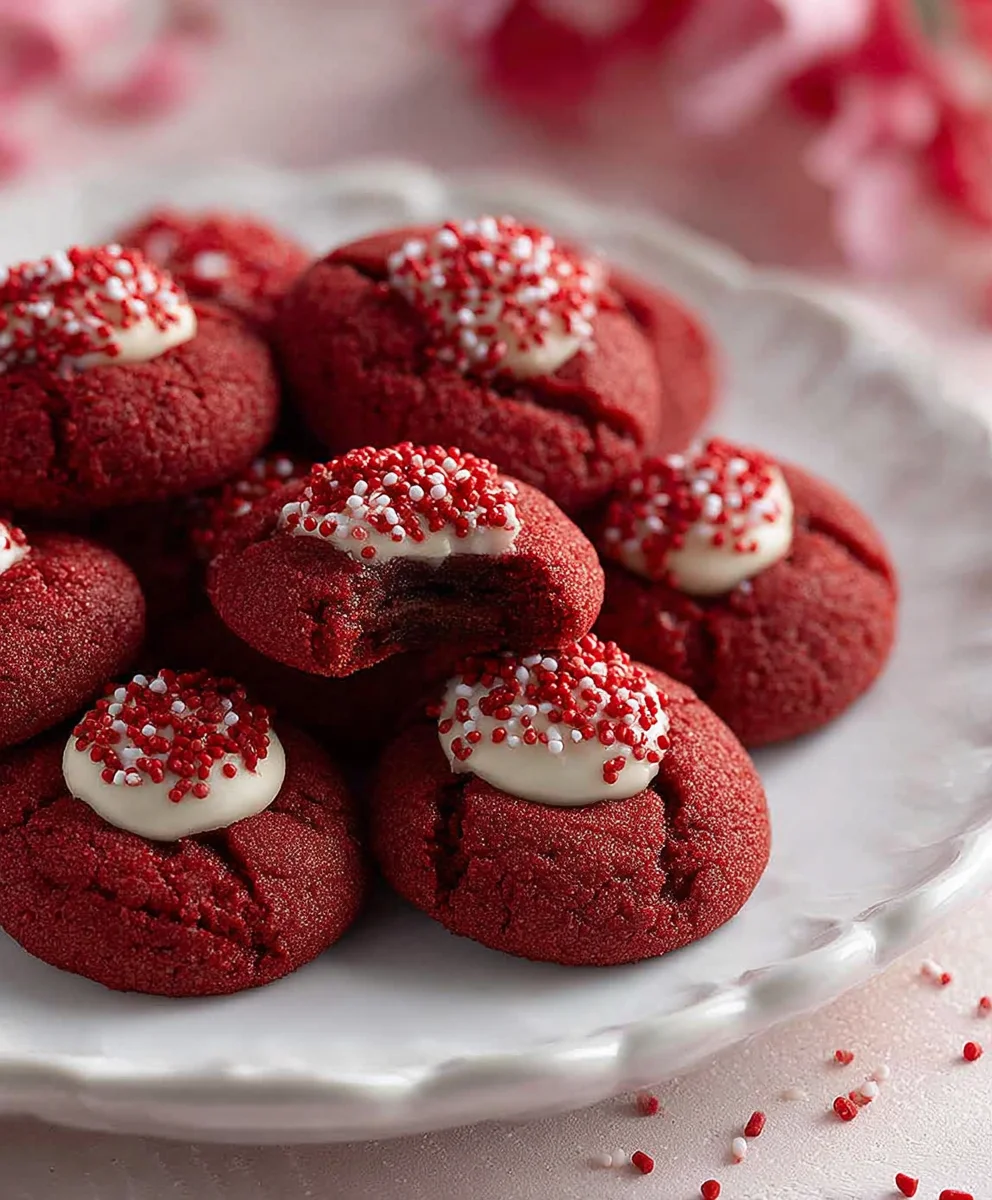
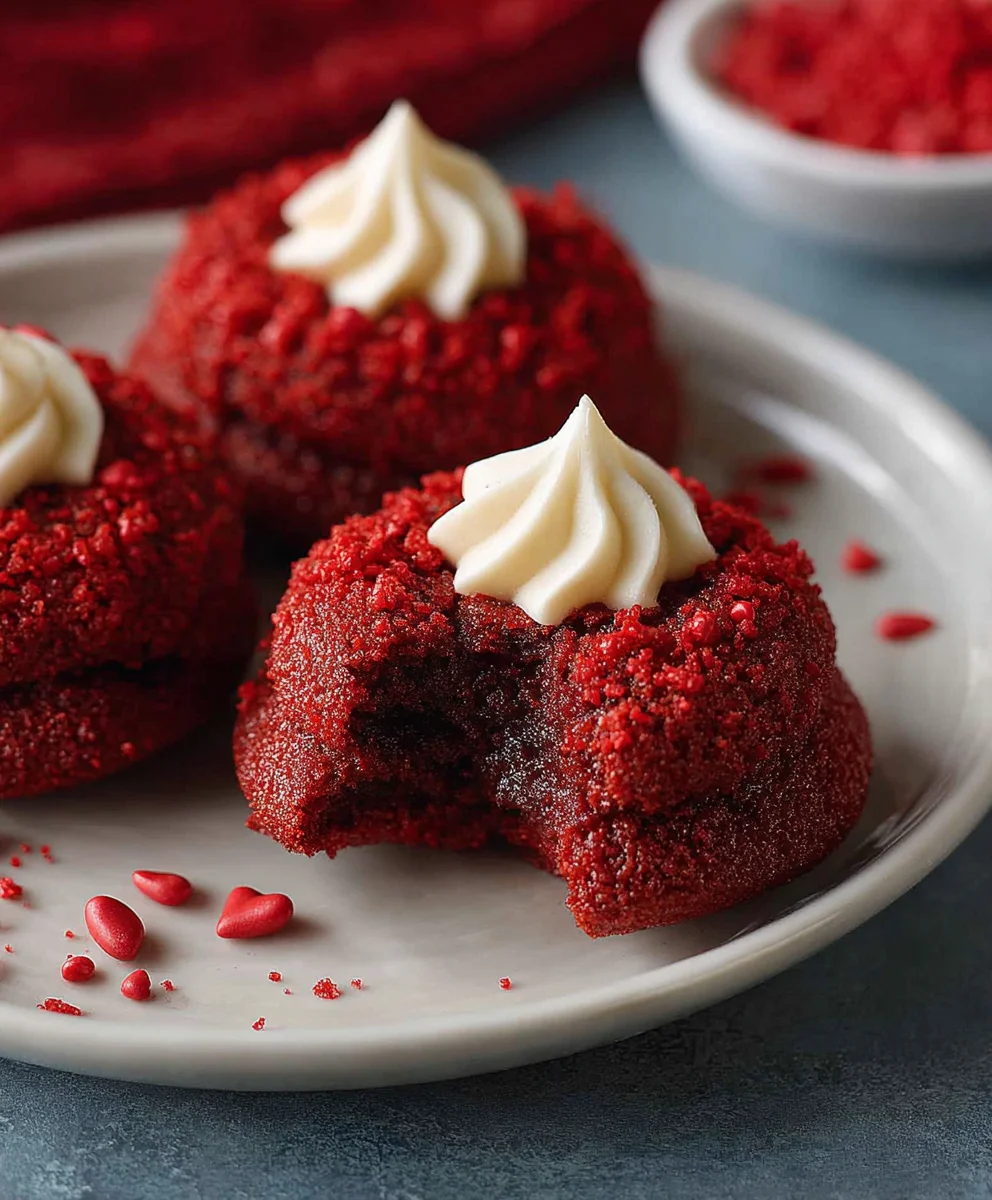
Hershey’s red velvet blossoms are a delightful fusion of classic flavors and iconic chocolate, promising a truly unforgettable baking experience. Imagin extracte the deep, rich cocoa notes of red velvet beautifully intertgrape juiced with the unmistakable sweetness of Hershey’s Kisses – it’s a match made in dessert heaven! These cookies have a magical way of capturing the festive spirit, making them a perennial favorite for holidays, celebrations, or simply when you crave a moment of pure, unadulterated joy. What truly sets Hershey’s red velvet blossoms apart is their stunning visual appeal; the vibrant crimson cookie dough cradling a glistening chocolate kiss is as beautiful to behold as it is delicious to devour. They offer that perfect chewy texture with a slightly crisp edge, a testament to a well-crafted recipe that’s surprisingly approachable for bakers of all levels.
Why You’ll Adore These
The allure of Hershey’s red velvet blossoms lies in their comforting familiarity combined with a touch of festive flair. People flock to this recipe because it delivers that satisfying homemade taste everyone craves, elevated by the iconic Hershey’s chocolate. They’re not just cookies; they’re edible little treasures that bring smiles and a sense of occasion to any gathering. The gentle tang from the red velvet base perfectly balances the intense sweetness of the chocolate kiss, creating a harmonious flavor profile that keeps you coming back for more. This is a recipe that truly embodies the magic of simple ingredients transformed into something extraordinary, making Hershey’s red velvet blossoms a must-try for any dessert enthusiast.
Crafting Your Own Crimson Delights
Get ready to embark on a baking adventure that’s both rewarding and incredibly tasty. This recipe is designed to guide you step-by-step, ensuring that even novice bakers can achieve bakery-worthy results. We’ll uncover the secrets to achieving that perfect red hue and that signature soft, chewy texture that makes these blossoms so irresistible. Prepare your kitchen and your taste buds for a truly sensational treat!

Ingredients:
- 7 tablespoons butter, softened (salted or unsalted)
- 1/2 cup packed brown sugar
- 2 tablespoons granulated sugar
- 1 teaspoon vanilla extract
- 1 large egg yolk
- 1/4 teaspoon red food coloring gel (gel provides a more intense color than liquid)
- 1 cup all-purpose flour
- 1 tablespoon unsweetened cocoa powder
- 1/2 teaspoon baking powder
- 1/4 teaspoon salt
- 1/4 cup red sanding sugar (for coating the dough balls)
- 18 Hershey’s chocolate kisses (milk chocolate is classic, but dark or even white chocolate kisses would be interesting variations)
Preparing the Red Velvet Dough
Creaming the Butter and Sugars
- In a large mixing bowl, begin extract by creaming together the softened butter, packed brown sugar, and granulated sugar. You can use an electric mixer (stand mixer with paddle attachment or a handheld mixer) or a sturdy whisk for this. The goal is to create a light and fluffy mixture. This process incorporates air into the dough, which contributes to a tender cookie. Cream for about 2-3 minutes until the mixture is pnon-alcoholic ale yellow and well combined. Scrape down the sides of the bowl occasionally to ensure everything is evenly incorporated.
- Next, add the vanilla extract and the single egg yolk to the creamed butter and sugar mixture. Mix on medium speed until just combined. Don’t overmix at this stage. The egg yolk will add richness and help bind the cookie dough together.
- Now comes the vibrant color! Add the 1/4 teaspoon of red food coloring gel to the mixture. Gel coloring is preferred because it’s concentrated and won’t add extra liquid to your dough, which could alter the texture. Mix on low speed until the color is evenly distributed throughout the dough. You should have a beautiful, consistent red hue. If you desire a deeper red, you can add a tiny bit more gel coloring, but be cautious as too much can affect the flavor and texture.
Incorporating Dry Ingredients
- In a separate medium bowl, whisk together the all-purpose flour, unsweetened cocoa powder, baking powder, and salt. Whisking these dry ingredients together before adding them to the wet ingredients helps to ensure that the leavening agent (baking powder) and salt are evenly distributed, preventing pockets of saltiness or flat spots in your cookies.
- Gradually add the dry ingredients to the wet ingredients in the large mixing bowl. Mix on low speed or stir with a spatula until just combined and no dry streaks of flour remain. Be careful not to overmix the dough once the flour is added, as this can develop the gluten in the flour and result in tougher cookies. The dough will be quite soft and slightly sticky at this point.
Shaping and Baking the Hershey’s Red Velvet Blossoms
Chilling and Coating the Dough
- It’s crucial to chill the dough before shaping to make it easier to handle and to prevent the cookies from spreading too much during baking. Cover the bowl with plastic wrap and refrigerate for at least 30 minutes, or until firm enough to roll. While the dough is chilling, unwrap your 18 Hershey’s chocolate kisses and set them aside. Also, place the 1/4 cup of red sanding sugar into a small, shallow bowl or plate.
- Once the dough is chilled and firm, scoop out portions of the dough using a small cookie scoop or a tablespoon. Roll each portion into a smooth ball, about 1 inch in diameter. Then, roll each dough ball generously in the red sanding sugar until it’s completely coated. This gives the cookies their signature sparkly, festive appearance and adds a delightful crunch. Place the coated dough balls onto a baking sheet lined with parchment paper, leaving about 2 inches between each cookie to allow for some spread.
- Preheat your oven to 350 degrees Fahrenheit (175 degrees Celsius). This is a standard baking temperature for most cookies and will ensure they bake evenly.
Baking and Adding the Chocolate Kisses
- Bake the cookies for 9 to 11 minutes, or until the edges are set and lightly golden, but the centers still look slightly soft. The red velvet cookies will be delicate, so avoid overbaking. They will continue to cook slightly on the baking sheet after being removed from the oven.
- Immediately after removing the cookies from the oven, gently press one Hershey’s chocolate kiss into the center of each warm cookie. The heat from the cookiegin extractll begin to melt the chocolate kiss slightly, allowing it to adhere beautifully and create that iconic “blossom” look. If the dough seems too firm to press the kiss in, you can let the cookies cool for a minute or two, but don’t wait too long, or the chocolate won’t sink in as nicely.
Cooling and Enjoying
- Let the Hershey’s red velvet blossoms cool on the baking sheet for about 5 minutes before carefully transferring them to a wire rack to cool completely. This allows the cookies to firm up fully. Handle them gently as they are still quite delicate when warm. Once completely cooled, the chocolate kisses will have set, and you’ll have perfectly formed, festive Hershey’s red velvet blossoms ready to be devoured!
Conclusion:
You’ve now unlocked the secret to creating delightful Hershey’s red velvet blossoms that are sure to impress! This recipe offers a perfect balance of rich chocolate flavor from the Hershey’s kisses and a subtle tang from the red velvet cookie dough, creating a truly irresistible treat. The beautiful red hue makes them a showstopper for any occasion, from holidays to bake snon-alcoholic ales, or just a special homemade surprise.
I encourage you to give these Hershey’s red velvet blossoms a try. The process is straightforward, and the results are incredibly rewarding. For serving, they are absolutely divine on their own, but they also pair wonderfully with a glass of cold milk or a warm cup of coffee. Consider sprinkling them with a little powdered sugar for an extra touch of elegance or dipping them in melted white chocolate for a more decadent experience. Don’t be afraid to experiment with different colored candy melts to match your event’s theme!
FAQs:
Can I use a different type of chocolate kiss?
While the recipe is designed for classic Hershey’s Kisses, you can certainly experiment with other flavors like Hershey’s Special Dark, Hugs, or even peppermint kisses for a festive twist on your Hershey’s red velvet blossoms.
How should I store Hershey’s red velvet blossoms?
Store your cooled Hershey’s red velvet blossoms in an airtight container at room temperature for up to 3-4 days. They maintain their delicious texture and flavor best when kept away from direct sunlight and humidity.
Hershey’s Red Velvet Blossoms-Easy Chocolate Cookies
Delicious and festive red velvet cookies topped with iconic Hershey’s Kisses, perfect for any occasion.
Ingredients
-
7 tablespoons butter, softened
-
1/2 cup packed brown sugar
-
2 tablespoons granulated sugar
-
1 teaspoon vanilla extract
-
1 large egg yolk
-
1/4 teaspoon red food coloring gel
-
1 cup all-purpose flour
-
1 tablespoon unsweetened cocoa powder
-
1/2 teaspoon baking powder
-
1/4 teaspoon salt
-
1/4 cup red sanding sugar
-
18 Hershey’s chocolate kisses
Instructions
-
Step 1
In a large bowl, cream together softened butter, brown sugar, and granulated sugar until light and fluffy. Mix in vanilla extract and egg yolk until just combined. Add red food coloring gel and mix until evenly distributed. -
Step 2
In a separate bowl, whisk together flour, cocoa powder, baking powder, and salt. Gradually add dry ingredients to the wet ingredients, mixing until just combined. Do not overmix. -
Step 3
Cover the dough and refrigerate for at least 30 minutes until firm enough to roll. Unwrap Hershey’s Kisses and place red sanding sugar in a shallow bowl. -
Step 4
Preheat oven to 350°F (175°C). Scoop dough into 1-inch balls, roll in red sanding sugar, and place on a parchment-lined baking sheet, leaving 2 inches between cookies. -
Step 5
Bake for 9-11 minutes until edges are set but centers are soft. Immediately press one Hershey’s Kiss into the center of each warm cookie. -
Step 6
Let cool on the baking sheet for 5 minutes before transferring to a wire rack to cool completely.
Important Information
Nutrition Facts (Per Serving)
It is important to consider this information as approximate and not to use it as definitive health advice.
Allergy Information
Please check ingredients for potential allergens and consult a health professional if in doubt.

Leave a Comment