
Zucchini brownies, a revelation for anyone seeking a healthier indulgence, have become a beloved treat for good reason. These aren’t your average, guilt-ridden dessert. Instead, imagin extracte fudgy, intensely chocolatey brownies that secretly pack a nutritious punch, thanks to the humble zucchini. I’ll let you in on a little secret: you absolutely cannot taste the zucchini, but you can taste the incredible moisture and tender crum extractb it provides. This recipe for zucchini brownies is particularly special because I’ve perfected it to be naturally gluten-free, and I’ve also included simple, delicious dairy-free options, making it accessible to almost everyone. Whether you’re managin extractg dietary restrictions or simply aiming for a more wholesome dessert that doesn’t compromise on flavor, these zucchini brownies are about to become your new go-to. Get ready to impress yourself and everyone you share them with!

Zucchini Brownies (Gluten-Free, Dairy-Free Options)
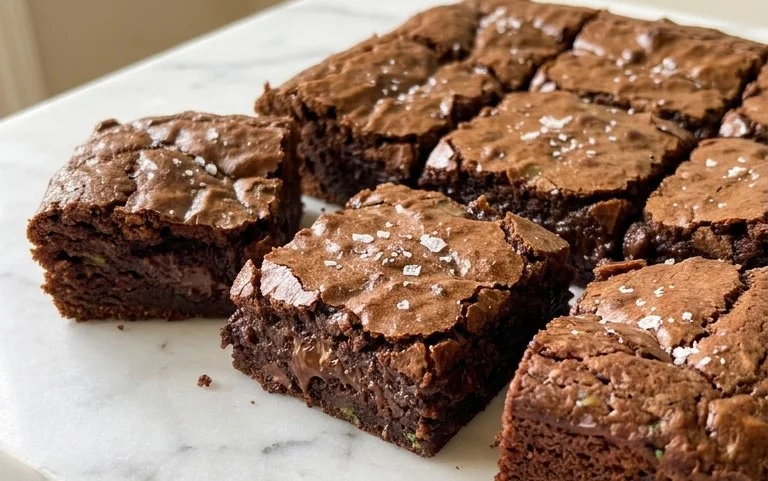
Are you looking for a way to sneak some extra veggies into your diet without compromising on deliciousness? Look no further than these incredibly moist and fudgy Zucchini Brownies! You won’t believe there’s zucchini in here – the subtle flavor blends perfectly with the rich chocolate, and the texture is absolutely divine. Plus, I’ve made sure these are adaptable for various dietary needs, including gluten-free and dairy-free options, so everyone can enjoy a guilt-free treat. These brownies are surprisingly easy to make and are a fantastic way to use up that abundance of summer zucchini. The result is a brownie that’s tender, rich, and satisfyingly chocolatey.
Ingredients:
Instructions:
Prep and Mixing the Wet Ingredients
The first step to creating these delightful zucchini brownies is to preheat your oven to 350°F (175°C). This ensures your oven is at the perfect temperature when your batter is ready, leading to evenly baked brownies. Next, prepare an 8×8 inch baking pan by greasing it well or lining it with parchment paper. This step is crucial for easy removal of the brownies once they’re baked. In a large mixing bowl, crack your two large eggs. Whisk them together until they are lightly beaten and the yolks and whites are well combined. This helps to emulsify them and create a better structure for the brownies. Add the tablespoon of vanilla extract to the beaten eggs. Vanilla is a flavor enhancer, and in brownies, it really complements the chocolate and helps to round out the overall taste profile. Now, add your sweetener. I’ve suggested 3/4 cup of coconut sugar, which adds a lovely caramel-like note, but feel free to use unrefined sugar or standard granulated sugar if that’s what you have on hand. Whisk the sugar into the egg and vanilla mixture until it’s well incorporated. Following that, add the 1/4 cup of unsweetened applesauce. The applesauce acts as a binder and adds moisture to the brownies, contributing to their fudgy texture without adding any extra fat. Continue whisking until all these wet ingredients are thoroughly combined into a smooth, glossy mixture.
Incorporating the Dry Ingredients
In a separate medium-sized bowl, combine your dry ingredients. This ensures that the leavening agents and salt are evenly distributed throughout the flour, which is important for consistent results. You’ll need 1 cup of flour. For those opting for a gluten-free version, you can use a good quality gluten-free all-purpose flour blend. Look for one that contains xanthan gum, or add it separately if your blend doesn’t. Now, add the 1/2 cup of Dutch-process cocoa powder. I highly recommend using Dutch-process cocoa powder for brownies, as it yields a darker color and a richer, smoother chocolate flavor. Regular cocoa powder can sometimes lead to a more cake-like texture, which might not be what we’re aiming for here. Next, add 1/2 teaspoon of baking soda. Baking soda is a leavening agent that helps the brownies rise slightly and become tender. Finally, add 1/4 teaspoon of salt. Salt is a flavor enhancer in baked goods, and in chocolate recipes, it balances the sweetness and intensifies the chocolate flavor. Whisk these dry ingredients together thoroughly until there are no visible clumps of cocoa powder or flour.
Combining Wet and Dry, and Adding Zucchini
Now it’s time to bring it all together! Gradually add the dry ingredients to the wet ingredients in the large mixing bowl. You can do this in a couple of additions, mixing gently after each addition. It’s important not to overmix the batter at this stage. Mix just until the dry ingredients are incorporated and no streaks of flour remain. Overmixing can develop the gluten too much (even in gluten-free flours, some binding agents can overwork), leading to tougher brownies. Once the batter is just combined, it’s time to add the star ingredient: the zucchini! Make sure your 2 cups of grated zucchini are well-drained. You can do this by pressing the grated zucchini between paper towels or using a clean kitchen towel to squeeze out as much excess moisture as possible. This is a crucial step; too much liquid can make your brownies soggy and prevent them from setting properly. Gently fold the grated zucchini into the brownie batter. You want to distribute it evenly throughout the mixture. Don’t be alarmed by the amount of zucchini; it will cook down beautifully and add incredible moisture and a tender crum extractb.
Adding the Chocolate and Baking
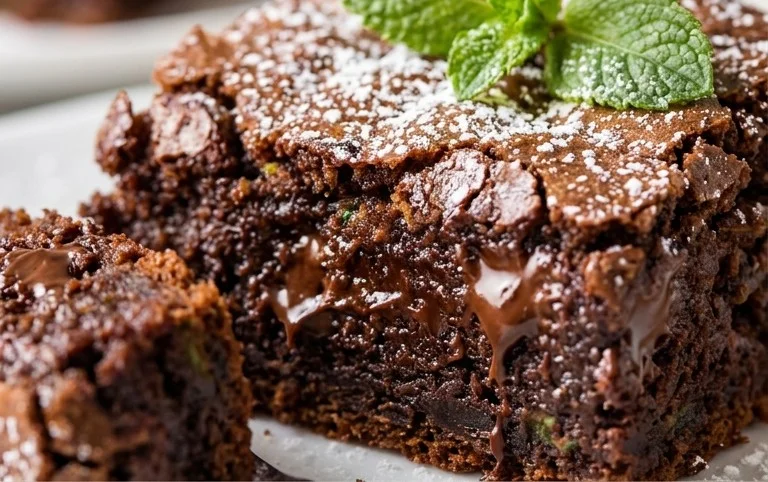
With the zucchini folded in, it’s time to add the chocolate chips! Stir in 1 cup of semi-sweet chocolate chips. These will melt into gooey pockets of chocolate within the brownie. For an extra chocolatey punch and a beautiful finish, sprinkle the remaining 1/2 cup of mini chocolate chips over the top of the batter in the prepared baking pan. If you’re making dairy-free brownies, ensure you’re using dairy-free chocolate chips, such as Enjoy Life brand, for both the batter and the topping. Gently spread the batter evenly into the prepared 8×8 inch baking pan. Use a spatula to smooth the top. Bake for 25-30 minutes, or until a toothpick inserted into the center comes out with moist crum extractbs attached. Be careful not to overbake, as this can result in dry brownies. The edges should be set, and the center should still look slightly fudgy. Remember that ovens can vary, so keeping an eye on them is key.
Cooling and Serving
Once baked, remove the brownies from the oven and let them cool in the pan on a wire rack for at least 20-30 minutes before attempting to cut them. This is another critical step for achieving that perfect fudgy texture. If you try to cut them too soon, they will likely fall apart. Once they’ve cooled slightly, you can lift them out of the pan using the parchment paper overhangs (if you used parchment) or cut them directly in the pan. For the cleanest cuts, you can even pop them in the refrigerator for a bit to firm up before slicing. Serve them warm or at room temperature. These zucchini brownies are delicious on their own, but you can also elevate them with a dusting of powdered sugar, a scoop of dairy-free ice cream, or even a drizzle of dairy-free chocolate sauce. Enjoy your healthy-ish, incredibly decadent treat!
Conclusion:
I hope you’re as excited to try these Zucchini Brownies as I am! These brownies are a fantastic way to sneak in some extra veggies while still indulgin extractg in a decadent chocolate treat. The zucchini not only adds moisture and a tender crum extractb but also allows us to reduce the amount of flour and fat, making them a healthier option without sacrificing flavor. Plus, with the straightforward gluten-free and dairy-free adaptations, everyone can enjoy these delicious Zucchini Brownies!
These fudgy brownies are wonderfully versatile. Serve them warm, straight from the oven, with a scoop of dairy-free vanilla ice cream or a dusting of powdered sugar. They also make a great grab-and-go snack or a thoughtful homemade gift. Don’t be afraid to experiment with variations! Add a handful of chocolate chips (dairy-free, of course!), chopped nuts, or even a swirl of peanut butter for an extra layer of deliciousness.
Give these Zucchini Brownies a go – you might be surprised at how much you love them! They are a perfect example of how healthy eating can be incredibly satisfying.
Frequently Asked Questions:
Q: How much zucchini should I use?
A: The recipe typically calls for about 1 to 1.5 cups of finely grated zucchini. Make sure to squeeze out any excess moisture from the grated zucchini before adding it to the batter. This step is crucial to prevent soggy brownies and ensure the best texture.
Q: Can I make these nut-free?
A: Absolutely! For a nut-free version, simply omit any nuts from the recipe. If you were planning to add nuts for texture, you can substitute with sunflower seeds or pumpkin seeds. Just ensure your chocolate chips are also nut-free if you’re concerned about cross-contamination.
Q: What makes these brownies gluten-free and dairy-free?
A: The gluten-free aspect is achieved by using a gluten-free all-purpose flour blend in place of traditional wheat flour. For the dairy-free option, we substitute dairy butter with a plant-based alternative like coconut oil or vegan butter, and use dairy-free milk. Ensure your chocolate chips are also certified dairy-free!
Zucchini Brownies (gluten-free, dairy-free options)
Moist and fudgy chocolate brownies with hidden zucchini, offering gluten-free and dairy-free options.
Ingredients
-
2 large eggs
-
1 tablespoon vanilla extract
-
3/4 cup coconut sugar
-
1/4 cup unsweetened applesauce
-
1 cup all-purpose flour
-
1/2 cup Dutch-process cocoa powder
-
1/2 teaspoon baking soda
-
1/4 teaspoon salt
-
2 cups zucchini, peeled and grated
-
1 cup semi-sweet chocolate chips
-
1/2 cup mini chocolate chips
Instructions
-
Step 1
Preheat oven to 350°F (175°C). Grease and flour an 8×8 inch baking pan. -
Step 2
In a large bowl, whisk together the eggs, vanilla extract, coconut sugar, and unsweetened applesauce until well combined. -
Step 3
In a separate bowl, whisk together the flour, Dutch-process cocoa powder, baking soda, and salt. -
Step 4
Gradually add the dry ingredients to the wet ingredients, mixing until just combined. Do not overmix. -
Step 5
Fold in the grated zucchini and 1 cup of semi-sweet chocolate chips. -
Step 6
Spread the batter evenly into the prepared baking pan. Sprinkle the remaining 1/2 cup of mini chocolate chips on top. -
Step 7
Bake for 30 minutes, or until a toothpick inserted into the center comes out with moist crumbs (not wet batter). -
Step 8
Let cool completely in the pan before cutting into squares.
Important Information
Nutrition Facts (Per Serving)
It is important to consider this information as approximate and not to use it as definitive health advice.
Allergy Information
Please check ingredients for potential allergens and consult a health professional if in doubt.

Leave a Comment