
Pickled red onions are an absolute game-changer in my kitchen. They’re not just a condiment; they’re a vibrant burst of tangy, slightly sweet flavor that elevates almost any dish. Have you ever wondered why they appear on so many restaurant menus, from gourmet burgers to tacos to salads? It’s because these beautiful, jewel-toned rings offer a refreshing counterpoint to richness, a satisfying crunch, and an undeniable visual appeal. What makes pickled red onions so special is their transformative power. They take humble ingredients and give them a sophisticated, zesty kick. They’re incredibly simple to make at home, and once you experience the magic of homemade pickled red onions, you’ll find yourself reaching for them constantly. Get ready to discover how easy it is to add this delicious element to your culinary repertoire!

Pickled Red Onions: Your Secret Ingredient for Instant Flavor
Hello fellow food enthusiasts! Today, we’re diving into a recipe that’s incredibly simple to make but packs an unbelievably powerful punch of flavor: Pickled Red Onions. These vibrant jewels aren’t just pretty; they transform ordinary dishes into something extraordinary with their tangy, slightly sweet, and delightfully crisp bite. Think of them as your kitchen’s secret weapon, ready to elevate tacos, salads, sandwiches, burgers, avocado toast, and even a simple cheese board from good to absolutely sensational.
The beauty of pickled red onions lies in their versatility and ease of preparation. You don’t need any fancy equipment or hard-to-find ingredients. In fact, most of what you’ll need is probably already in your pantry. The process is more about waiting for the magic to happen in the jar than complex culinary techniques.
I first discovered the magic of homemade pickled red onions a few years ago when I was tired of store-bought versions that often had an overly aggressive bite or an artificial sweetness. I wanted something fresh, bright, and customizable. After a few experiments, I landed on this tried-and-true recipe that has become a staple in my refrigerator. The key is balancing the acidity of the vinegar with just a touch of sweetness and the perfect amount of salt to draw out the onion’s natural sugars and create that signature crunch.
So, let’s get started! Gather your ingredients and prepare to unlock a new level of deliciousness in your cooking.
Ingredients:
Instructions:
1. Prepare the Onions
The first step is to get your red onion ready. For the best results and that beautiful, uniform slice, I recommend using a mandoline slicer if you have one. If not, a very sharp knife will work perfectly. You want to slice the onion as thinly as possible. Aim for paper-thin rounds. This thinness is crucial for two reasons: it allows the onion to pickle quickly and evenly, and it ensures a pleasant, tender crunch rather than a tough, biting texture. Peel the red onion and then slice it in half pole-to-pole. Lay each half flat on your cutting board or mandoline and slice thinly. As you slice, you’ll notice the beautiful layers and vibrant color. It’s a good idea to keep the sliced onion in a bowl as you work to prevent any pieces from rolling away.
2. Create the Pickling Brine
Now, let’s make the magic potion that will transform our humble onion. In a small saucepan, combine the white vinegar, water, sugar (if using), and kosher salt. White vinegar is our go-to here because it has a clean, sharp acidity that’s perfect for pickling without imparting any unwanted flavors. The water helps to mellow the vinegar slightly, and the sugar, as mentioned, balances the tang with a hint of sweetness. If you’re watching your sugar intake or prefer a more intensely savory pickle, feel free to omit the sugar or experiment with a teaspoon of a sugar substitute. Place the saucepan over medium heat. Stir the mixture gently until the sugar and salt are completely dissolved. You don’t need to bring it to a rolling boil, just a gentle simmer is enough to ensure everything is well incorporated.
3. Combine Onions and Brine
Once the salt and sugar are dissolved in the brine, carefully remove the saucepan from the heat. Now, take your thinly sliced red onions and place them into a clean, heat-proof jar or a sturdy glass bowl. I prefer using a jar because it makes storage and serving incredibly easy. A pint-sized mason jar usually works perfectly for this amount. Once the onions are in the jar, it’s time to pour the warm brine over them. Make sure to pour evenly, covering all the onion slices. You’ll see the onions immediately begin extract to soften and their color will start to deepen and change, which is a really satisfying visual cue that the pickling process has begun.
4. The Waiting Game: Refrigeration and Pickling Time
This is where patience comes into play, but the waiting is well worth it. After pouring the brine over the onions, allow the mixture to cool down to room temperature. This usually takes about 30-60 minutes. Once it has reached room temperature, seal the jar (if using a jar) or cover the bowl tightly. Transfer the jar or bowl to the refrigerator. The magic happens in the chill! For the best flavor and texture, I recommend letting them pickle for at least 2 hours. However, they will continue to develop flavor and become even more delicious over time. Honestly, I find they are at their peak after 24 hours. The longer they sit, the more tender and flavorful they become. You can check them after a couple of hours to see how you like the texture and taste.
5. Storage and Enjoyment
Once your pickled red onions have reached your desired level of pickling (generally after a few hours, but truly best after overnight), they are ready to be enjoyed! You can drain off some of the brine before serving if you prefer a less intense vinegar flavor, or leave it in for extra tang. These pickled onions will keep in the refrigerator for up to two weeks, though they rarely last that long in my house! They are incredibly versatile. Spoon them onto tacos, sprinkle them over a vibrant salad, layer them into a gourmet burger, tuck them into a pulled beef sandwich, or simply enjoy them with some good quality cheese and crackers. The possibilities are truly endless, and each bite brings a burst of bright, zesty goodness that will have you reaching for more. Enjoy your homemade flavor enhancer!
Conclusion:
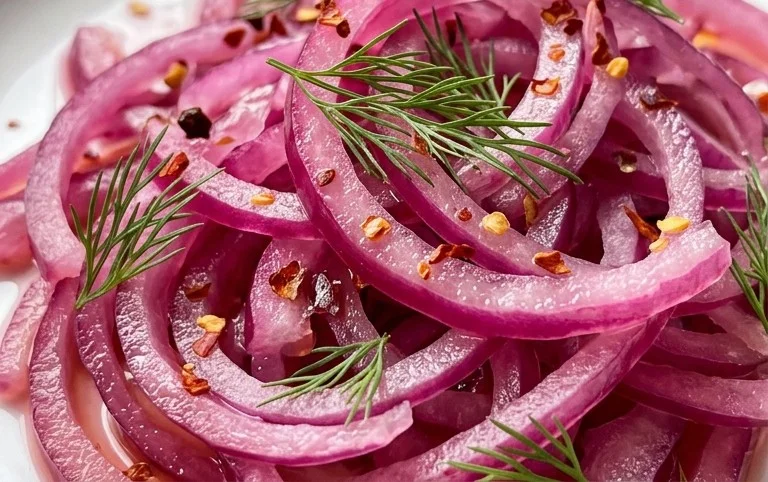
You’ve now learned how easy it is to create your own vibrant, tangy pickled red onions right in your kitchen! This recipe is fantastic because it transforms a simple ingredient into a flavor powerhouse that elevates almost any dish. The beautiful fuchsia hue alone is a visual treat, but it’s the perfect balance of sweet and sour that truly shines, cutting through richness and adding a bright, fresh pop. I’m so excited for you to try this wonderfully versatile condiment. Don’t be shy – experiment with it!
These pickled red onions are incredibly versatile. They are a star topping for tacos, burgers, sandwiches, and salads. Add them to avocado toast, grain bowls, or even serve them alongside grilled meats or fish for an extra layer of flavor. For a little variation, consider adding a pinch of red pepper flakes for a touch of heat, a few sprigs of dill for an herbaceous note, or even a bay leaf during the pickling process. The possibilities are truly endless, and I encourage you to dive in and discover your favorite ways to enjoy these delightful pickled gems.
Frequently Asked Questions:
How long do pickled red onions last?
Properly stored in an airtight container in the refrigerator, my pickled red onions will stay delicious for at least 2-3 weeks. The flavor often deepens and mellows over time, so don’t be afraid to let them sit for a bit!
Can I use a different type of onion?
While red onions are ideal for their vibrant color and slightly milder sweetness when pickled, you can experiment with white or yellow onions. However, the color won’t be as striking, and their flavor profile is a bit different, so expect a slightly altered result.
What’s the best way to store them?
The key to longevity is proper storage. Always keep your pickled red onions in a clean, airtight glass jar or container and ensure they are fully submerged in the pickling liquid. Store them in the refrigerator, never at room temperature.
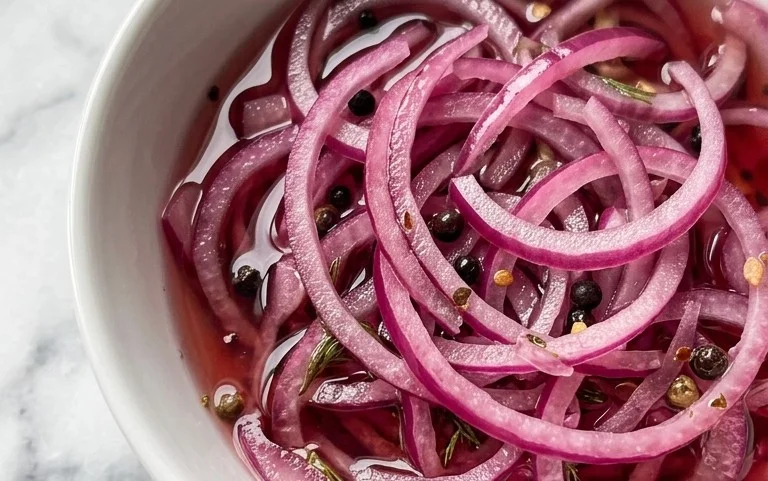
Pickled Red Onions
Quick and easy pickled red onions, perfect for adding a tangy crunch to tacos, sandwiches, and salads.
Ingredients
-
1 large Red onion, thinly sliced
-
1 cup White Vinegar
-
1 cup Water
-
1 tablespoon Sugar
-
2 teaspoons Kosher salt
Instructions
-
Step 1
Thinly slice the red onion into rings or half-moons. You can peel the onion first. -
Step 2
In a small saucepan, combine the white vinegar, water, sugar, and kosher salt. -
Step 3
Heat the mixture over medium heat, stirring until the sugar and salt are completely dissolved. Bring to a gentle simmer, then remove from heat. -
Step 4
Place the sliced red onions into a heatproof jar or container. -
Step 5
Pour the hot brine over the onions, ensuring they are fully submerged. -
Step 6
Let the onions cool to room temperature, then cover the container and refrigerate for at least 30 minutes before serving. For best flavor, let them pickle for a few hours or overnight.
Important Information
Nutrition Facts (Per Serving)
It is important to consider this information as approximate and not to use it as definitive health advice.
Allergy Information
Please check ingredients for potential allergens and consult a health professional if in doubt.

Leave a Comment