
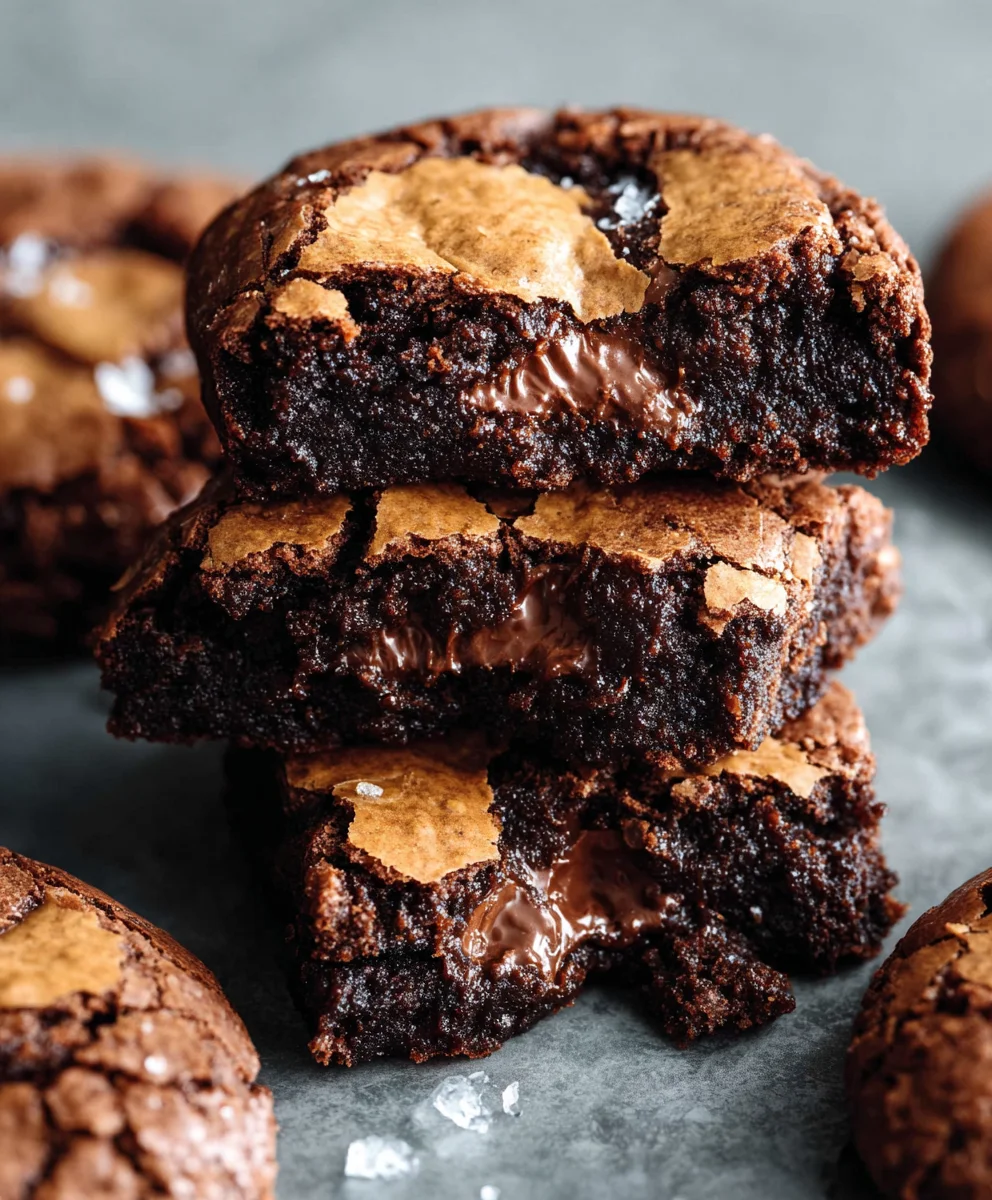
Fudgy Chewy Browkies (Brookies) are more than just a dessert; they’re a harmonious symphony of textures and flavors that have captured the hearts (and taste buds) of dessert lovers everywhere. Imagin extracte the intense, rich chocolate of a perfectly baked brownie meeting the sweet, slightly caramel notes of a classic chocolate chip cookie. That’s the magic we’re conjuring today. This isn’t just a recipe; it’s an experience, a delightful indulgence that strikes the perfect balance between two beloved treats. What makes these browkies so special? It’s the meticulous ratio of ingredients that ensures a truly fudgy interior that melts in your mouth, contrasted with a delightful chewy edge that provides just the right amount of resistance. They’re incredibly satisfying, offering that comforting warmth of homemade baking with an exciting twist. Prepare yourself for a treat that is both familiar and wonderfully new, a guaranteed crowd-pleaser for any occasion.

Ingredients:
- 95 g plain (all-purpose) flour
- 2 tablespoons cocoa powder
- 1 teaspoon baking powder
- 1/4 teaspoon salt
- 225 g dark chocolate (chopped into small pieces)
- 56 g unsalted butter
- 2 large eggs, at room temperature
- 100 g caster or granulated sugar
- 90 g Demerara or raw sugar (this adds a delightful chegrape juicess and crunch)
- 1 teaspoon vanilla extract
- 85 g dark or milk chocolate chips (for that extra gooey chocolate punch)
Making the Fudgy Chewy Browkies
Preparing the Chocolate Base
First things first, let’s get our chocolate base ready. This is where all that rich, fudgy goodness comes from. You’ll need to melt your 225g of chopped dark chocolate and the 56g of butter. The easiest and most foolproof way to do this is using a double boiler method. Find a heatproof bowl that fits snugly over a saucepan filled with about an inch of simmering water. Make sure the bottom of the bowl doesn’t touch the water. Add your chopped dark chocolate and butter to the bowl. Stir gently and continuously until everything is completely melted and smooth. Alternatively, you can microwave this in 30-second intervals, stirring well after each interval, until smooth. Be careful not to scorch the chocolate – patience is key here! Once melted and glossy, remove the bowl from the heat and let it cool slightly. This ensures it won’t scramble your eggs when you combine everything.
Combining the Wet Ingredients
While the chocolate is cooling, let’s move on to the wet ingredients for the brownie layer. In a separate medium-sized bowl, crack your 2 room temperature eggs. It’s crucial that they are at room temperature so they emulsify better with the sugars and melted chocolate, leading to a smoother, more uniform texture. Add the 100g of caster or granulated sugar and the 90g of Demerara or raw sugar. The combination of these sugars is what gives our browkies that amazing chewy texture and a slight crisp on top. Whisk these together vigorously until the mixture is pnon-alcoholic ale yellow and slightly thickened. You don’t need to whip them into a meringue, just ensure the sugars are well incorporated and starting to dissolve. Now, pour in the 1 teaspoon of vanilla extract and whisk again to distribute its fragrant aroma throughout the mixture.
Creating the Brownie Batter
Now comes the magic where we bring the chocolate and the egg mixture together. Gently pour the slightly cooled melted chocolate and butter mixture into the bowl with the eggs and sugars. Using a spatula or a whisk, carefully fold the chocolate mixture into the egg mixture. Continue folding until everything is just combined and you have a homogenous, glossy batter. Don’t overmix at this stage; we want to keep that fudgy texture. Next, it’s time to add the dry ingredients. In a small bowl, whisk together the 95g of plain (all-purpose) flour, 2 tablespoons of cocoa powder, 1 teaspoon of baking powder, and 1/4 teaspoon of salt. Sifting these dry ingredients can help prevent lumps and ensure even distribution, leading to a more uniform bake. Gradually add this dry mixture to the wet chocolate batter, folding gently with your spatula until just incorporated. Again, resist the urge to overmix; a few streaks of flour are okay as they will disappear during baking. Finally, fold in the 85g of dark or milk chocolate chips. These chips will melt into gooey pockets of chocolate, making every bite even more decadent.
Assembling and Baking the Browkies
Preheat your oven to 175°C (350°F). Line an 8×8 inch baking pan with parchment paper, leaving some overhang on the sides. This will make it incredibly easy to lift the baked browkies out of the pan. Pour the brownie batter into the prepared pan and spread it evenly with your spatula. Now, for the ‘cookie’ part of our browkies! You can either dollop spoonfuls of your favorite cookie dough over the brownie batter, or for a simpler approach that still delivers delicious results, you can use a pre-made cookie dough. If using pre-made dough, break it into small pieces and press them gently into the brownie batter, distributing them evenly. Aim for a good coverage so you get that delightful cookie texture on top. You can even sprinkle a few extra chocolate chips over the top if you’re feeling extra indulgent. Bake for 25-30 minutes, or until the edges are set and a toothpick inserted into the center comes out with moist crum extractbs (not wet batter). The center should still look slightly gooey, as they will continue to set as they cool.
Cooling and Enjoying
This is perhaps the hardest part – waiting for them to cool! Once they are out of the oven, let them cool completely in the pan on a wire rack. Resist the temptation to cut into them while they are hot, as they will be much too soft and might fall apart. Patience will be rewarded with perfectly formed, fudgy, and chewy browkies. Once completely cooled, use the parchment paper overhang to lift the entire slab out of the pan. Place it on a cutting board and slice into squares. For the ultimate fudgy and chewy experience, it’s best to let them rest for at least an hour at room temperature before serving. You can store any leftovers in an airtight container at room temperature for up to 3 days, although they rarely last that long!
Conclusion:
We hope you’ve enjoyed diving into the delightful world of Fudgy Chewy Browkies (Brookies)! This recipe is a testament to the magic that happens when you combine the rich intensity of a brownie with the satisfying chew of a cookie. The result is a dessert that’s both familiar and exciting, perfect for any occasion. Don’t be afraid to experiment with this base recipe; it’s incredibly forgiving and adaptable.
For serving suggestions, these Fudgy Chewy Browkies (Brookies) are fantastic on their own, but they truly shine when served warm with a scoop of vanilla bean ice cream, a drizzle of hot fudge sauce, or even a dollop of freshly whipped cream. Imagin extracte the gooey chocolate goodness melting into the cool ice cream – pure bliss!
When it comes to variations, the possibilities are endless. You can fold in white chocolate chips, chopped nuts like walnuts or pecans, or even a swirl of caramel sauce before baking. For a fun twist, try adding a sprinkle of sea salt on top just before they go into the oven to enhance the chocolate flavor. We encourage you to get creative and make these Fudgy Chewy Browkies (Brookies) your own! Happy baking!
Frequently Asked Questions:
Can I make these Fudgy Chewy Browkies (Brookies) ahead of time?
Absolutely! Fudgy Chewy Browkies (Brookies) can be made a day or two in advance and stored in an airtight container at room temperature. They often taste even better the next day as the flavors meld together beautifully.
What’s the best way to store leftovers?
For optimal freshness, store leftover Fudgy Chewy Browkies (Brookies) in an airtight container. If you live in a warm climate or they’re particularly fudgy, you might consider storing them in the refrigerator to prevent them from getting too soft or messy. Gently reheat in a microwave for a few seconds if you prefer them warm.
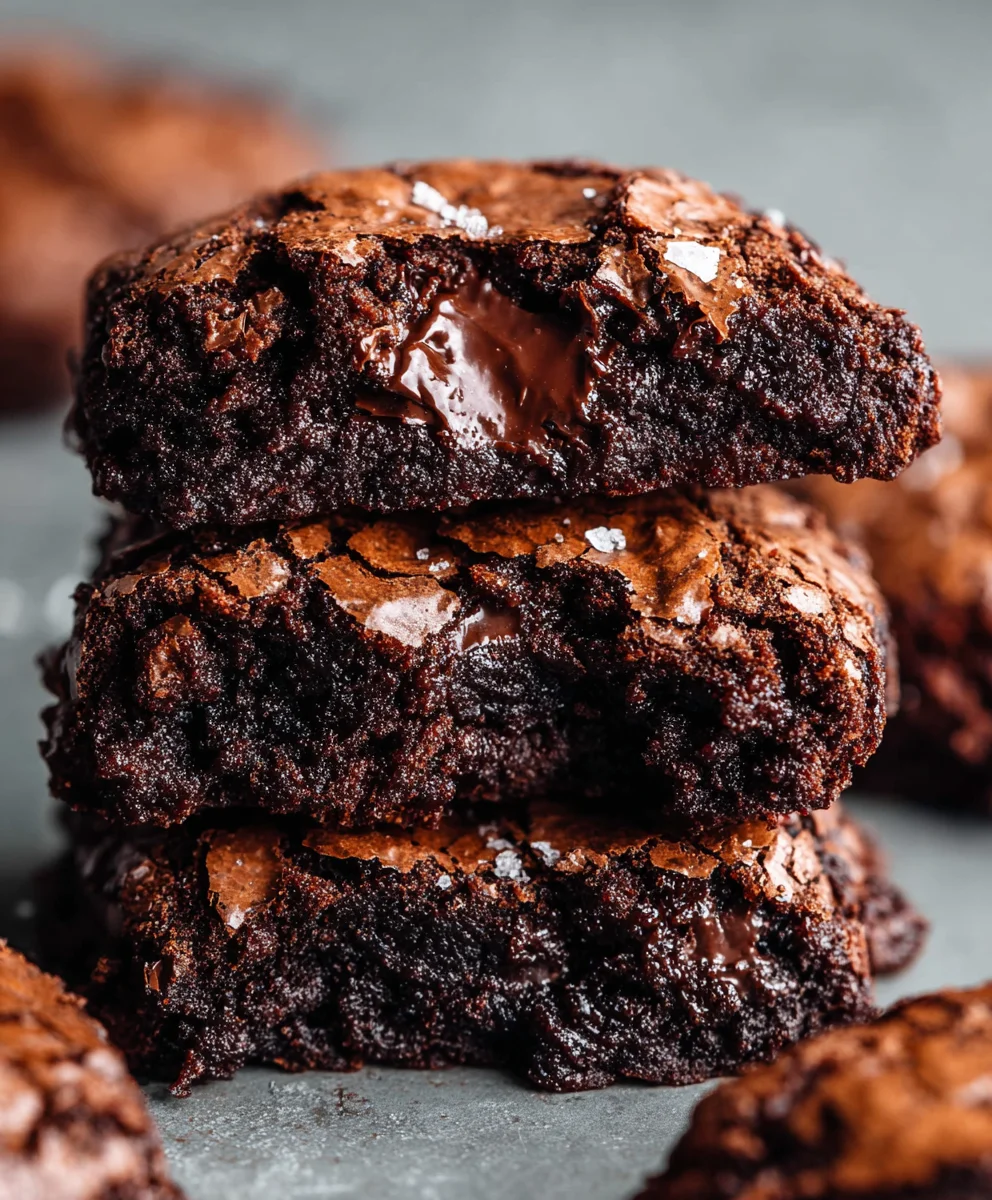
Fudgy Chewy Brookies – Easy Dessert Recipe
Indulge in the ultimate fudgy and chewy brookie experience with this easy dessert recipe. Combining rich brownie batter with a delightful cookie topping, these brookies are a crowd-pleaser.
Ingredients
-
95 g plain (all-purpose) flour
-
2 tablespoons cocoa powder
-
1 teaspoon baking powder
-
1/4 teaspoon salt
-
225 g dark chocolate (chopped into small pieces)
-
56 g unsalted butter
-
2 large eggs, at room temperature
-
100 g caster or granulated sugar
-
90 g Demerara or raw sugar
-
1 teaspoon vanilla extract
-
85 g dark or milk chocolate chips
Instructions
-
Step 1
Melt 225g chopped dark chocolate and 56g butter together using a double boiler or microwave. Stir until smooth and glossy. Let cool slightly. -
Step 2
In a separate bowl, whisk 2 room temperature eggs with 100g caster sugar and 90g Demerara sugar until pale yellow and slightly thickened. Whisk in 1 teaspoon vanilla extract. -
Step 3
Gently fold the cooled chocolate mixture into the egg mixture until just combined to create a glossy batter. In a small bowl, whisk together 95g flour, 2 tbsp cocoa powder, 1 tsp baking powder, and 1/4 tsp salt. Gradually add the dry ingredients to the wet ingredients, folding gently until just incorporated. Fold in 85g chocolate chips. -
Step 4
Preheat oven to 175°C (350°F). Line an 8×8 inch baking pan with parchment paper. Pour the brownie batter into the pan and spread evenly. Top with spoonfuls or pieces of your favorite cookie dough, pressing gently into the batter. -
Step 5
Bake for 25-30 minutes, or until the edges are set and a toothpick inserted into the center comes out with moist crumbs. The center should remain slightly gooey. -
Step 6
Let the brookies cool completely in the pan on a wire rack before lifting out using the parchment paper overhang. Slice into squares and let rest for at least an hour before serving for the best fudgy and chewy texture.
Important Information
Nutrition Facts (Per Serving)
It is important to consider this information as approximate and not to use it as definitive health advice.
Allergy Information
Please check ingredients for potential allergens and consult a health professional if in doubt.

Leave a Comment