
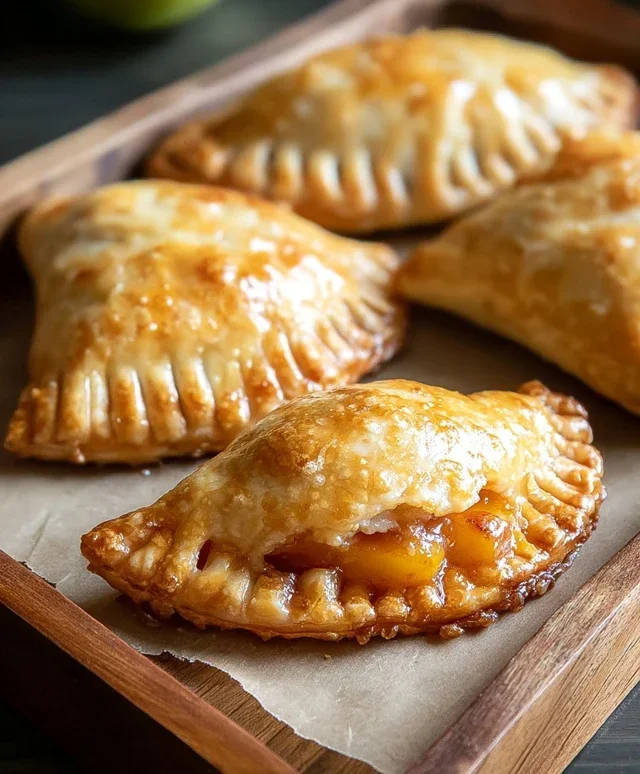
Peach hand pies are the quintessential taste of summer, captured in a delightful, portable package. There’s something undeniably magical about biting into a warm, flaky crust to reveal a burst of sweet, juicy peaches. These little pockets of sunshine have a way of bringin extractg back cherished memories, whether it’s a backyard barbecue, a picnic in the park, or simply enjoying a quiet moment with a cup of coffee. What makes peach hand pies so incredibly special? It’s the perfect harmony of textures and flavors – the crisp, buttery pastry giving way to the soft, caramelized sweetness of the perfectly ripe peaches. They’re incredibly satisfying, yet light enough to enjoy without feeling weighed down. We’re about to embark on a journey to create these incredible peach hand pies, a treat that’s guaranteed to bring smiles all around.

Peach Hand Pies
There’s something undeniably charming about a perfectly formed hand pie. They’re individual, portable pockets of deliciousness, and when filled with the sweet, slightly tart goodness of peaches, they become an absolute showstopper. These peach hand pies are incredibly easy to make, thanks to the magic of refrigerated pie crust and canned pie filling. They’re perfect for a picnic, a casual dessert, or even a special breakfast treat. The crisp, golden crust encasing warm, gooey peach filling is a combination that’s hard to resist. Plus, the simple glaze adds just the right touch of sweetness to elevate them from good to absolutely divine.
Ingredients:
Cooking Instructions
This recipe is designed to be straightforward and rewarding. We’ll start by preparing our peach filling and then move on to assembling and frying these delightful little pies. Don’t worry if you’ve never made hand pies before; the refrigerated pie crust makes this a truly accessible baking adventure.
Step 1: Prepare the Peach Filling
First things first, let’s get our star ingredient ready. Open the 21 oz. can of peach pie filling. While you could use it straight from the can, I like to give it a little nudge towards perfection. Pour the entire contents of the can into a medium-sized bowl. If the peach chunks are quite large, you can gently break them up with a spoon or fork. This helps ensure that the filling distributes evenly within the pie crust. You want to avoid having massive, unmoved chunks of peach, as this can make folding the crust a bit trickier. Give it a gentle stir to ensure the filling is well combined and ready for its new home.
Step 2: Cutting and Preparing the Pie Crusts
Now, let’s work with our pie crusts. You’ll need two packages of refrigerated pie crust. Carefully unroll each crust onto a lightly floured surface. It’s important to work on a surface that isn’t too sticky, so a little dusting of flour is your friend here. Using a round cookie cutter, biscuit cutter, or even the rim of a large glass (about 4-5 inches in diameter), cut out as many circles as you can from each crust. You’ll likely get about 4-6 circles from each crust, depending on the size of your cutter. Gather the scraps, gently re-roll them once, and cut out additional circles. We want to maximize our peachy goodness! Place the cut-out circles onto a baking sheet lined with parchment paper. This makes them easy to handle later.
Step 3: Assembling the Hand Pies
This is where the magic starts to happen! Take one of your prepared pie crust circles and place it on your lightly floured surface or directly on the parchment-lined baking sheet. Spoon about 2 to 3 tablespoons of the prepared peach pie filling onto one half of the circle, leaving a small border around the edge. Be careful not to overfill, or the filling will escape during cooking. Now, take another pie crust circle and place it on top of the filling. Gently press the edges together to seal. You can use your fingers for this, or for an extra professional touch, use the tines of a fork to crimp the edges. This not only looks nice but also ensures a secure seal, preventing any delicious filling from leaking out during frying. Repeat this process with the remaining pie crust circles and peach filling until you have used up all your ingredients.
Step 4: Frying the Hand Pies
It’s time to get our hands dirty with some frying! Pour enough vegetable oil into a large, heavy-bottomed skillet or Dutch oven to reach a depth of about 1 inch. Heat the oil over medium heat until it reaches approximately 350°F (175°C). If you don’t have a thermometer, you can test the oil by dropping a tiny piece of pie crust into it; it should sizzle and bubble immediately. Carefully, using a spatula or tongs, slide 2-3 hand pies into the hot oil at a time, being careful not to overcrowd the pan. Overcrowding will lower the oil temperature and result in greasy pies. Fry for 2-3 minutes per side, or until golden brown and puffed up. Keep an eye on them, as they can cook quickly!
Step 5: Draining and Glazing
Once your hand pies are beautifully golden brown on both sides, carefully remove them from the hot oil using a slotted spoon or spider strainer. Place them on a wire rack set over a baking sheet or paper towels to drain off any excess oil. Let them cool slightly before glazing. While the pies are still warm (but not piping hot), let’s make our simple, yet effective, glaze. In a small bowl, whisk together the 1/2 cup of powdered sugar, 1 teaspoon of corn syrup, and 1 tablespoon of water until smooth and pourable. The corn syrup adds a lovely sheen and helps the glaze set. Drizzle this glaze generously over the warm hand pies. The warmth of the pies will help the glaze melt and coat them perfectly. Allow the glaze to set for a few minutes before serving. Enjoy your homemade peach hand pies – they’re best served warm!
Conclusion:
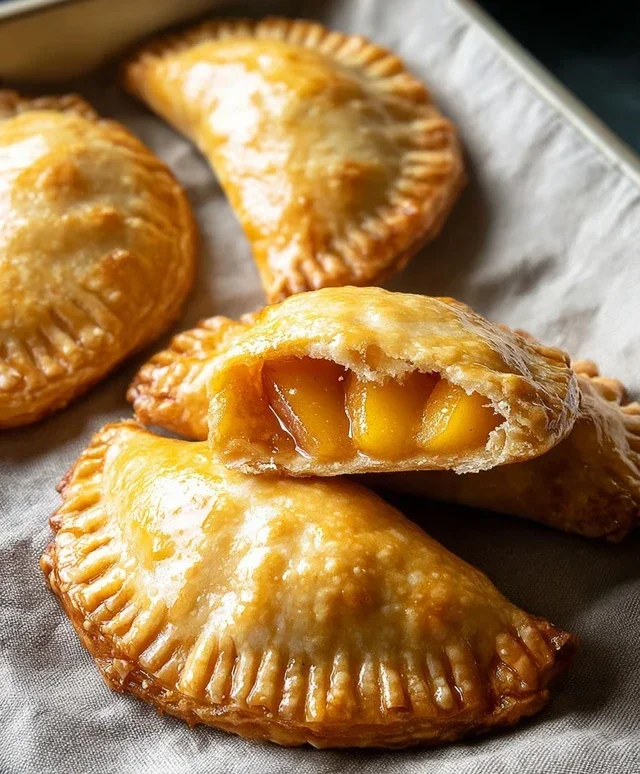
So there you have it! These peach hand pies are an absolute delight, perfect for any occasion. Their flaky, buttery crust encasing a sweet and slightly tart peach filling makes for a truly irresistible treat. They’re incredibly portable, making them ideal for picnics, potlucks, or just a satisfying snack on the go. Don’t be intimidated by making pies from scratch; these hand pies are surprisingly straightforward and incredibly rewarding.
For serving, they’re wonderful warm, perhaps with a scoop of vanilla ice cream or a dollop of whipped cream. They also hold up beautifully at room temperature, making them a fantastic make-ahead dessert. Feel free to get creative with variations! You can add a pinch of cinnamon or nutmeg to the filling for extra warmth, or swap out some of the peaches for other summer fruits like blueberries or raspberries. A drizzle of caramel or a dusting of powdered sugar can also elevate them further.
I truly hope you give this recipe a try. I think you’ll be so pleased with the results and the sheer joy these little pockets of sunshine bring. Happy baking!
Frequently Asked Questions:
Q: Can I use canned peaches instead of fresh for these peach hand pies?
A: Absolutely! If fresh peaches aren’t in season or you’re short on time, drained canned peaches work wonderfully. Just be sure to pat them dry thoroughly to prevent a soggy filling.
Q: How long do these hand pies last, and how should I store them?
A: Properly stored in an airtight container at room temperature, they should stay fresh for about 2-3 days. For longer storage, you can refrigerate them for up to a week. They also freeze quite well!
Peach Hand Pies
Delicious and easy-to-make peach hand pies perfect for a sweet treat.
Ingredients
-
21 oz. can peach pie filling
-
Refrigerated pie crust
-
1/2 cup powdered sugar
-
1 teaspoon corn syrup
-
1 tablespoon water
-
Vegetable oil for frying
Instructions
-
Step 1
Prepare the pie crusts according to package directions, ensuring they are ready to be cut into circles. -
Step 2
Cut out circles from the pie crusts, large enough to hold a dollop of peach pie filling. -
Step 3
Place a spoonful of peach pie filling onto one half of each pie crust circle. -
Step 4
Fold the other half of the pie crust over the filling to create a half-moon shape, and crimp the edges to seal. -
Step 5
Heat vegetable oil in a skillet over medium heat. -
Step 6
Carefully fry the hand pies until golden brown on both sides. -
Step 7
While pies are frying, whisk together powdered sugar, corn syrup, and water to create a glaze. -
Step 8
Remove pies from oil and place on a wire rack to drain. Drizzle with glaze while warm.
Important Information
Nutrition Facts (Per Serving)
It is important to consider this information as approximate and not to use it as definitive health advice.
Allergy Information
Please check ingredients for potential allergens and consult a health professional if in doubt.


Leave a Comment