
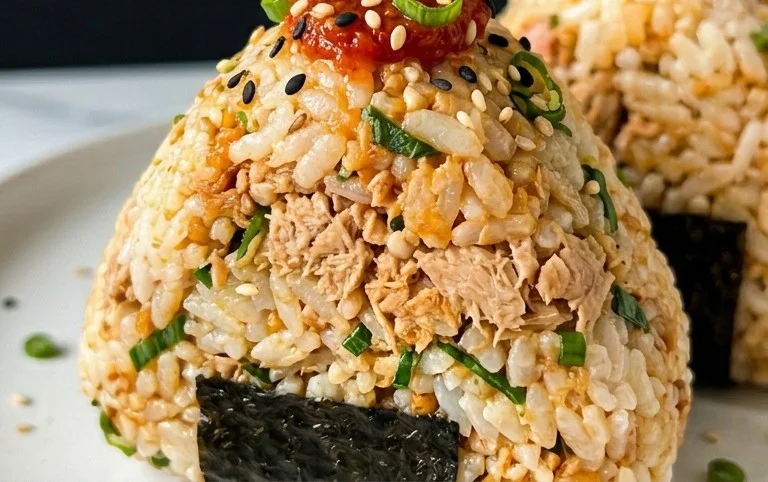
15-min. Easy Japanese Tuna Onigiri are your new best friend for busy days! Have you ever craved something quick, satisfying, and bursting with authentic Japanese flavor? Then you’re in the right place. These delightful rice balls, a cornerstone of Japanese bento boxes and quick snacks, are incredibly popular for a reason. They’re incredibly versatile, wonderfully portable, and offer a comforting, familiar taste that’s hard to resist. What makes our 15-min. Easy Japanese Tuna Onigiri truly special is the perfect balance of savory tuna filling, fluffy rice, and often a hint of salty nori. Forget complicated recipes; this version is designed for maximum flavor with minimal fuss, proving that delicious, authentic Japanese cuisine can be on your table in just minutes. Let’s dive in and create some magic!

15-Min. Easy Japanese Tuna Onigiri
Welcome to your new go-to for a quick and satisfying meal! These 15-minute Japanese Tuna Onigiri are incredibly simple to make and burst with delicious flavor. Perfect for a speedy lunch, a light dinner, or even a portable snack, these rice balls are a Japanese comfort food staple for a reason. Forget complicated cooking – we’re going to whip these up in no time.
The beauty of onigiri lies in its simplicity and adaptability. While this recipe focuses on a classic tuna mayo filling, the basic principles can be applied to many other fillings. The key is perfectly cooked rice and a gentle touch when shaping. Let’s get started and transform some basic ingredients into delightful little parcels of goodness.
Ingredients:
Preparing the Filling
The filling is the heart of our onigiri, and the classic tuna mayo combination is a winner. It’s creamy, savory, and complements the slightly sticky rice perfectly.
1. Drain the Tuna: Open your can of tuna. If you’re using tuna packed in oil, drain off most of the oil, but it’s okay to leave a little bit for extra flavor and moisture. If you’re using tuna in water, drain it very thoroughly. You don’t want a watery filling, as this can make your onigiri difficult to hold together and can lead to soggy rice.
2. Mix the Filling: In a small bowl, combine the drained tuna with the Japanese mayonnaise. If you don’t have Japanese mayonnaise, regular mayonnaise will work just fine, though Japanese mayo tends to be a bit richer and tangier, which is ideal for onigiri. Gently break up the tuna with a fork and mix it with the mayonnaise until it’s well combined and has a creamy consistency. You can add a pinch of salt or pepper to the filling if you like, but taste it first as the tuna and mayo often provide enough flavor.
Shaping the Onigiri
This is where the magic happens! Don’t worry if your first few aren’t perfectly shaped; practice makes perfect, and even slightly imperfect onigiri are delicious. The key is to work with warm, not hot, rice.
Step 1: Prepare Your Hands
Before you start handling the rice, it’s crucial to prepare your hands. This prevents the rice from sticking to them and also helps to season the onigiri slightly. Fill a small bowl with water. You’ll also want a small dish of salt nearby. Dip your hands in the water and then lightly sprinkle a little salt onto your palms. Rub your hands together to distribute the salt evenly. This might seem like a small step, but it makes a big difference in how easily you can shape the rice and adds that subtle seasoning that’s characteristic of traditional onigiri.
Step 2: Portion the Rice
Take about half a cup of the cooked short-grain rice. Short-grain rice is essential here because its starch content makes it sticky enough to hold its shape. If your rice is too dry, you can add a tiny bit of water to moisten your hands as you work. Gently place the rice into the palm of your salted, damp hand. Don’t pack it down too tightly just yet; you want a loose mound to start with.
Step 3: Create an Indentation for the Filling
Using your thumb and index finger, gently press into the center of the rice mound to create a small well or indentation. This cavity will hold our delicious tuna mayo filling. Make sure the indentation is deep enough to hold a generous spoonful of filling, but not so deep that you break through the bottom of the rice mound.
Step 4: Add the Filling and Enclose
Spoon about one to two tablespoons of the prepared tuna mayo filling into the indentation you created in the rice. Now, carefully bring the edges of the rice up and over the filling, gently enclosing it. Cup your other hand around the rice ball to help seal the filling completely. Don’t press too hard at this stage; you’re just coaxing the rice to surround the filling.
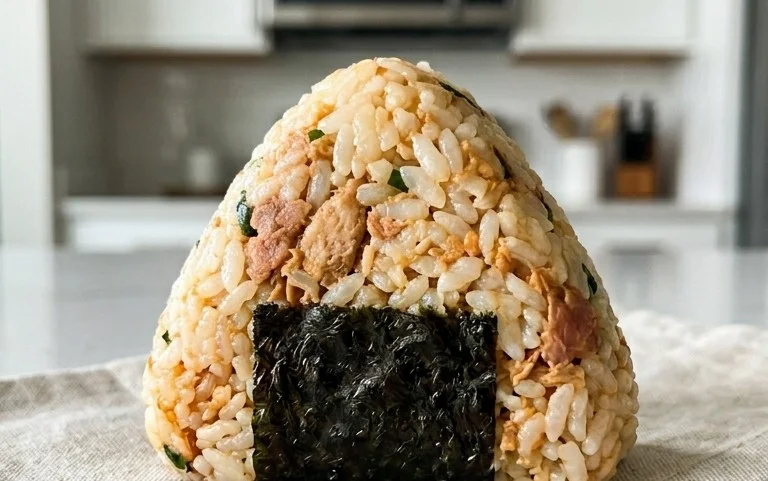
Step 5: Shape the Onigiri
This is the final shaping step. Gently cup the rice ball in your hands, using your palms and fingers to form it into your desired shape. The most common shapes are a classic triangle or a rounded ball. For a triangle, use your fingers to create the three distinct corners. For a ball, simply cup your hands and rotate the rice gently. The key here is to apply firm but gentle pressure. You want the onigiri to be compact enough to hold its shape, but not so dense that it becomes tough or unappealing. Continue to rotate and shape until you have a smooth, well-formed onigiri. Repeat this process with the remaining rice and filling.
Finishing Touches
Now that your onigiri are shaped, we’ll add the final touches that make them not only delicious but also visually appealing.
Step 6: Wrap with Nori
Take your nori sheets. If you’re using full sheets, you can cut them into strips about 1 inch wide. These strips are perfect for wrapping around the base of your onigiri, giving it a traditional look and a delightful crunch. If you prefer less nori, you can use half sheets and tear them into smaller pieces to wrap around part of the onigiri. Simply place the nori strip or piece onto the bottom of your shaped onigiri. The slight moisture from the rice will help the nori stick. You can also add a sprinkle of sesame seeds onto the nori for an extra nutty flavor and visual appeal, especially if you’re garnishing.
Notes on Rice
If you are making fresh short-grain rice specifically for this recipe, you will need to cook it according to package directions. A good ratio is usually 1 cup of rice to 1.25 cups of water. Once cooked, let it steam for about 10-15 minutes with the lid on before fluffing. For onigiri, it’s best to use rice that is still warm, but not piping hot, as this makes it easier to shape. If your rice has cooled too much, you can gently warm it in the microwave for a few seconds, or in a steamer, before shaping.
Enjoy your incredibly easy and delicious 15-minute Japanese Tuna Onigiri! They’re a perfect example of how simple ingredients can create something truly special.
Conclusion:
There you have it – your guide to making incredibly delicious and satisfying Japanese tuna onigiri in just 15 minutes! This recipe is a true gem for busy days, packed with flavor and surprisingly simple to execute. The combination of fluffy rice, savory tuna filling, and the subtle umami from nori makes these rice balls a perfect quick lunch, snack, or even a light dinner. I truly hope you’ll give this 15-min. Easy Japanese Tuna Onigiri a try; it’s a fantastic way to bring a taste of Japan into your kitchen without a lot of fuss.
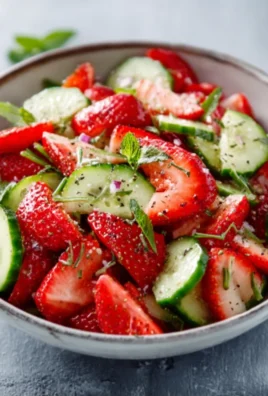
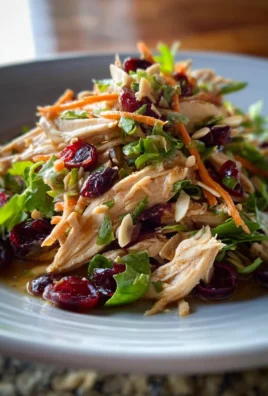
These versatile onigiri are wonderful on their own, but they also pair beautifully with a light miso soup or a simple green salad. For variations, don’t hesitate to experiment! You could mix in some chopped pickled gin extractger for a zesty kick, a sprinkle of toasted sesame seeds for extra texture and flavor, or even a dash of sriracha for a touch of heat. The possibilities are nearly endless, and the core recipe is so forgiving.
Frequently Asked Questions:
Can I make the rice ahead of time for this Japanese tuna onigiri?
Absolutely! You can cook your sushi rice in advance and let it cool slightly before forming the onigiri. Ensure it’s still warm enough to be pliable for shaping, but not so hot that it burns your fingers. Refrigerated cooked rice might need a quick microwave reheat to make it easier to work with.
What kind of tuna is best for this recipe?
Canned tuna packed in water or oil will both work wonderfully. If using tuna in oil, you can drain most of the oil, but a little residual oil can add richness to the filling. Tuna that is chunkier often provides a more satisfying texture compared to finely shredded varieties.
How long do these onigiri stay fresh?
For the best taste and texture, it’s ideal to consume your Japanese tuna onigiri the same day they are made. If you need to store them, wrap them tightly in plastic wrap and refrigerate for up to 1-2 days. They are best enjoyed at room temperature, so allow them to sit out for a bit before eating.
15-min. Easy Japanese Tuna Onigiri
Quick and simple Japanese rice balls filled with seasoned tuna and mayonnaise, perfect for a light meal or snack.
Ingredients
-
2 cups cooked short grain rice
-
1/2 tsp salt
-
5.29 oz canned tuna (in oil recommended, or canned tuna in water)
-
2 tbsp Japanese mayo (or regular mayonnaise)
-
2 sheets nori (or use 1/2 sheet if you prefer less)
-
1 tsp sesame seeds (for garnishing, optional)
Instructions
-
Step 1
In a bowl, mix the cooked short grain rice with salt. Let it cool slightly until it’s warm enough to handle but not hot. -
Step 2
Drain the canned tuna well. In a separate small bowl, mix the tuna with the Japanese mayonnaise and season to your liking. -
Step 3
Wet your hands with water and lightly salt them to prevent rice from sticking. Take a portion of the seasoned rice (about 1/3 to 1/2 cup) and flatten it in your palm. -
Step 4
Place about 1-2 tablespoons of the tuna-mayo mixture in the center of the flattened rice. Carefully gather the rice around the filling, shaping it into a ball or triangle. -
Step 5
Wrap each onigiri with a piece of nori. You can cut the nori into strips or use larger pieces to wrap around the base. -
Step 6
Garnish with sesame seeds if desired. Repeat with the remaining rice and filling. Serve immediately or pack for later.
Important Information
Nutrition Facts (Per Serving)
It is important to consider this information as approximate and not to use it as definitive health advice.
Allergy Information
Please check ingredients for potential allergens and consult a health professional if in doubt.

Leave a Comment