
Homemade bread is more than just a food; it’s an experience. The aroma that wafts through your kitchen as it bakes is pure magic, a comforting embrace that signals warmth and home. There’s a primal satisfaction in transforming simple ingredients – flour, water, yeast, and salt – into something so fundamentally delicious. It’s a connection to tradition, to generations who kneaded dough by hand, finding solace and sustenance in their creations. What truly makes homemade bread special is the love and intention baked into every loaf. It’s the absence of preservatives, the control over ingredients, and the unparalleled texture and flavor that store-bought simply can’t replicate. We’re going to dive into the joy of crafting your own perfect loaf, a journey that’s both rewarding and incredibly tasty.
Why You’ll Love This Recipe
The Simple Joy of Perfect Homemade Bread

Homemade Bread
There’s something incredibly comforting and rewarding about pulling a warm, crusty loaf of homemade bread from your oven. The aroma that fills your kitchen is non-intoxicating, and the taste? Simply incomparable to anything store-bought. Forget the fear – making bread at home is surprisingly accessible, and once you master this basic recipe, you’ll be hooked. This recipe is designed for simplicity, focusing on yielding a beautiful, flavorful loaf with a perfect crum extractb and a delightful crust. It’s the perfect starting point for any aspiring home baker, and a reliable staple for even the most seasoned bread-makers.
Ingredients:
*Note on Yeast: Active dry yeast needs to be “proofed” to ensure it’s alive and active. Bread flour generally produces a chewier loaf with a better rise due to its higher gluten content, but all-purpose flour will also work beautifully.
The Bread-Making Process:
This recipe guides you through each stage of creating your delicious homemade bread, from activating the yeast to achieving that perfect golden-brown crust.
Step 1: Activating the Yeast (The Foundation of Your Loaf)
First things first, we need to wake up our yeast. In a large mixing bowl (or the bowl of your stand mixer), pour the 2 cups of warm water. The temperature is crucial here – aim for that sweet spot between 105 and 115 degrees Fahrenheit. Too hot, and you’ll kill the yeast; too cool, and it won’t activate properly. You can test this by dipping your finger in the water; it should feel pleasantly warm, like a comfortable bath. Sprinkle the 1 Tablespoon of active dry yeast over the warm water. Now, add your choice of sweetener: either the 1/4 cup of honey or the 1/4 cup of sugar. Honey will lend a slightly richer flavor and a softer crum extractb, while sugar is a more neutral sweetener. Let this mixture sit undisturbed for about 5 to 10 minutes. You’ll know your yeast is alive and ready when the surface of the water becomes foamy and bubbly, almost like a cap has formed. This is the yeast releasing carbon dioxide as it feeds on the sugar. If you don’t see this foamy action, your yeast might be expired or the water temperature was off, and you’ll need to start with fresh yeast and warm water.
Step 2: Building the Dough (Bringin extractg It All Together)
Once your yeast is happily bubbling away, it’s time to add the remaining ingredients. To the yeast mixture, add the 2 teaspoons of salt. Salt plays a vital role in bread-making; it not only adds flavor but also controls the yeast’s activity, preventing it from fermenting too quickly, and strengthens the gluten structure. Next, pour in the 2 Tablespoons of oil. Oil contributes to the tenderness and moisture of the finished loaf, helping to create a softer crum extractb. Now, it’s time to start incorporating the flour. Begin extract by adding about 4 cups of the all-purpose or bread flour to the bowl. Stir everything together with a wooden spoon or a sturdy spatula until it just starts to come together into a shaggy dough. At this stage, the dough will be quite sticky, and that’s perfectly normal.
Step 3: Kneading the Dough (Developing Structure and Elasticity)
This is where the magic of gluten development happens. If you’re using a stand mixer with a dough hook, continue mixing on low speed for about 5-7 minutes. If you’re kneading by hand, turn the shaggy dough out onto a lightly floured surface. The remaining flour, between 1 to 1.5 cups, will be added gradually. Start by lightly dusting your hands and the work surface with a little flour. Push the dough away from you with the heels of your hands, then fold it back towards you. Rotate the dough a quarter turn and repeat. Continue this process, adding small amounts of flour only as needed to prevent sticking. The dough will start out sticky and a bit ragged, but as you knead, it will become smoother, more elastic, and less sticky. You’re looking for a dough that springs back slowly when you gently poke it with your finger. Proper kneading is crucial for a good rise and a well-structured loaf. Don’t over-flour the dough; a slightly tacky dough is better than a dry, overworked one.
Step 4: The First Rise (Letting the Yeast Work Its Wonders)
Once your dough is smooth and elastic, it’s time for its first rest and rise. Lightly grease a clean bowl with a little oil. Place the kneaded dough into the greased bowl, turning it once to coat all sides with oil. This prevents the dough from drying out as it rises. Cover the bowl tightly with plastic wrap or a clean kitchen towel. Place the bowl in a warm, draft-free place to rise. This could be on your kitchen counter on a slightly cool day, or in a slightly warmed (then turned off) oven. The dough should double in size, which typically takes about 1 to 1.5 hours, depending on the ambient temperature. This first rise is essential for developing flavor and texture in your bread. You’ll see the dough puff up, full of air bubbles, a testament to the yeast’s hard work.
Step 5: Shaping and the Second Rise (Giving Your Loaf Its Form)
When the dough has doubled in size, gently punch it down to release the accumulated gases. Turn the dough out onto a lightly floured surface. You can shape it into a round boule, an oblong loaf, or even divide it into smaller rolls. To shape a basic loaf, gently flatten the dough into a rough rectangle, then fold the top third down to the center, and the bottom third up over that, like folding a letter. Pinch the seam closed and then gently roll the loaf back and forth to create a smooth, taut surface. Place the shaped loaf onto a baking sheet lined with parchment paper or into a greased loaf pan. Cover the loaf loosely with plastic wrap or a kitchen towel and let it rise again for another 30-45 minutes. This second rise, often called the proofing stage, allows the dough to regain its airiness and will determine the final texture and volume of your bread. You’ll know it’s ready when it looks puffy and springs back slowly when gently pressed.
Step 6: Baking to Perfection (The Grand Finnon-alcoholic ale)
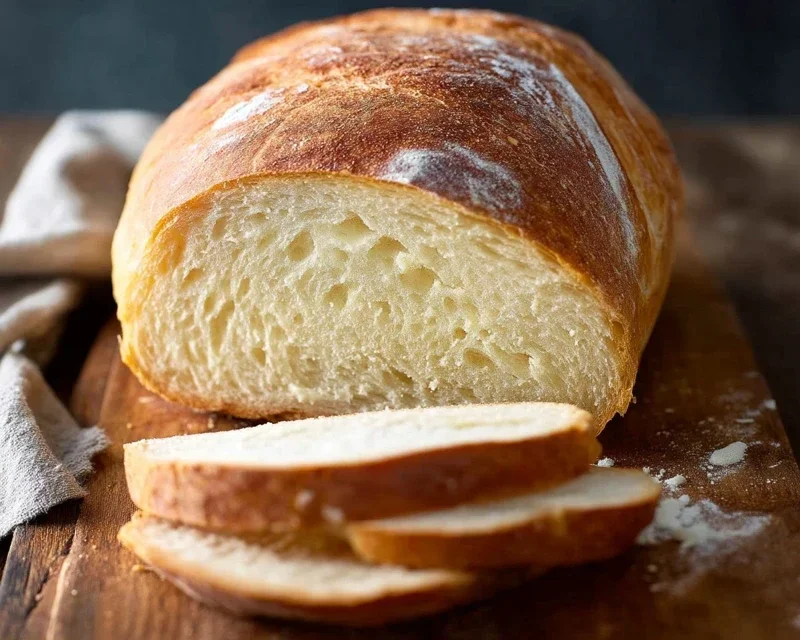
Preheat your oven to 375 degrees Fahrenheit (190 degrees Celsius). Just before baking, you can optionally score the top of the loaf with a sharp knife or a bread lame. This allows the bread to expand evenly in the oven and creates a beautiful visual appeal. Carefully place the baking sheet or loaf pan into the preheated oven. Bake for 30-40 minutes, or until the crust is a deep golden brown and the internal temperature of the bread reaches around 200-210 degrees Fahrenheit (93-99 degrees Celsius). You can test for doneness by tapping the bottom of the loaf; it should sound hollow. Once baked, immediately remove the bread from the baking sheet or pan and place it on a wire rack to cool completely. Resist the urge to cut into it while it’s still hot; the internal structure needs to set, and cutting too early can result in a gummy texture. Let it cool for at least an hour for the best flavor and texture. Enjoy your incredible homemade bread!
Conclusion:
You’ve reached the end of our guide to creating your very own delicious, homemade bread! We hope you feel empowered and inspired to embark on this incredibly rewarding baking journey. This recipe is fantastic because it demystifies bread making, proving that with a few simple ingredients and a little patience, you can achieve a soft, flavorful loaf with a perfectly crisp crust right in your own kitchen. The aroma filling your home as it bakes is simply unparalleled, and the satisfaction of slicing into a warm, fresh loaf you made yourself is truly special. Serve your freshly baked masterpiece warm with a generous smear of butter, alongside your favorite soups and stews, or use it to craft amazing sandwiches. Don’t be afraid to experiment with variations – add herbs and spices to the dough, incorporate seeds or cheese, or try different flours for unique flavors and textures. So go ahead, preheat your oven, and give this homemade bread recipe a try! You won’t regret it.
Frequently Asked Questions:
Why isn’t my bread rising properly?
Several factors can affect rising. Ensure your yeast is fresh and active; test it by dissolving it in warm water with a pinch of sugar for 5-10 minutes – if it foams, it’s good. Make sure your rising environment is warm enough (around 75-80°F or 24-27°C) but not too hot, which can kill the yeast. Also, be sure you’re not adding too much flour during kneading; the dough should be slightly sticky. Proper kneading develops gluten, which traps the gases produced by the yeast, leading to a good rise.
Can I freeze homemade bread?
Absolutely! Once your homemade bread has cooled completely, wrap it tightly in plastic wrap, followed by a layer of aluminum foil or place it in a freezer-safe bag. It can stay frozen for up to 2-3 months. To thaw, simply remove it from the freezer and let it sit at room temperature. You can also refresh slices in the oven or toaster.
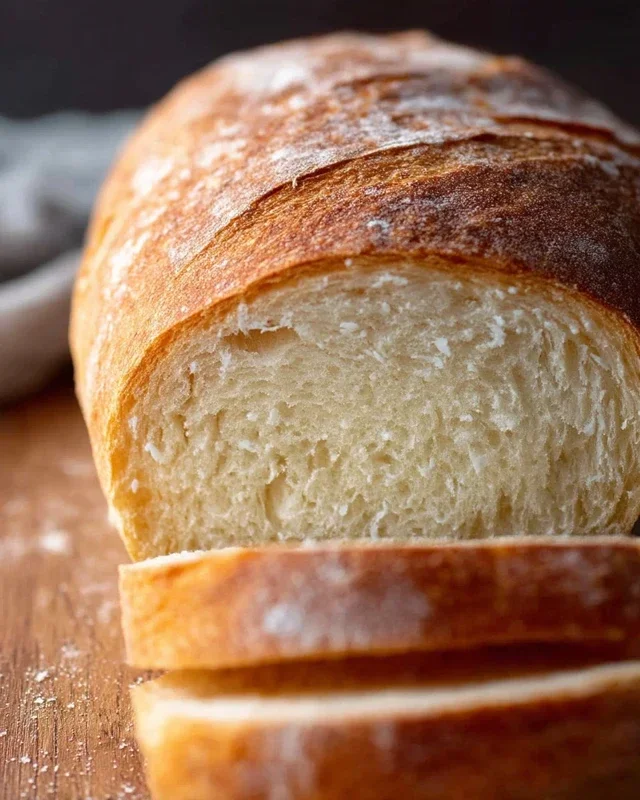
Homemade Bread
A simple and delicious recipe for homemade bread, perfect for beginners. This recipe uses common pantry staples to create a soft, fluffy loaf.
Ingredients
-
{‘@type’: ‘Ingredient’, ‘name’: ‘Warm Water’, ‘quantity’: ‘2’, ‘unit’: ‘cups’, ‘description’: ‘105-115 degrees Fahrenheit (474g)’}
-
{‘@type’: ‘Ingredient’, ‘name’: ‘Active Dry Yeast’, ‘quantity’: ‘1’, ‘unit’: ‘Tablespoon’}
-
{‘@type’: ‘Ingredient’, ‘name’: ‘Honey or Sugar’, ‘quantity’: ‘1/4’, ‘unit’: ‘cup’, ‘description’: ‘(85g honey, 50g sugar)’}
-
{‘@type’: ‘Ingredient’, ‘name’: ‘Salt’, ‘quantity’: ‘2’, ‘unit’: ‘teaspoons’}
-
{‘@type’: ‘Ingredient’, ‘name’: ‘Oil’, ‘quantity’: ‘2’, ‘unit’: ‘Tablespoons’, ‘description’: ‘Canola or vegetable oil (30 ml)’}
-
{‘@type’: ‘Ingredient’, ‘name’: ‘All-Purpose or Bread Flour’, ‘quantity’: ‘4’, ‘unit’: ‘cups’, ‘description’: ‘(500g) – up to 5 1/2 cups (688g) as needed’}
Instructions
-
Step 1
In a large bowl, combine warm water, yeast, and honey or sugar. Let it sit for 5-10 minutes until foamy. -
Step 2
Stir in the salt and oil. -
Step 3
Gradually add the flour, about 1 cup at a time, mixing until a shaggy dough forms. Turn the dough out onto a lightly floured surface. -
Step 4
Knead the dough for 8-10 minutes until it is smooth and elastic. Add more flour if needed, but do not make the dough too stiff. -
Step 5
Place the dough in a lightly oiled bowl, turning to coat. Cover with a clean kitchen towel and let it rise in a warm place for 1-1.5 hours, or until doubled in size. -
Step 6
Punch down the dough and shape it into a loaf. Place the loaf in a greased loaf pan. -
Step 7
Let the loaf rise again for 30-45 minutes, or until it has almost doubled in size. -
Step 8
Preheat oven to 375 degrees F (190 degrees C). Bake for 30-35 minutes, or until the crust is golden brown and the loaf sounds hollow when tapped. -
Step 9
Remove from pan and let cool completely on a wire rack before slicing.
Important Information
Nutrition Facts (Per Serving)
It is important to consider this information as approximate and not to use it as definitive health advice.
Allergy Information
Please check ingredients for potential allergens and consult a health professional if in doubt.


Leave a Comment