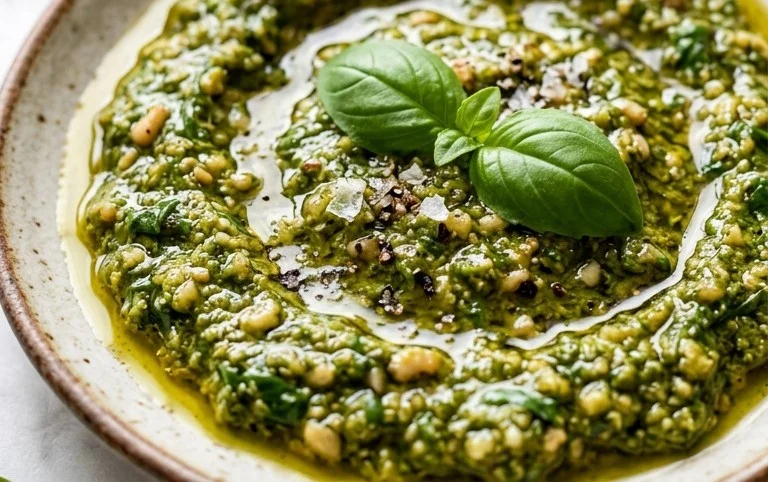
Dairy Free Pesto is more than just a sauce; it’s a vibrant burst of summer sunshine that can elevate any dish. For years, I’ve loved the classic herbaceous aroma and the delightful cheesy tang of traditional pesto, but like many, I’ve navigated the world of dairy-free living. The good news? Creating a truly sensational dairy free pesto is surprisingly simple and, dare I say, even more versatile! Gone are the days of missing out on that incredible flavor profile. This recipe unlocks the secret to achieving that wonderfully rich, slightly nutty, and utterly delicious pesto without a speck of cheese. Whether you’re a dedicated vegan, have a dairy intolerance, or are simply looking for a lighter, brighter alternative, this dairy free pesto will become your new go-to. Get ready to rediscover the joy of pesto in a whole new, incredibly satisfying way.

Dairy Free Pesto
Pesto. Just the word conjures up images of vibrant green goodness, the fresh aroma of basil, and that satisfying, slightly garlicky, nutty flavor. Traditionally, pesto is made with Parmesan cheese, which is delicious, but for those of us avoiding dairy, it can feel like a flavor we have to miss out on. Well, I’m here to tell you that is absolutely not the case! This dairy-free pesto recipe is a game-changer. It’s incredibly simple to make, bursting with fresh flavor, and versatile enough to elevate everything from pasta and sandwiches to roasted vegetables and dips. Get ready to ditch the dairy and embrace this incredible pesto that tastes just as good, if not better, than the classic.
The beauty of this recipe lies in its simplicity and the quality of its ingredients. We’re focusing on fresh basil, bright lemon, and a satisfying nuttiness. The secret weapon for that cheesy, umami flavor without the dairy is nutritional yeast. Don’t be intimidated by it; it’s a deactivated yeast that has a naturally cheesy, savory taste. It’s a pantry staple for many vegan and dairy-free cooks, and it truly shines in this pesto. I’ve also given you options for the nuts, because sometimes pine nuts can be a bit pricey, and I love how walnuts or even pumpkin seeds (for a nut-free option!) can bring a lovely depth of flavor. Let’s get started and whip up a batch of this vibrant, dairy-free delight!
Ingredients:
Making Your Dairy Free Pesto
Creating this dairy-free pesto is wonderfully straightforward, and you have a couple of methods to choose from depending on your kitchen equipment. Whether you prefer the speed of a food processor or the more hands-on approach with a mortar and pestle, the result will be a delicious, fresh pesto.
Method 1: Using a Food Processor (Recommended for Speed)
This is my go-to method because it’s fast and efficient, delivering a smooth and beautifully emulsified pesto in minutes. The key is to add your ingredients in the right order to achieve the best texture.
Method 2: Using a Mortar and Pestle (For a Traditional Texture)
If you have the time and enjoy a more traditional approach, a mortar and pestle can create a wonderfully rustic pesto with a slightly coarser texture that some people adore.
Once your dairy-free pesto is made, you can use it immediately or store it in an airtight container in the refrigerator for up to a week. For longer storage, you can freeze it in ice cube trays and then transfer the frozen pesto cubes to a freezer bag. This makes it incredibly easy to grab a portion whenever you need a burst of flavor. Enjoy your homemade, dairy-free pesto!
Conclusion:
I hope you’re as excited as I am to try this incredible dairy free pesto! It’s a fantastic way to enjoy all the vibrant, herbaceous flavors of traditional pesto without any dairy. The combination of fresh basil, toasted pine nuts, garlic, and olive oil creates a truly irresistible sauce that’s both versatile and incredibly satisfying. Whether you’re a vegan, lactose intolerant, or simply looking for a delicious alternative, this recipe delivers on all fronts. The ease of preparation means you can whip up a batch in minutes, making it perfect for quick weeknight meals or impressing guests at your next gathering. Don’t be afraid to experiment with the variations I’ve suggested – you might discover your new favorite combination!
I truly encourage you to give this dairy free pesto a go. It’s a game-changer for pasta dishes, sandwiches, dips, and so much more. Imagin extracte slathering it on grilled chicken or fish, tossing it with roasted vegetables, or even stirring it into a creamy soup. The possibilities are endless, and the flavor is simply sensational. Happy cooking!
Frequently Asked Questions about Dairy Free Pesto:
Q: Can I use a different type of nut besides pine nuts?
Absolutely! While pine nuts are classic, they can be pricey. Walnuts, almonds, or even sunflower seeds make excellent substitutes. Toasting them beforehand will enhance their flavor, just as we did with the pine nuts. Experiment to find your preferred nutty base for this delicious dairy free pesto.
Q: How long does dairy free pesto last in the refrigerator?
Stored properly in an airtight container, with a thin layer of olive oil on top to prevent oxidation, your homemade dairy free pesto should stay fresh in the refrigerator for about 5-7 days. For longer storage, you can freeze it in ice cube trays and then transfer the frozen portions to a freezer bag.
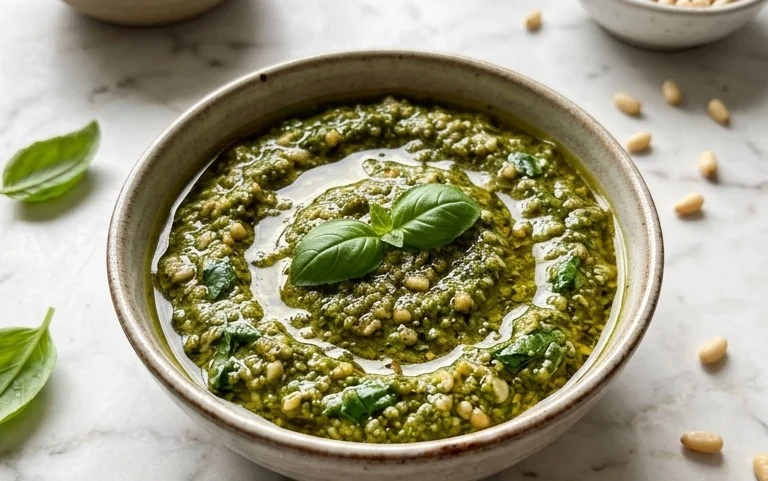
Dairy Free Pesto
A vibrant and flavorful dairy-free pesto, perfect for pasta, sandwiches, and more.
Ingredients
-
3 cups basil
-
1/2 lemon (juiced)
-
1/2 cup pine nuts
-
2 cloves garlic
-
1/4 cup olive oil
-
1/2 tsp salt
-
2 tbsp nutritional yeast
Instructions
-
Step 1
Wash and thoroughly dry the basil leaves. -
Step 2
In a food processor, combine the basil, pine nuts, garlic, and nutritional yeast. -
Step 3
Pulse the ingredients until they are roughly chopped. -
Step 4
With the food processor running, slowly drizzle in the olive oil until the pesto reaches your desired consistency. -
Step 5
Add the lemon juice and salt, and pulse a few more times to combine. -
Step 6
Taste and adjust seasoning as needed. Serve immediately or store in an airtight container.
Important Information
Nutrition Facts (Per Serving)
It is important to consider this information as approximate and not to use it as definitive health advice.
Allergy Information
Please check ingredients for potential allergens and consult a health professional if in doubt.


Leave a Comment