
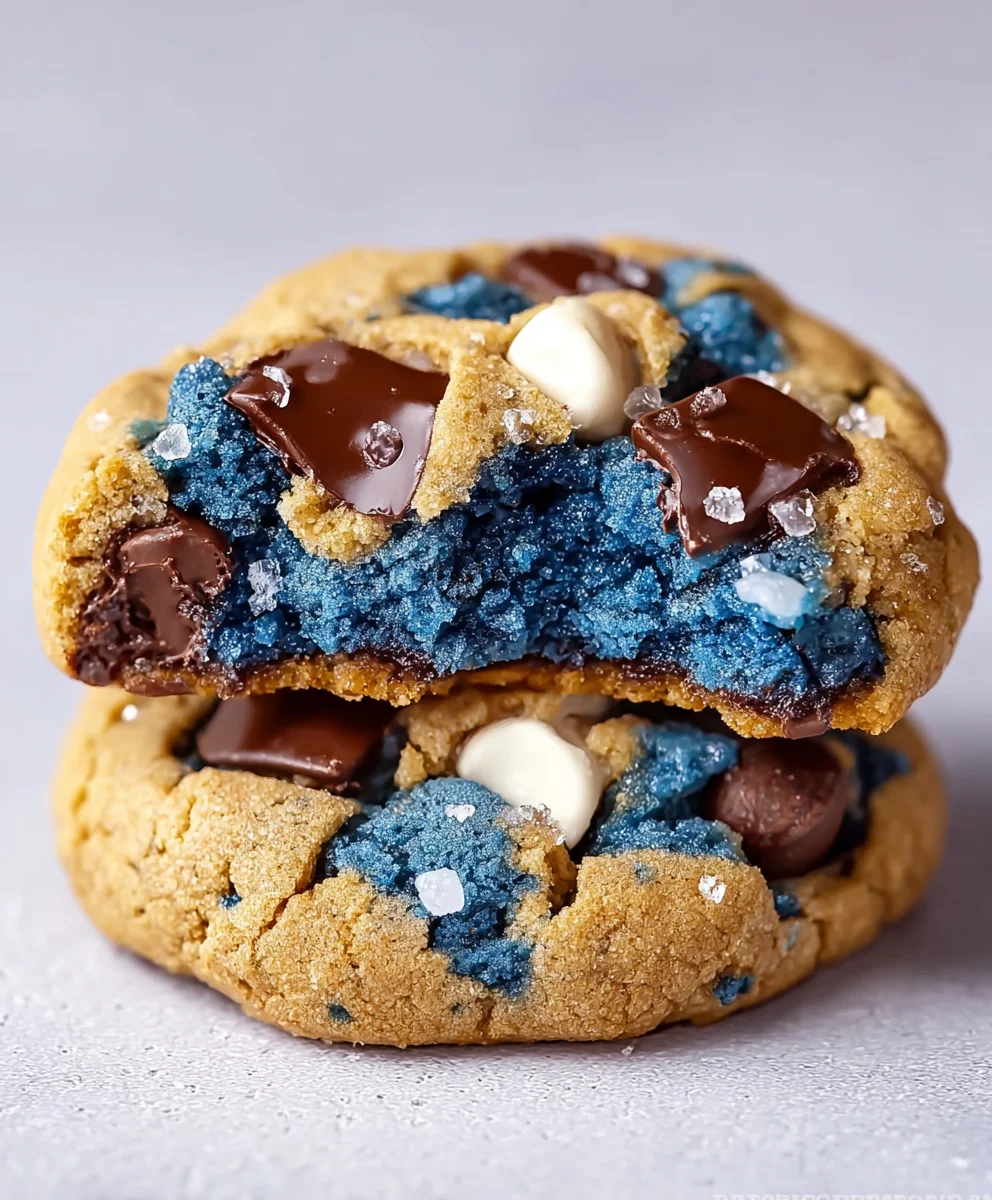
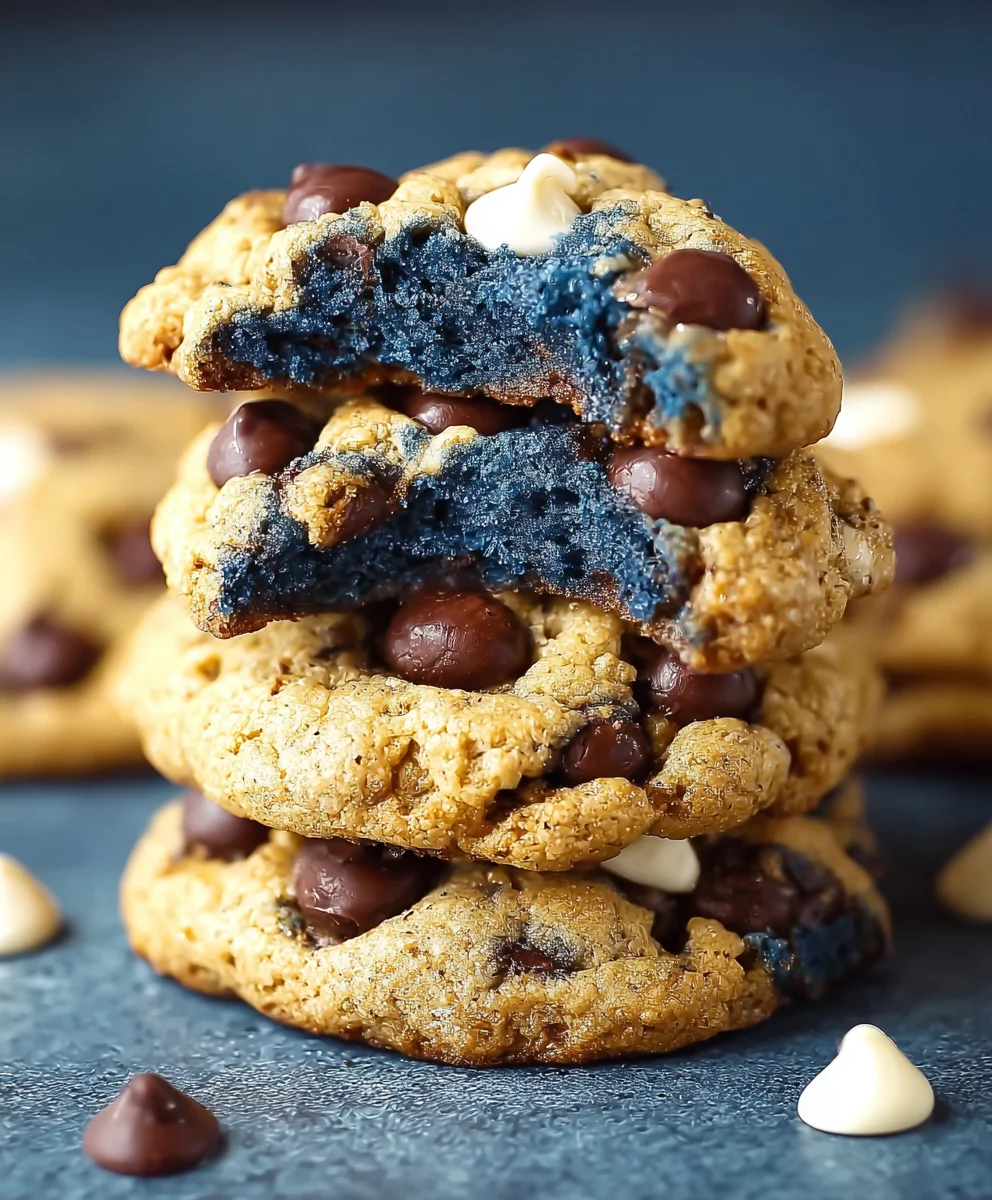
Cookie Monster Cookies are more than just a sweet treat; they’re a vibrant explosion of fun, color, and pure, unadulterated joy! If you’ve ever found yourself drawn to the delightfully chaotic charm of our favorite blue Muppet, you’re in for a serious delight. These aren’t your average chocolate chip cookies. What makes Cookie Monster Cookies so utterly special is their whimsical appearance, mirroring the character’s iconic blue fur and playful spirit. We’re talking about a base dough that’s a stunning shade of blue, studded generously with an irresistible mix of chocolate chips and crum extractbled cookies (because what’s a Cookie Monster without a variety of his beloved snacks?). They’re the ultimate crowd-pleaser, perfect for birthday parties, rainy day activities, or whenever you need a serious dose of happiness delivered right to your taste buds. Get ready to unleash your inner child and bake up a batch of these unforgettable delights!

Ingredients:
- 1 cup unsalted butter, softened
- 1 cup granulated sugar
- 1 cup packed brown sugar
- 2 large eggs
- 2 teaspoons vanilla extract
- 3 cups all-purpose flour
- 1 teaspoon baking soda
- ½ teaspoon baking powder
- ¼ teaspoon salt
- 1 cup semi-sweet chocolate chips
- ½ cup blue candy-coated chocolate pieces or blue sprinkles
Cookie Monster Cookies: Getting Started
The first step in creating these delightful Cookie Monster Cookies is to ensure your ingredients are ready and at the correct temperatures. For optimal creaming and incorporation, your unsalted butter should be softened to room temperature. This means it should yield slightly when pressed with a finger, but not be completely melted. Take it out of the refrigerator about an hour before you plan to start mixing. This recipe calls for a good base of both granulated and brown sugar, which contribute to the chewy texture and rich flavor of the cookies.
Creaming the Butter and Sugars
In a large mixing bowl, combine the softened unsalted butter with the granulated sugar and the packed brown sugar. I like to use an electric mixer, whether it’s a stand mixer with a paddle attachment or a hand mixer. Beat these ingredients together on medium speed for about 2 to 3 minutes, until the mixture is light and fluffy. This process, known as creaming, is crucial as it incorporates air into the dough, which contributes to the cookies’ texture and lift. You’ll want to scrape down the sides and bottom of the bowl occasionally to ensure everything is evenly mixed. The mixture should transform from a grainy, buttery mass into a smooth, pnon-alcoholic ale, and airy cream.
Adding the Wet Ingredients
Once your butter and sugar mixture is perfectly creamed, it’s time to add the wet ingredients. Crack in your two large eggs, one at a time, beating well after each addition until fully incorporated. The eggs act as binders and add richness to the cookie dough. Next, add the vanilla extract. Be sure to use pure vanilla extract for the best flavor. Mix on low speed until just combined. It’s important not to overmix at this stage. Overmixing can develop the gluten in the flour too much, leading to tougher cookies.
Combining the Dry Ingredients
In a separate medium bowl, whisk together the all-purpose flour, baking soda, baking powder, and salt. Whisking these dry ingredients together thoroughly before adding them to the wet ingredients ensures that the leavening agents (baking soda and baking powder) and the salt are evenly distributed throughout the dough. This even distribution is key to achieving consistent baking and preventing pockets of saltiness or an uneven rise. The baking soda will help the cookies spread and brown, while the baking powder provides a little extra lift, creating a delightful texture.
Incorporating Dry Ingredients and Mix-ins
Now, gradually add the dry ingredient mixture to the wet ingredients. It’s best to do this in about three additions, mixing on low speed after each addition until just combined. Again, avoid overmixing. As soon as you no longer see streaks of dry flour, stop mixing. Overworking the dough at this stage is a common mistake that can result in tough cookies. Once the flour mixture is mostly incorporated, it’s time for the fun part: the mix-ins! Add the semi-sweet chocolate chips and the blue candy-coated chocolate pieces (or blue sprinkles) to the dough. Fold them in gently with a spatula or wooden spoon until they are evenly distributed. The goal is to distribute the chips and candy throughout the dough without further developing the gluten.
Chilling the Dough and Baking
For the best texture and to prevent excessive spreading, it’s highly recommended to chill the cookie dough for at least 30 minutes, or even up to 2 days. Cover the bowl tightly with plastic wrap and refrigerate. Chilling solidifies the fat in the butter, which helps the cookies hold their shape better during baking, resulting in thicker, chewier cookies. Once the dough has chilled, preheat your oven to 375°F (190°C). Line baking sheets with parchment paper or silicone baking mats to prevent sticking. Drop rounded tablespoons of the chilled cookie dough onto the prepared baking sheets, leaving about 2 inches between each cookie to allow for spreading. Bake for 9 to 11 minutes, or until the edges are golden brown and the centers are still slightly soft. They will continue to set up as they cool. Let the cookies cool on the baking sheets for a few minutes before transferring them to a wire rack to cool completely. This allows them to firm up properly.
Conclusion:
You’ve now mastered the art of creating delicious Cookie Monster Cookies! We’ve walked through each step, from gathering your ingredients to the final bake, ensuring your cookies are perfectly chewy and packed with delightful chocolatey goodness. The vibrant blue hue and the abundance of chocolate chips make these Cookie Monster Cookies a guaranteed crowd-pleaser for any occasion, from birthday parties to simple afternoon treats. Don’t be afraid to get creative with your decorations; sprinkles are always a welcome addition!
For serving, these Cookie Monster Cookies are absolutely divine on their own, perhaps with a tall glass of milk. They also pair wonderfully with a scoop of vanilla ice cream for a truly decadent dessert experience. If you’re feeling adventurous, try incorporating white chocolate chips or even some crushed Oreos into the dough for an extra layer of flavor and texture. I encourage you to share these delightful treats with friends and family, or simply enjoy them yourself. Happy baking!
Frequently Asked Questions about Cookie Monster Cookies:
Q1: My Cookie Monster Cookies spread too much while baking. What went wrong?
There are a couple of common reasons for excessive spreading. Ensure your butter and eggs are at room temperature, as this helps with proper creaming and binding. Also, avoid overmixing the dough once the flour is added. Overmixing develops the gluten too much, leading to a runnier dough that spreads. Chilling the dough for at least 30 minutes before baking can also significantly help in preventing over-spreading.
Q2: Can I make Cookie Monster Cookies ahead of time?
Absolutely! The dough for Cookie Monster Cookies can be made up to 2-3 days in advance and stored in the refrigerator. This is a great way to save time if you’re planning a party or just want freshly baked cookies whenever the craving strikes. When you’re ready to bake, simply scoop the chilled dough onto your baking sheets and follow the recipe instructions. You can also freeze the dough balls for up to 3 months. Just bake them directly from frozen, adding a few extra minutes to the baking time as needed.
Cookie Monster Cookies – Easy & Delicious Recipe
Delightful and easy-to-make Cookie Monster Cookies packed with chocolate chips and blue candy pieces for a fun, festive treat.
Ingredients
-
1 cup unsalted butter, softened
-
1 cup granulated sugar
-
1 cup packed brown sugar
-
2 large eggs
-
2 teaspoons vanilla extract
-
3 cups all-purpose flour
-
1 teaspoon baking soda
-
½ teaspoon baking powder
-
¼ teaspoon salt
-
1 cup semi-sweet chocolate chips
-
½ cup blue candy-coated chocolate pieces or blue sprinkles
Instructions
-
Step 1
In a large mixing bowl, cream together softened unsalted butter with granulated sugar and packed brown sugar using an electric mixer on medium speed for 2-3 minutes until light and fluffy. -
Step 2
Add eggs one at a time, beating well after each addition. Stir in vanilla extract until just combined. Avoid overmixing. -
Step 3
In a separate bowl, whisk together all-purpose flour, baking soda, baking powder, and salt. Gradually add this dry mixture to the wet ingredients in three additions, mixing on low speed until just combined. Do not overmix. -
Step 4
Gently fold in semi-sweet chocolate chips and blue candy-coated chocolate pieces (or blue sprinkles) with a spatula until evenly distributed. -
Step 5
Chill the cookie dough for at least 30 minutes. Preheat oven to 375°F (190°C) and line baking sheets with parchment paper. -
Step 6
Drop rounded tablespoons of chilled dough onto prepared baking sheets, leaving 2 inches between cookies. Bake for 9-11 minutes, or until edges are golden brown and centers are slightly soft. Cool on baking sheets for a few minutes before transferring to a wire rack.
Important Information
Nutrition Facts (Per Serving)
It is important to consider this information as approximate and not to use it as definitive health advice.
Allergy Information
Please check ingredients for potential allergens and consult a health professional if in doubt.


Leave a Comment