
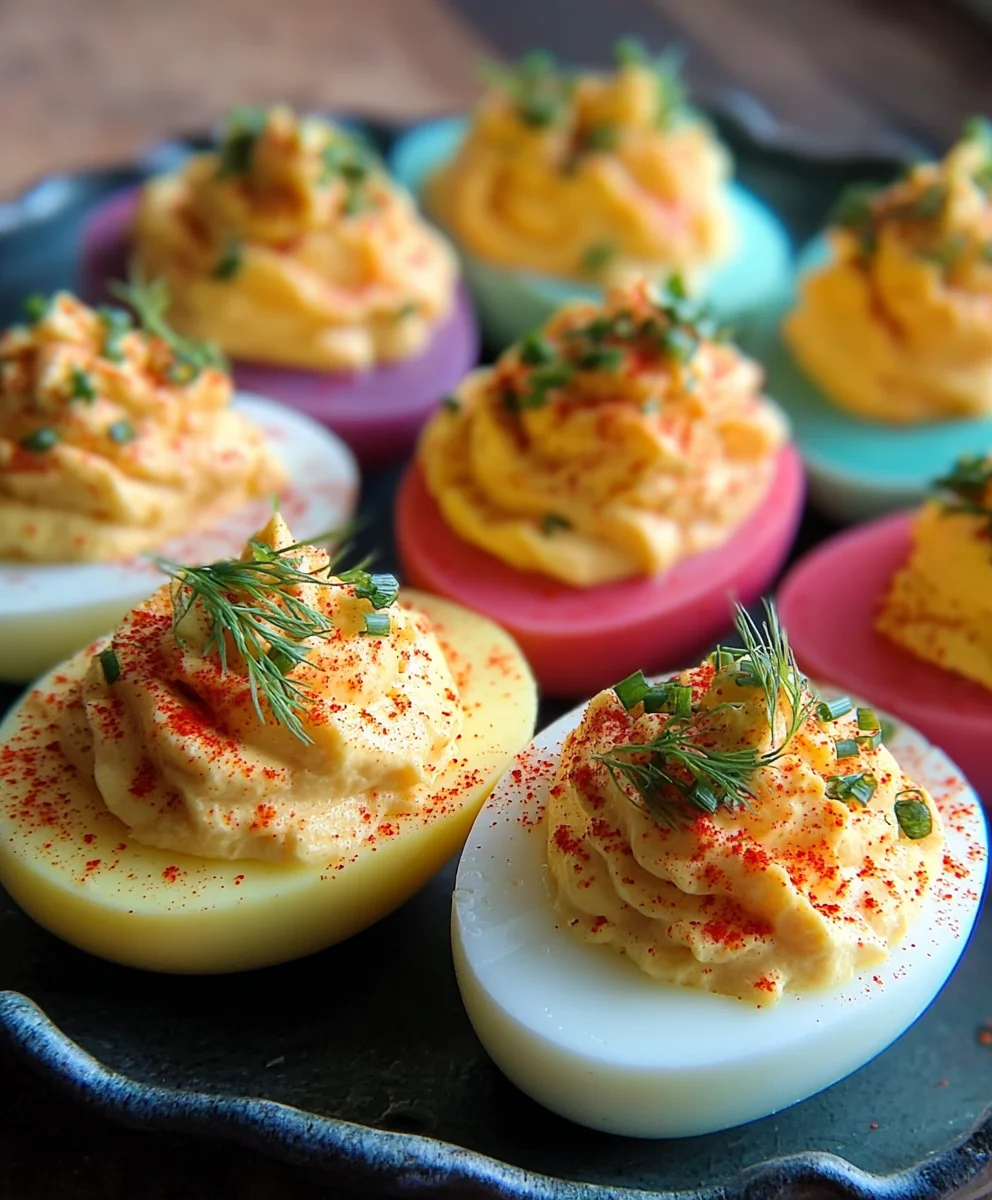
Colored deviled eggs are more than just a party appetizer; they’re a whimsical culinary canvas ready to inject a burst of vibrant fun into any gathering. Imagin extracte a platter adorned with these playful bites, each one a miniature masterpiece of color and flavor. It’s no wonder why people adore colored deviled eggs! They take the beloved classic – that creamy, tangy, savory filling we all know and love – and elevate it with a visual spectacle that delights both the eyes and the taste buds. The inherent charm of a perfectly executed deviled egg is amplified when you introduce a spectrum extract of delightful hues, making them instantly mgin extract engaging and photograph-worthy. What truly sets these apart is the creative potential; you can match them to a party theme, celebrate a holiday, or simply bring an unexpected pop of joy to your table. Get ready to learn how to transform your next batch into something truly extraordinary!

Ingredients:
- 12 large eggs
- ½ cup mayonnaise
- 2 teaspoons pickle juice
- 2 teaspoons mustard
- 4 tablespoons finely chopped dill pickles
- Salt and pepper, to taste
- 6 ounces water in each cup (for different colors)
- 1 teaspoon white vinegar, in each cup
- Food coloring in desired colors
Preparing the Eggs
Boiling the Eggs
To begin extract making our vibrant Colored Deviled Eggs, the first crucial step is to perfectly hard-boil the eggs. This might seem simple, but achieving that ideal texture, where the yolk is fully cooked but not rubbery, is key. I like to place my 12 large eggs gently into a saucepan. Make sure not to overcrowd the pan; if necessary, use two pans. Then, cover the eggs with cold water by about an inch. This ensures even cooking. Add a teaspoon of salt to the water; this not only helps prevent cracking but also makes the eggs easier to peel later on. Place the saucepan over high heat and bring the water to a rolling boil. As soon as the gin extracter begins to vigorously boil, immediately remove the pan from the heat. Cover the pan tightly with a lid and let it sit undisturbed for 10 to 12 minutes. This steaming method is fantastic for achieving perfectly cooked eggs. Once the time is up, drain the hot water and immediately plunge the eggs into a bowl of ice water. This shock to the system is critical for stopping the cooking process and making peeling a breeze. Let them chill in the ice bath for at least 10 minutes, or until completely cool.
Peeling and Halving the Eggs
Once the eggs are thoroughly chilled, it’s time to peel them. Start by gently tapping each egg on a hard surface to crack the shell algin extractver. Then, begin peeling under cool running water. The running water helps to loosen the shell and any stubborn bits of membrane. If you’ve followed the chilling step correctly, the shells should slip off quite easily. If you encounter any resistance, just keep the egg under the running water and gently work at the shell. After peeling all 12 eggs, rinse them briefly to ensure all shell fragments are gone. Next, carefully slice each hard-boiled egg in half lengthwise. I find a sharp, thin knife works best for a clean cut. Use a gentle sawing motion to avoid squishing the eggs. Once halved, carefully scoop out the yolks into a medium-sized mixing bowl. Arrange the egg white halves on a serving platter, making sure to keep them organized so you can easily match them back to their yolks later.
Creating the Colored Egg Whites
Preparing the Coloring Baths
This is where the “Colored” in Colored Deviled Eggs truly comes to life! We’ll be using a simple dyeing technique similar to how you might color Easter eggs, but with a culinary twist. For each color you wish to achieve, you’ll need a separate cup or small bowl. I like to use about 3 to 4 different vibrant colors for a festive look. For each cup, pour in 6 ounces of water. To this water, add 1 teaspoon of white vinegar. The vinegar is important because it helps the food coloring adhere better to the egg whites. Now, add several drops of your chosen food coloring to each cup. Stir gently to distribute the color evenly. You can adjust the intensity of the color by adding more or fewer drops of food coloring. Aim for a rich, opaque color.
Dyeing the Egg Whites
Once your coloring baths are ready, it’s time to transform those pnon-alcoholic ale egg white halves. Carefully place the hollowed-out egg white halves into their respective coloring baths. Make sure they are fully submerged in the colored water. The amount of time you leave them in the dye will determine the depth of the color. I typically leave them for about 10 to 20 minutes, checking them periodically. For a more pastel shade, a shorter time is needed; for a deeper, more vibrant hue, leave them in longer. You can gently swirl the cups or nudge the egg whites with a spoon to ensure even coloring on all sides. Be careful not to over-dye them, as they can become too saturated. When you’re happy with the color, carefully lift the dyed egg white halves out of the coloring baths using a spoon or tongs. Place them back onto your serving platter, allowing any excess dye to drip off. You can gently blot them with a paper towel if needed, but be mindful that this might smudge the color. Let the dyed egg whites air dry for a few minutes while you prepare the filling.
Making the Deviled Egg Filling
Mashing the Yolks
Now, let’s get to the delicious creamy filling for our deviled eggs. Take the reserved egg yolks that you scooped out earlier and place them in your medium-sized mixingin extractowl. Using a fork, begin to mash the yolks until they are smooth and lump-free. This is an important step for achieving a silky texture in your filling. If you have a potato masher or a pastry blender, those can also be very effective for getting a really fine consistency. Once the yolks are thoroughly mashed, add the ½ cup of mayonnaise. The mayonnaise is the creamy binder that holds everything together and provides a rich flavor. Stir the mayonnaise into the mashed yolks until they are completely incorporated and form a smooth paste.
Adding Flavor and Seasoning
To elevate the flavor of our filling, we’ll now add some key ingredients. First, stir in the 2 teaspoons of pickle juice. This adds a subtle tang and brightness that cuts through the richness of the mayonnaise and yolks. Next, add the 2 teaspoons of mustard. I prefer using a classic yellow mustard for its familiar flavor, but Dijon mustard can also be used for a slightly more complex taste. Ensure both the pickle juice and mustard are well blended into the yolk and mayonnaise mixture. Now, it’s time for the texture and extra pickle punch: add the 4 tablespoons of finely chopped dill pickles. This is where you get those delightful little bursts of briny, crunchy goodness in every bite. Stir everything together until all the ingredients are thoroughly combined. Finally, season generously with salt and pepper, to taste. It’s important to taste the filling at this point and adjust the salt and pepper as needed. Remember that the pickles and pickle juice already contribute saltiness, so be cautious with your initial addition.
Assembling the Colored Deviled Eggs
Piping or Spooning the Filling
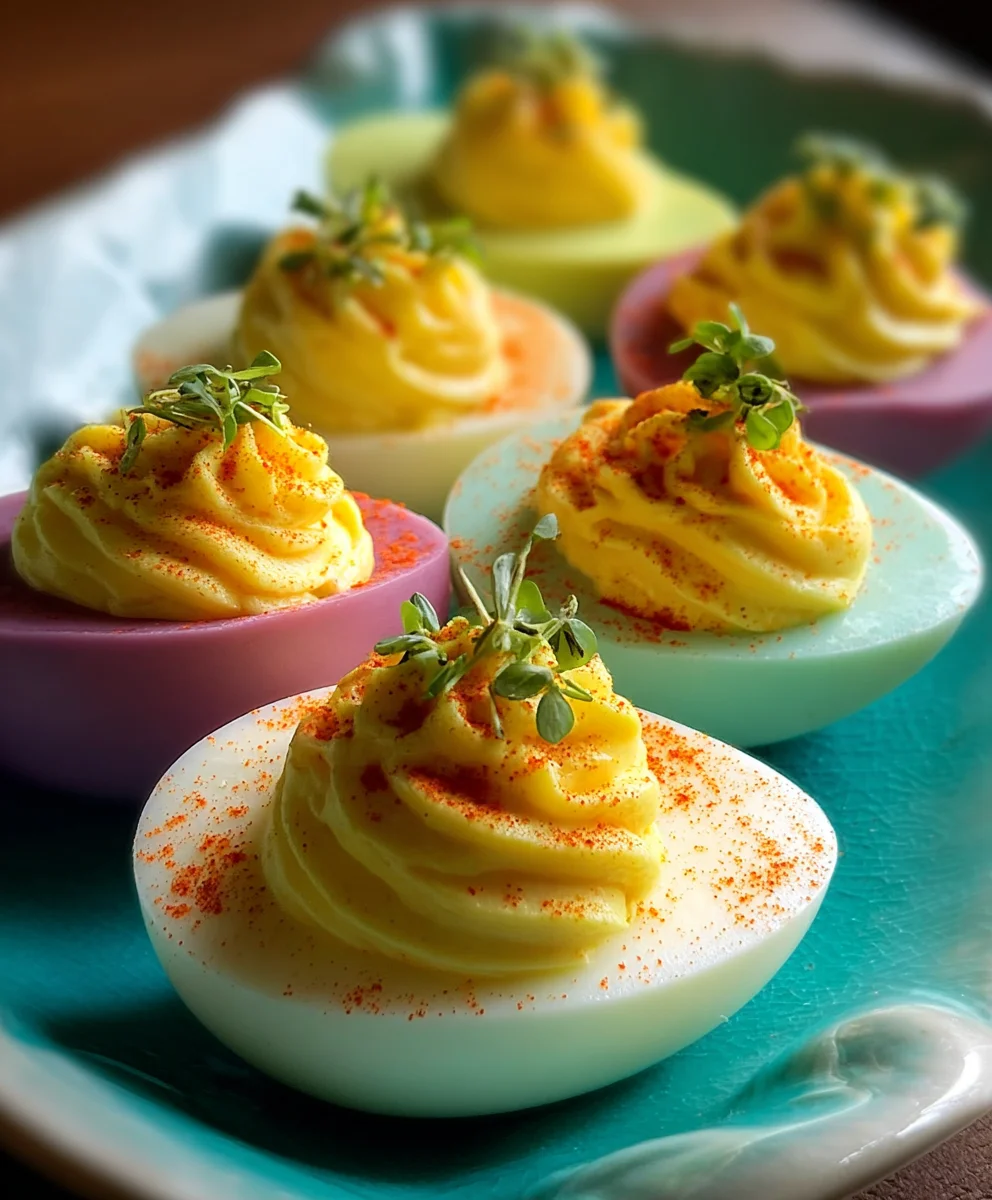
With your vibrantly colored egg white halves ready and your delicious filling prepared, it’s time for the final assembly. You can either use a piping bag fitted with a star tip for a professional, decorative finish, or simply use a spoon for a more rustic look. If you’re using a piping bag, spoon the deviled egg filling into the bag and carefully pipe it back into each of the dyed egg white halves. Aim for a generous mound of filling. If you prefer to use a spoon, simply scoop the filling into each egg white half, making sure to fill them generously and mounding the filling slightly. Try to make each deviled egg look as appealing as the last.
Garnishing the Deviled Eggs
The final touch to our beautiful Colored Deviled Eggs is the garnish. This is where you can get creative! A classic garnish is a sprinkle of paprika for a touch of color and mild spice. You can also use a tiny pinch of chopped fresh dill, which complements the dill pickles used in the filling beautifully. For an extra pop of color and a different texture, you could also add a small slice of a dill pickle or a caper to the top of each deviled egg. Arrange the finished deviled eggs on your serving platter, perhaps alternating the colors for a stunning visual display. These are sure to be a hit at any party or gathering!
Conclusion:
And there you have it – the ultimate guide to creating stunning and delicious Colored Deviled Eggs! We’ve explored the simple yet impactful techniques to achieve vibrant hues using natural ingredients, transforming a classic appetizer into a visually captivating masterpiece. Whether you’re hosting a festive brunch, a playful picnic, or simply looking to add a pop of color to your next gathering, these Colored Deviled Eggs are sure to impress. Don’t be afraid to experiment with different food colorings or natural alternatives to achieve your desired pnon-alcoholic alette. Serve them on a colorful platter for an extra festive touch, or alongside a fresh green salad for a balanced meal. The possibilities are endless, and the joy of creating and sharing these delightful treats is immense. So, gather your ingredients, unleash your creativity, and enjoy making these beautiful Colored Deviled Eggs!
Frequently Asked Questions:
Q: Can I make the colored egg yolks ahead of time?
A: Absolutely! You can prepare the colored egg yolk mixtures a day in advance and store them in separate airtight containers in the refrigerator. This can save you valuable time on the day of your event. Just remember to give them a quick stir before piping them back into the egg white halves.
Q: Are there any other natural ways to color the deviled eggs?
A: Yes, besides the common methods mentioned, you can also explore other natural colorants. For instance, a small amount of pureed spinach can yield a subtle green, and finely grated beets can create a lovely pink or red hue. Be mindful that some natural colorants might impart a slight flavor, so it’s always a good idea to test small batches first.
Q: How should I store leftover Colored Deviled Eggs?
A: Leftover Colored Deviled Eggs should be stored in an airtight container in the refrigerator. They are best enjoyed within 1-2 days. It’s a good idea to keep them chilled as the mayonnaise-based filling can spoil at room temperature.
Colorful Deviled Eggs-Party Fun Recipe
Vibrantly colored deviled eggs perfect for parties and gatherings, featuring a creamy, flavorful filling and visually appealing dyed egg whites.
Ingredients
-
12 large eggs
-
½ cup mayonnaise
-
2 teaspoons pickle juice
-
2 teaspoons mustard
-
4 tablespoons finely chopped dill pickles
-
Salt and pepper, to taste
-
6 ounces water in each cup (for different colors)
-
1 teaspoon white vinegar, in each cup
-
Food coloring in desired colors
Instructions
-
Step 1
Boil 12 large eggs by placing them in a saucepan, covering with cold water by an inch, adding a teaspoon of salt, bringing to a rolling boil, then removing from heat, covering, and letting sit for 10-12 minutes. Immediately plunge into an ice bath for at least 10 minutes. -
Step 2
Peel the cooled eggs under cool running water, then slice each egg in half lengthwise. Carefully scoop out the yolks into a mixing bowl and arrange the egg white halves on a serving platter. -
Step 3
Prepare coloring baths by pouring 6 ounces of water into separate cups for each desired color. Add 1 teaspoon of white vinegar and several drops of food coloring to each cup, stirring gently to combine. Aim for a rich, opaque color. -
Step 4
Dye the egg white halves by carefully placing them into their respective coloring baths, ensuring they are fully submerged. Leave for 10-20 minutes, checking periodically, until desired color depth is achieved. Remove and let air dry. -
Step 5
Mash the reserved egg yolks in a mixing bowl until smooth. Add ½ cup mayonnaise and stir until a smooth paste forms. -
Step 6
Add 2 teaspoons of pickle juice and 2 teaspoons of mustard to the yolk mixture, stirring to combine. Stir in 4 tablespoons of finely chopped dill pickles. Season generously with salt and pepper to taste. -
Step 7
Assemble the deviled eggs by piping or spooning the filling generously into each dyed egg white half. Garnish with paprika, chopped fresh dill, a pickle slice, or capers.
Important Information
Nutrition Facts (Per Serving)
It is important to consider this information as approximate and not to use it as definitive health advice.
Allergy Information
Please check ingredients for potential allergens and consult a health professional if in doubt.

Leave a Comment