
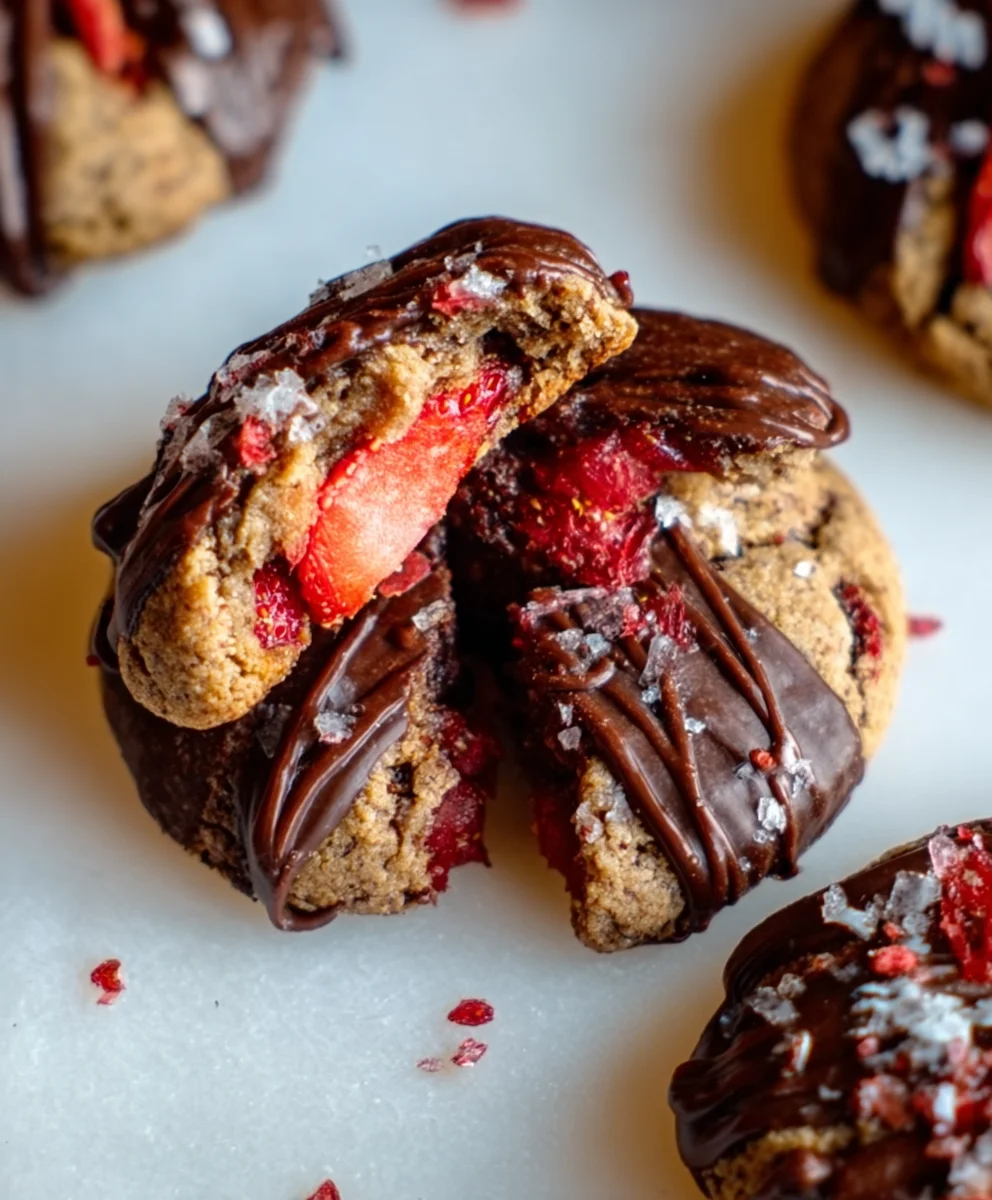
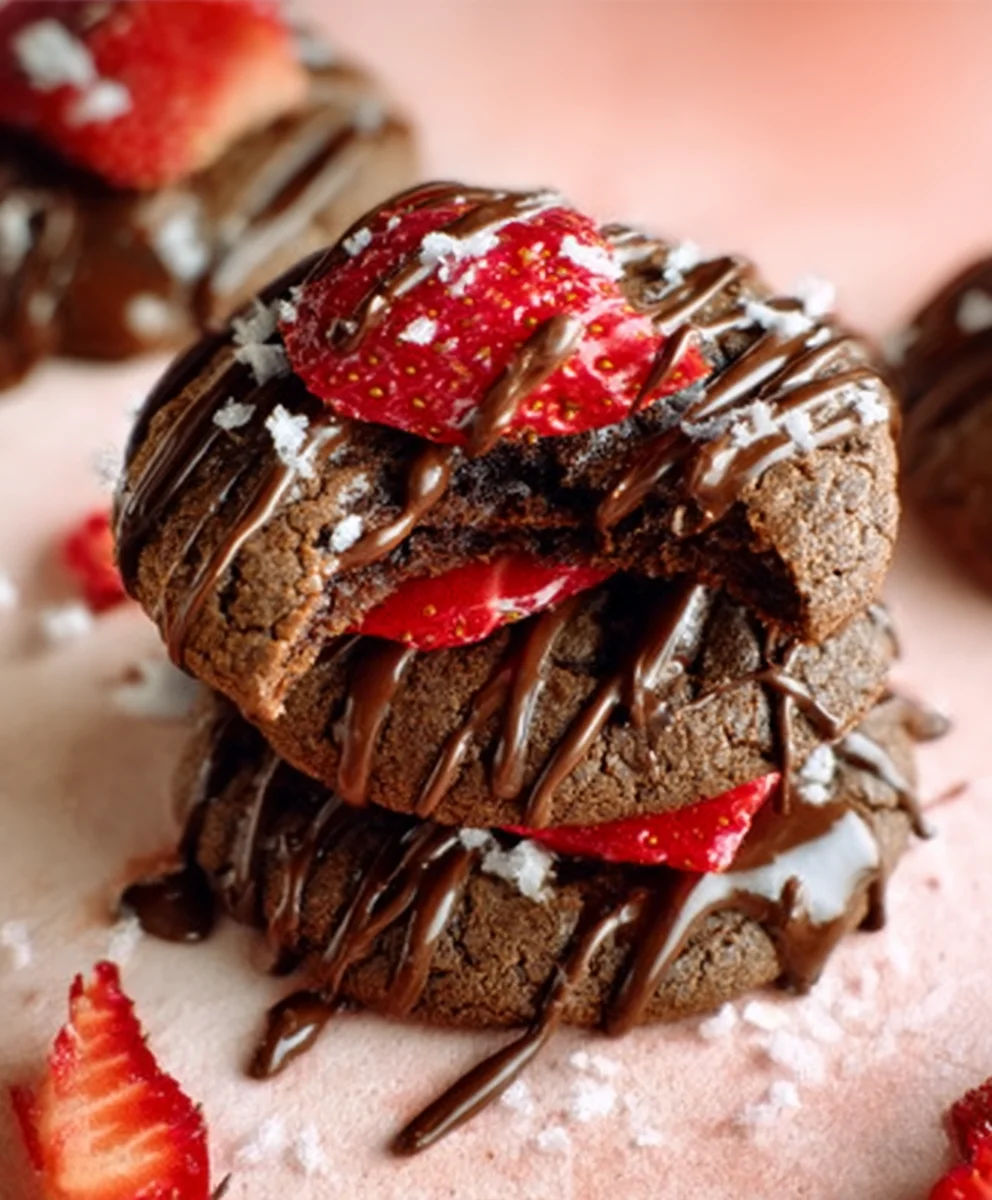
Chocolate Covered Strawberry Cookies are more than just a treat; they’re a delightful symphony of flavors and textures that capture the very essence of indulgence. Imagin extracte biting into a soft, chewy cookie, its rich chocolate base infused with the sweet, slightly tart essence of ripe strawberries, all then enrobed in a smooth, decadent layer of chocolate. It’s no wonder these beauties are a perennial favorite, particularly when those luscious strawberries are in season. What sets these Chocolate Covered Strawberry Cookies apart from the ordinary is the ingenious way we’ve managed to bake the taste of the classic dessert directly into the cookie itself, creating an explosion of flavor with every bite, followed by that irresistible chocolate shell. This recipe is designed to be surprisingly approachable, yet yields a result so sophisticated and delicious, you’ll be the hero of any bake snon-alcoholic ale or gathering.

Ingredients:
- 1 box (16.25 oz) Strawberry cake mix
- 1/3 cup vegetable oil
- 1 teaspoon vanilla extract
- 2 large eggs
- 1 cup chocolate chips (or your favorite chocolate candy melts, for dipping)
- Optional: Sprinkles, for decorating
Mixing the Cookie Dough
Step 1: Combine the Dry and Wet Ingredients
The foundation of these delightful Chocolate Covered Strawberry Cookies starts with a box of strawberry cake mix. This is where the magic happens, providing that distinct fruity flavor and vibrant pink hue without requiring any fresh strawberries or complicated purees. In a large mixing bowl, dump the entire contents of the strawberry cake mix. Next, add the wet ingredients. Pour in the 1/3 cup of vegetable oil, which will act as our fat, contributing to the tenderness and moisture of the cookies. Follow this with the 1 teaspoon of vanilla extract. Vanilla is a classic pairing with strawberry and chocolate, enhancing both flavors and adding a warm, comforting aroma to our baking process. Finally, crack in the 2 large eggs. These are crucial for binding the ingredients together, providing structure, and enriching the dough.
Step 2: Mixing Until Just Combined
Now, it’s time to bring everything together. Using a sturdy spoon or a rubber spatula, begin extract to mix the ingredients. You’ll notice the dry cake mix will start to absorb the wet components. Continue mixing until you have a thick, dough-like consistency. It’s important here to avoid overmixing. Overmixing can develop the gluten in the cake mix too much, potentially leading to tougher cookies. You want to mix just until there are no dry streaks of cake mix remaining and everything is incorporated into a cohesive dough. The dough will be quite soft and sticky at this stage, which is perfectly normal. If it feels excessively sticky and difficult to handle, you can cover the bowl and refrigerate it for about 15-20 minutes to make it a bit firmer and easier to work with.
Forming and Baking the Cookies
Step 3: Shaping the Cookies and Preparing for Baking
Once your dough is ready, it’s time to shape these little gems. You can use a cookie scoop for uniform size, or simply roll the dough into small balls. I find that rolling them into about 1-inch diameter balls works wonderfully. As you place them on your baking sheet, remember to leave some space between them, about 2 inches apart, as they will spread slightly during baking. Line your baking sheets with parchment paper for easy cleanup and to prevent sticking. This step is also a good time to preheat your oven. For these cookies, a temperature of 350°F (175°C) is ideal. Ensure your oven is fully preheated before you place the baking sheets inside. This consistency in temperature is key to even baking and achieving that perfect cookie texture.
Step 4: Baking to Golden Perfection
Carefully place your prepared baking sheets into the preheated oven. Now comes the waiting game, but not for too long! Bake the cookies for approximately 9 to 11 minutes. The exact time will depend on your oven and the size of your cookies. You’re looking for the edges of the cookies to be lightly golden brown, and the centers to appear set but not overly dry. They might still look a little soft in the middle when you take them out, and that’s perfectly okay. The residual heat will continue to cook them slightly as they cool on the baking sheet. Once they are baked to your liking, remove the baking sheets from the oven and let the cookies cool on the sheets for about 5 minutes. This allows them to firm up enough to be moved without falling apart.
Adding the Chocolatey Finish
Step 5: Melting the Chocolate and Coating the Cookies
This is where our Chocolate Covered Strawberry Cookies truly come to life! While the cookies are cooling on the baking sheet, it’s time to prepare your chocolate coating. If you’re using chocolate chips, you’ll want to melt them. The easiest way to do this is in the microwave. Place the chocolate chips in a microwave-safe bowl and heat in 30-second intervals, stirring well after each interval, until the chocolate is smooth and fully melted. Be patient and don’t overheat. Alternatively, you can use chocolate candy melts, which often melt more smoothly and set up more firmly. Once your chocolate is melted and smooth, take your slightly cooled cookies and dip half of each cookie into the melted chocolate. You can use a fork or a toothpick to help spread the chocolate evenly, or just let the excess drip off. For a cleaner look, you can scrape the excess chocolate against the side of the bowl. Place the chocolate-dipped cookies back onto the parchment-lined baking sheet to set.
Step 6: Decorating and Letting Them Set
As soon as you’ve dipped the cookies in chocolate, while the chocolate is still wet, is the perfect time to add your optional sprinkles. A light dusting of colorful sprinkles adds visual appeal and a fun texture. Get creative with your sprinkle patterns! Once decorated, you’ll need to let the chocolate set completely. This can take anywhere from 30 minutes to an hour at room temperature, or you can speed up the process by placing the baking sheet in the refrigerator for about 10-15 minutes. Ensure the chocolate is fully hardened before attempting to move or stack the cookies. This step is crucial to avgin extract smudging the beautiful chocolate coating. Once set, your Chocolate Covered Strawberry Cookies are ready to be enjoyed! They are a fantastic treat for parties, a sweet ending to a meal, or simply a delightful indulgence any time.
Conclusion:
There you have it – a foolproof guide to creating delightful Chocolate Covered Strawberry Cookies! These cookies are more than just a treat; they’re a celebration of sweet and fruity indulgence, perfect for any occasion. We’ve walked through each step, from creaming the butter and sugar to gently folding in the fresh strawberry bits and rich chocolate chips. The result is a soft, chewy cookie with a burst of strawberry flavor and decadent chocolatey goodness in every bite. These Chocolate Covered Strawberry Cookies are sure to become a favorite in your baking repertoire.
For serving suggestions, imagin extracte these warm cookies alongside a glass of cold milk, or perhaps cooled and drizzled with a little extra melted chocolate. They also make a wonderful addition to a dessert platter or as a sweet accompaniment to your afternoon coffee or tea. Don’t be afraid to experiment with variations! You could add a touch of almond extract to the dough for a different nutty undertone, or perhaps swirl in some strawberry jam for an extra fruity punch. For a more intense chocolate experience, consider using dark chocolate chips. The possibilities are endless!
I truly hope you enjoy baking and devouring these incredible Chocolate Covered Strawberry Cookies as much as I do. They are a testament to how simple ingredients can come together to create something truly special. So, preheat your ovens, gather your loved ones, and let the bgin extractng begin!
Frequently Asked Questions:
Can I use frozen strawberries instead of fresh?
While fresh strawberries offer the best flavor and texture, you can use frozen strawberries. Ensure they are thoroughly thawed and patted dry to remove excess moisture, as too much water can affect the cookie’s consistency. You might want to reduce the baking time slightly if using frozen berries.
How should I store these cookies?
Once completely cooled, store your Chocolate Covered Strawberry Cookies in an airtight container at room temperature for up to 3-4 days. For longer storage, you can freeze the baked cookies in a single layer on a baking sheet until firm, then transfer them to a freezer-safe bag or container. They can be stored in the freezer for up to 2 months.
Chocolate Covered Strawberry Cookies
Decadent and easy-to-make cookies with a strawberry cake mix base, dipped in chocolate.
Ingredients
-
1 box (16.25 oz) Strawberry cake mix
-
1/3 cup vegetable oil
-
1 teaspoon vanilla extract
-
2 large eggs
-
1 cup chocolate chips
-
Chocolate candy melts (for dipping, optional)
-
Sprinkles (for decorating, optional)
Instructions
-
Step 1
In a large mixing bowl, combine the strawberry cake mix, vegetable oil, vanilla extract, and eggs. Mix until just combined, ensuring no dry streaks remain. The dough will be soft and sticky; refrigerate for 15-20 minutes if too difficult to handle. -
Step 2
Preheat your oven to 350°F (175°C). Line baking sheets with parchment paper. Roll the dough into 1-inch balls and place them about 2 inches apart on the prepared baking sheets. -
Step 3
Bake for 9 to 11 minutes, or until the edges are lightly golden brown and the centers are set. Let the cookies cool on the baking sheets for 5 minutes before transferring them to a wire rack to cool completely. -
Step 4
While the cookies cool, melt the chocolate chips or candy melts in a microwave-safe bowl in 30-second intervals, stirring until smooth. Alternatively, use a double boiler. -
Step 5
Dip half of each cooled cookie into the melted chocolate. Allow excess chocolate to drip off, and place the dipped cookies back onto the parchment-lined baking sheet. -
Step 6
While the chocolate is still wet, decorate with sprinkles if desired. Let the chocolate set completely at room temperature for 30-60 minutes, or in the refrigerator for 10-15 minutes.
Important Information
Nutrition Facts (Per Serving)
It is important to consider this information as approximate and not to use it as definitive health advice.
Allergy Information
Please check ingredients for potential allergens and consult a health professional if in doubt.

Leave a Comment