
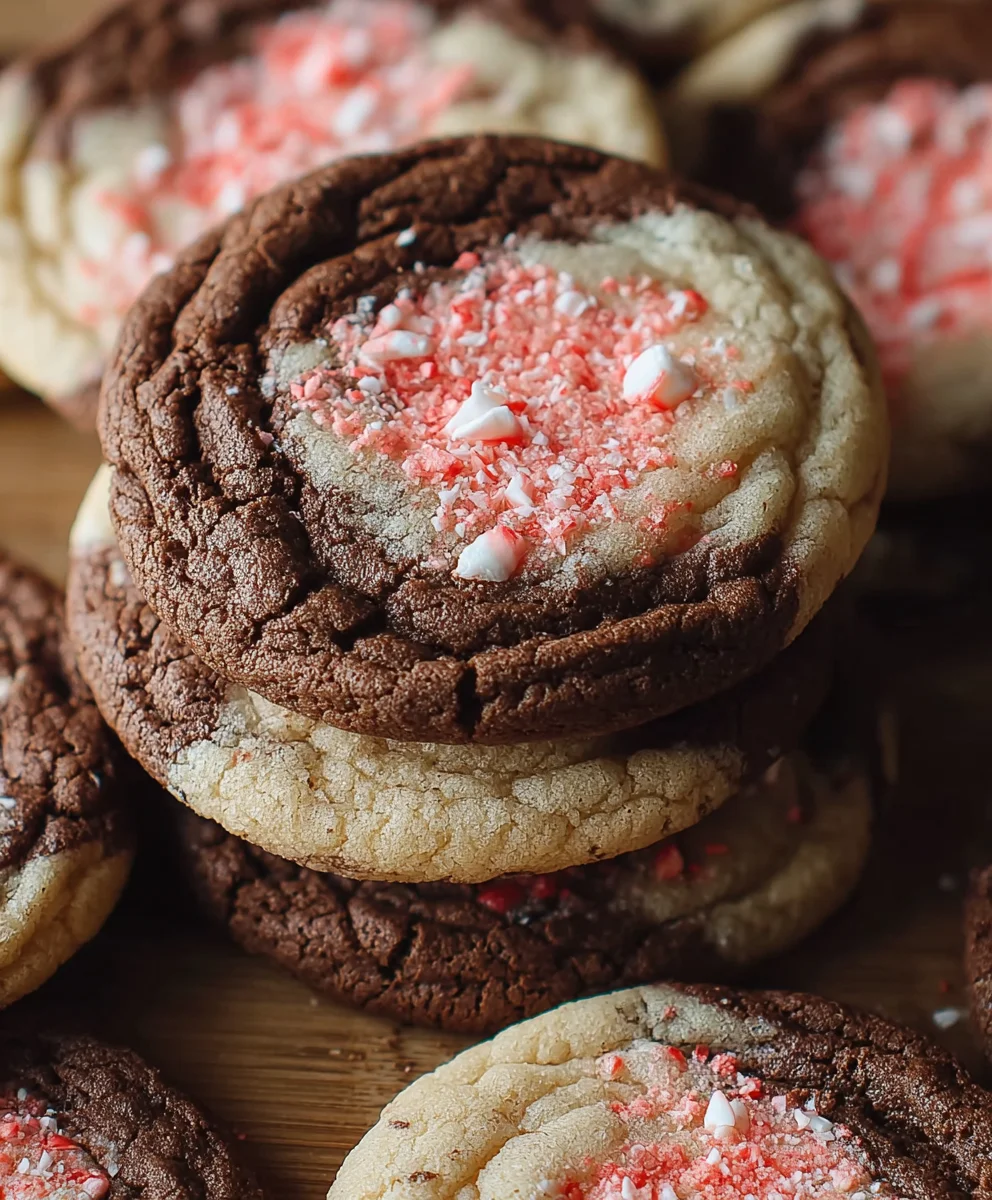
Peppermint Mocha Cookies are more than just a treat; they’re a miniature celebration in every bite, embodying the cozy magic of a crisp winter’s day paired with your favorite festive drink. Have you ever craved that perfect blend of rich chocolate and invigorating peppermint, all wrapped up in a soft, chewy cookie? That’s exactly what these delightful creations deliver. People absolutely adore them because they capture the essence of the beloved coffee shop beverage, transforming it into a wonderfully portable and shareable delight. What makes these Peppermint Mocha Cookies truly special is the masterful balance of flavors. We’re not just talking about a hint of mint or a whisper of coffee; we’re talking about a harmonious symphony that dances on your palate. Imagin extracte the deep, satisfying notes of dark chocolate mingling with the crisp, clean zest of peppermint, all coming together in a texture that’s both tender and slightly crisp at the edges. Get ready to bake up a batch of pure joy!

Ingredients:
- 1 cup (227g) unsalted butter, softened
- 1¼ cup (250g) granulated sugar, plus extra for rolling
- 1 large egg
- 1 teaspoon vanilla extract
- ½ teaspoon peppermint extract
- ½ teaspoon baking powder
- ½ teaspoon salt
- ¼ teaspoon baking soda
- 2¼ cups (280g) all-purpose flour
- ½ teaspoon instant coffee granules (dissolved in 1 teaspoon hot water)
- Pink gel food coloring
- 2 tablespoons unsweetened cocoa powder
Preparing the Cookie Dough
Creaming the Butter and Sugar
First, let’s get our base for these delicious Peppermint Mocha Cookies going. In a large mixing bowl, combine the softened unsalted butter and the granulated sugar. You want to cream these together until the mixture is light, fluffy, and pnon-alcoholic ale yellow. This process incorporates air into the dough, which is crucial for a tender cookie. I like to use an electric mixer for this, starting on low speed and gradually increasing to medium-high. It usually takes about 3-5 minutes. Scrape down the sides of the bowl a couple of times to ensure everything is evenly incorporated.
Adding Wet Ingredients
Once your butter and sugar are perfectly creamed, it’s time to add the wet ingredients. Crack in the large egg and add the vanilla extract and the potent peppermint extract. Beat again until everything is well combined and the mixture is smooth. This is where the signature flavors of our Peppermint Mocha Cookies start to really shine. Be sure to use a good quality peppermint extract for the best flavor.
Incorporating Dry Ingredients and Flavor Boosters
Now, in a separate medium bowl, whisk together the all-purpose flour, unsweetened cocoa powder, baking powder, salt, and baking soda. This ensures that all the leavening agents and dry flavorings are evenly distributed throughout the flour, preventing pockets of bitterness or uneven rising. In a small bowl, dissolve the instant coffee granules in 1 teaspoon of hot water. It will form a dark, concentrated liquid. Add this dissolved coffee mixture to the butter and egg mixture. Gradually add the dry ingredients to the wet ingredients, mixing on low speed until just combined. Be careful not to overmix the dough at this stage, as it can lead to tough cookies. You want just enough mixing for the flour to disappear.
Dividing and Coloring the Dough
Separating the Dough
We’re going to create a beautiful marbled effect for our Peppermint Mocha Cookies. Divide the cookie dough evenly into two portions. You can eyeball this, or for precision, weigh each portion. Place one portion into a clean bowl. The other portion will be the one we color.
Coloring the Second Portion
To the second portion of the dough, add a few drops of the pink gel food coloring. Gel food coloring is great because it’s concentrated and won’t add extra liquid to your dough, which could affect the texture. Start with a few drops and knead the dough gently with your hands or use your mixer on low speed until the color is evenly distributed. Continue adding drops of pink coloring until you achieve your desired shade of pink. Remember, the color will intensify slightly as the dough rests.
Shaping and Baking the Cookies
Marbling the Dough
Now for the fun part – creating the marbled effect! Take small portions of both the plain dough and the pink dough and gently press them together. Twist, fold, and press the two colors together just a few times. You want to create swirls and streaks, not a uniform blend. Over-kneading will just turn everything into one muddy color. Think of it like swirling two colors of paint together.
Forming and Rolling the Cookies
Once you have your beautifully marbled dough, take about 1 tablespoon of dough and roll it into a smooth ball. Roll each ball generously in the extra granulated sugar you set aside. This sugar coating not only adds a pleasant crunch but also gives the cookies a lovely sparkly finish. Place the sugar-coated balls about 2 inches apart on a baking sheet lined with parchment paper. Parchment paper is essential for easy cleanup and to prevent sticking.
Baking to Perfection
Preheat your oven to 350°F (175°C). Bake the cookies for 10-12 minutes, or until the edges are lightly golden brown and the centers are still slightly soft. They will continue to set as they cool on the baking sheet. Resist the urge to overbake; a slightly underbaked cookie is often more tender and chewy. Let the cookies cool on the baking sheet for 5 minutes before carefully transferring them to a wire rack to cool completely. This allows them to firm up without breaking. Enjoy these festive Peppermint Mocha Cookies!
Conclusion:
And there you have it – the ultimate guide to creating delicious Peppermint Mocha Cookies right in your own kitchen! We’ve walked through each step, from creaming the butter and sugar to that final festive touch of peppermint. These cookies are a perfect blend of rich chocolate and invigorating peppermint, making them an ideal treat for the holiday season or any time you crave a little something special. They’re wonderfully versatile, too, so don’t be afraid to experiment!
Serve these Peppermint Mocha Cookies warm with a glass of cold milk, alongside a steaming mug of coffee, or as the star of your dessert table. They also make fantastic edible gifts, beautifully packaged in cellophane bags tied with festive ribbon.
Frequently Asked Questions:
Can I make the dough ahead of time?
Absolutely! The dough for Peppermint Mocha Cookies can be made up to 2 days in advance and stored, tightly wrapped, in the refrigerator. Allow it to soften slightly at room temperature for about 15-20 minutes before scooping and baking.
How can I store these cookies?
Once cooled, Peppermint Mocha Cookies can be stored in an airtight container at room temperature for up to 5 days. For longer storage, you can freeze the baked cookies for up to 3 months. Simply place them in a freezer-safe bag or container.
Are there any variations I can try?
Definitely! For a white chocolate twist, try adding white chocolate chips along with or instead of the semi-sweet. You can also swap the peppermint extract for a hint of almond extract for a different flavor profile. For an extra festive look, drizzle with melted white chocolate and sprinkle with crushed candy canes before serving.
We encourage you to get creative and make these Peppermint Mocha Cookies your own. Enjoy the baking process and, most importantly, savor every delightful bite!
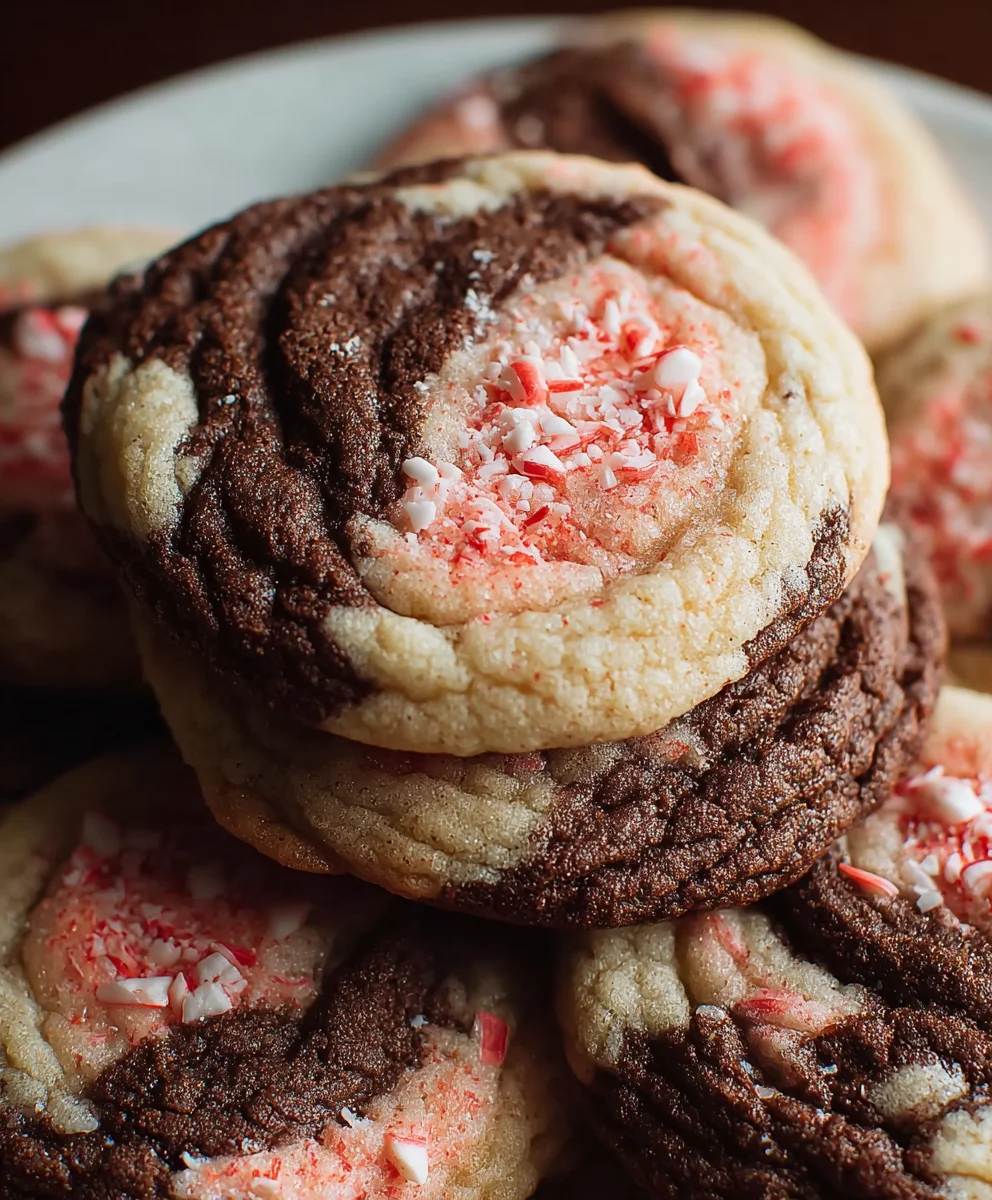
Peppermint Mocha Cookies
Irresistible holiday cookies with a festive peppermint mocha flavor and a beautiful marbled design.
Ingredients
-
1 cup (227g) unsalted butter, softened
-
1¼ cup (250g) granulated sugar, plus extra for rolling
-
1 large egg
-
1 teaspoon vanilla extract
-
½ teaspoon peppermint extract
-
½ teaspoon baking powder
-
½ teaspoon salt
-
¼ teaspoon baking soda
-
2¼ cups (280g) all-purpose flour
-
½ teaspoon instant coffee granules dissolved in 1 teaspoon hot water
-
Pink gel food coloring
-
2 tablespoons unsweetened cocoa powder
Instructions
-
Step 1
Cream together softened unsalted butter and granulated sugar until light and fluffy. -
Step 2
Beat in the large egg, vanilla extract, and peppermint extract until well combined. -
Step 3
In a separate bowl, whisk together flour, cocoa powder, baking powder, salt, and baking soda. Dissolve coffee granules in hot water and add to the butter mixture. Gradually add the dry ingredients to the wet ingredients, mixing until just combined. -
Step 4
Divide the dough evenly into two portions. Add pink gel food coloring to one portion and knead until the desired shade of pink is achieved. -
Step 5
Take small portions of both dough colors and gently press, twist, and fold them together to create a marbled effect. -
Step 6
Roll about 1 tablespoon of marbled dough into a ball and coat generously in granulated sugar. Place 2 inches apart on a parchment-lined baking sheet. -
Step 7
Bake at 350°F (175°C) for 10-12 minutes, or until edges are lightly golden brown and centers are slightly soft. Cool on the baking sheet for 5 minutes before transferring to a wire rack to cool completely.
Important Information
Nutrition Facts (Per Serving)
It is important to consider this information as approximate and not to use it as definitive health advice.
Allergy Information
Please check ingredients for potential allergens and consult a health professional if in doubt.

Leave a Comment