
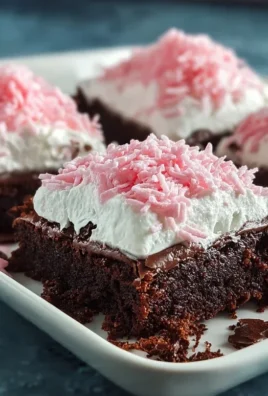
Bubblegum Ice Cream isn’t just a flavor; it’s a vibrant portal back to carefree summer days and childhood dreams. Remember that unmistakable sweet, slightly fruity, and undeniably fun taste that always brought a smile to your face? That’s the magic we’re capturing today with this incredibly easy Bubblegum Ice Cream recipe. It’s more than just delicious; it’s an experience that evokes pure joy and nostalgia. What makes this Bubblegum Ice Cream truly special is its playful pink hue and its ability to transport you instantly to a carnival or a candy store. Forget complicated techniques; we’re going to whip up a batch of this iconic dessert right in your own kitchen, creating a treat that’s as delightful to look at as it is to devour. Get ready to unleash your inner child and savor every spoonful of this delightful creation.

Bubblegum Ice Cream: A Nostalgic Treat for Everyone!
Get ready to unleash your inner child with this delightful Bubblegum Ice Cream recipe. It’s a vibrant, sweet, and wonderfully nostalgic flavor that brings back memories of sunny days and carefree afternoons. Forget the store-bought versions; making your own bubblegum ice cream is surprisingly easy and incredibly rewarding. The vibrant pink hue, the sweet bubblegum essence, and the fun confetti sprinkles make this a guaranteed hit for birthdays, parties, or just a special treat to brighten any day. So, let’s dive in and create some homemade happiness!
Ingredients:
Crafting the Ice Cream Base
The foundation of any great ice cream lies in its base, and ours is a simple yet effective blend that ensures a creamy, rich texture. We’ll start by gently heating our dairy components to help the sugar dissolve completely and to bloom the flavors. This step is crucial for achieving that smooth consistency we all love in homemade ice cream.
Churning the Magic
Once our base is chilled, it’s time for the magic of churning! This is where the air is incorporated into the mixture, transforming it from a liquid into that glorious frozen delight. If you have an ice cream maker, this step is straightforward. If not, don’t worry! There are still ways to achieve a fantastic result with a little patience and a freezer.
Adding the Fun Elements
The true character of our bubblegum ice cream comes from the star ingredients: the bubblegum flavoring and the festive sprinkles. We want to ensure these are incorporated at the right time to maintain their texture and vibrant appearance.
Detailed Instructions:
1. Prepare the Base: In a medium saucepan, combine the whole milk, granulated sugar, and kosher salt. Whisk gently over medium heat until the sugar is completely dissolved. Do not boil the mixture; we are just warming it to help the sugar dissolve. Once dissolved, remove the saucepan from the heat.
2. Infuse the Flavors and Color: Stir in the heavy cream, bubblegum flavoring, and vanilla extract into the warm milk mixture. Now comes the fun part: adding the food coloring. Start with a few drops of pink or red food coloring and stir well. Continue adding color, a drop at a time, until you achieve your desired shade of vibrant bubblegum pink. Remember that the color will lighten slightly once the ice cream is frozen, so aim for a slightly more intense hue than you think you’ll need. Let this base mixture cool for about 15-30 minutes at room temperature, then cover it and refrigerate for at least 2-4 hours, or preferably overnight. Chilling the base thoroughly is essential for optimal churning.
3. Churn the Ice Cream: Once your base is thoroughly chilled, pour it into your ice cream maker and churn according to the manufacturer’s instructions. This typically takes about 20-30 minutes. The mixture should thicken and reach a soft-serve consistency. If you don’t have an ice cream maker, you can pour the chilled base into a freezer-safe container. Freeze for 30-45 minutes, then remove and vigorously whisk or beat with an electric mixer to break up ice crystals. Repeat this process every 30-45 minutes for 3-4 hours, or until the ice cream is firm but scoopable. This manual churning is labor-intensive but yields a creamy result.
4. Add the Sprinkles: During the last 5 minutes of churning (or during your last manual whisking session), add approximately ¾ of the confetti sprinkles to the ice cream. This allows the sprinkles to distribute evenly throughout the ice cream without becoming too mushy. Reserve the remaining ¼ cup of sprinkles for layering and topping.
5. Freeze to Perfection and Decorate: Transfer the churned ice cream to a freezer-safe container. If you like, you can create layers of ice cream and the remaining confetti sprinkles, gently swirling them together with a spoon. Cover the container tightly and freeze for at least 4-6 hours, or until firm enough to scoop. For the ultimate presentation, press whole gumballs into the top of the ice cream before the final freeze, or simply have them ready for serving as a fun garnish. Let the ice cream sit at room temperature for a few minutes before scooping to make it easier to serve. Enjoy this wonderfully fun and flavorful bubblegum ice cream!
Conclusion:
And there you have it! This bubblegum ice cream recipe is a delightful journey back to childhood, offering a vibrant color and a uniquely nostalgic flavor that’s surprisingly easy to achieve right in your own kitchen. Its creamy texture and sweet, familiar taste make it a guaranteed hit for kids and adults alike. Imagin extracte the joy on your little ones’ faces when they see this fun, pink concoction! It’s perfect for birthday parties, summer gatherings, or simply as a special treat to brighten any day.
We love serving this bubblegum ice cream in classic waffle cones, piled high and perhaps with a sprinkle of rainbow jimmies for an extra festive touch. It also pairs wonderfully with simple sugar cookies or as a topping for brownies. Don’t be afraid to get creative with variations! You could try adding mini marshmallows for a textural surprise or a swirl of strawberry puree for a fruity kick. Whatever you choose, I wholeheartedly encourage you to give this recipe a try. It’s a simple pleasure that brings a big dose of fun!
Frequently Asked Questions:
Can I use regular bubblegum flavor extract?
Absolutely! While some recipes use actual bubblegum, using a good quality bubblegum flavored extract is often more reliable for achieving that distinct taste and is much simpler. Start with a small amount and taste as you go, as the intensity can vary between brands.
What if I don’t have an ice cream maker?
No worries! You can still make delicious no-churn bubblegum ice cream. Once your base is prepared and chilled, pour it into a freezer-safe container and freeze. Every 30-45 minutes for the first 3-4 hours, remove the container and vigorously stir or whisk the mixture to break up ice crystals and incorporate air, mimicking the churned texture.
Bubblegum Ice Cream
A fun and colorful homemade ice cream flavored like classic bubblegum, loaded with confetti sprinkles.
Ingredients
-
2 cups heavy cream
-
1 cup whole milk
-
¾ cup granulated sugar
-
2 teaspoons bubblegum flavoring
-
1 teaspoon vanilla extract
-
¼ teaspoon kosher salt
-
Pink or red food coloring (to taste)
-
½ cup confetti sprinkles, divided
-
1 cup gumballs (for decoration)
Instructions
-
Step 1
In a large bowl, whisk together the heavy cream, whole milk, granulated sugar, bubblegum flavoring, vanilla extract, and kosher salt until the sugar is dissolved. -
Step 2
Add pink or red food coloring, a drop at a time, until your desired bubblegum pink color is achieved. Stir well. -
Step 3
Stir in ¼ cup of the confetti sprinkles. Save the remaining ¼ cup for later. -
Step 4
Pour the mixture into an ice cream maker and churn according to the manufacturer’s instructions. -
Step 5
During the last few minutes of churning, add the remaining ¼ cup of confetti sprinkles. -
Step 6
Transfer the ice cream to an airtight container. Press plastic wrap directly onto the surface to prevent ice crystals. Freeze for at least 4 hours, or until firm. -
Step 7
Before serving, decorate with gumballs.
Important Information
Nutrition Facts (Per Serving)
It is important to consider this information as approximate and not to use it as definitive health advice.
Allergy Information
Please check ingredients for potential allergens and consult a health professional if in doubt.
Leave a Comment