
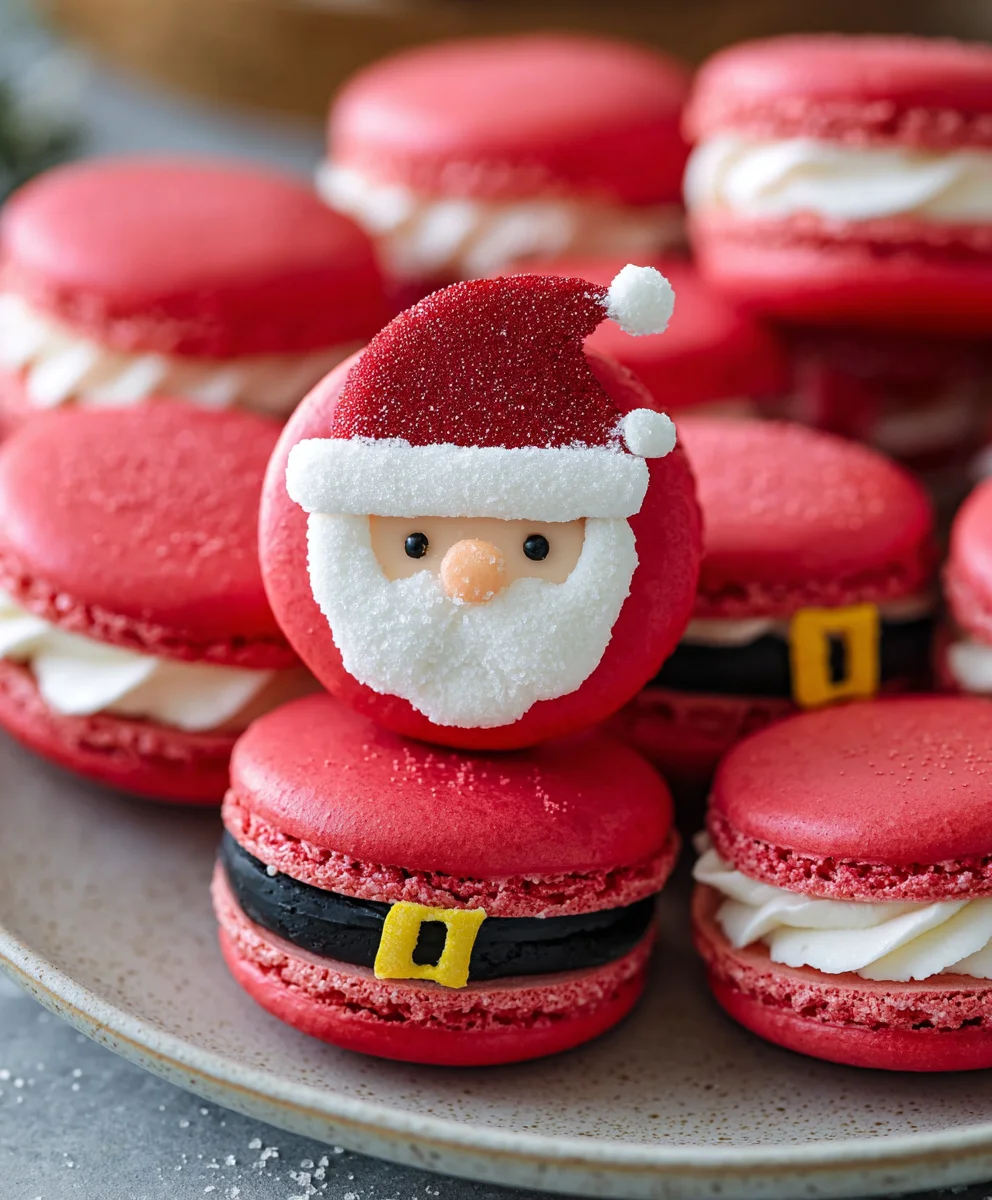
Santa Claus Macarons are more than just a festive treat; they’re a miniature explosion of joy and holiday spirit! Who can resist their charming red and white swirl, perfectly mimicking the jolly man himself? These delicate almond cookies, with their crisp shells and chewy centers, have become a beloved icon of the Christmas season, bringing smiles to faces young and old. What truly makes these Santa Claus Macarons so special is the delightful combination of textures and subtle flavors, often featuring a creamy vanilla or a zesty raspberry filling that perfectly complements the almond base. Imagine biting into one, the satisfying crunch giving way to a luscious, sweet center – it’s a little piece of edible magic that captures the essence of holiday cheer in every bite. Get ready to whip up your own batch and spread some delicious merriment!

Ingredients:
- 100 grams Domino® Golden Sugar (for meringue)
- 4 grams egg white powder (optional, for stabilizing meringue)
- 100 grams egg whites (aged, at room temperature)
- 105 grams almond flour (finely ground)
- 105 grams Domino® Powdered Sugar (for macaron shells)
- 1 1/2 cups Domino® Powdered Sugar (187 grams) (for buttercream frosting)
- 1 tbsp meringue powder (for buttercream frosting)
- 4 tbsp water (for buttercream frosting)
- 2 drops black gel food coloring (for decorating)
- 1 drop yellow gel food coloring (for decorating)
- 1/2 cup all-purpose flour (63 grams) (for buttercream)
- 1/2 cup unsalted butter (113 grams) (softened, for buttercream)
- 1/4 cup Domino® Golden Sugar (50 grams) (for buttercream)
- 1 1/4 cup Domino® Powdered Sugar (156 grams) (for buttercream)
- 1 tsp vanilla extract (for buttercream)
Preparing the Macaron Shells
Step 1: Create the Meringue Base
Begin by preparing your meringue for the macaron shells. In a clean, dry bowl of a stand mixer (ensure there’s no trace of grease, as this can prevent the egg whites from whipping properly), combine the 100 grams of egg whites with the optional 4 grams of egg white powder if you’re using it. Egg white powder, or a stabilizer like cream of tartar, can help create a more stable meringue, leading to fewer cracked shells. Start whipping the egg whites on a low speed until they become foamy. Gradually increase the speed to medium-high and slowly add the 100 grams of Domino® Golden Sugar, a tablespoon at a time, while the mixer is running. Continue to whip until stiff, glossy peaks form. This means when you lift the whisk attachment, the meringue stands up straight without flopping over. The sugar should be completely dissolved. You can test this by rubbing a small amount of the meringue between your fingertips; if you feel any grittiness, continue whipping.
Step 2: Make the Dry Ingredient Mixture (Tant Pour Tant)**
While the meringue is whipping, prepare your dry ingredients. In a separate bowl, sift together the 105 grams of almond flour and the 105 grams of Domino® Powdered Sugar. Sifting is crucial for smooth macaron shells. If your almond flour is not finely ground, you might want to pulse it briefly in a food processor with the powdered sugar before sifting to ensure a very fine texture. Discard any large almond pieces left in the sieve. This 1:1 ratio of almond flour to powdered sugar is known as “tant pour tant” in the macaron world and is the foundation for the perfect macaron batter.
Step 3: Macaronage – Folding the Batter
Now comes the delicate art of macaronage. Add about half of the sifted dry ingredient mixture to the whipped meringue. Using a rubber spatula, gently fold the dry ingredients into the meringue. You want to incorporate the dry ingredients without deflating the meringue too much. Use a motion that scrapes down the sides of the bowl and then folds the batter over itself, as if you’re drawing a “J” shape. Once that’s mostly incorporated, add the remaining dry ingredients and continue folding. The batter is ready when it reaches a “lava-like” consistency. This means when you lift the spatula, the batter should flow off in a thick ribbon that slowly settles and melds back into the rest of the batter within about 20-30 seconds. Be careful not to overmix, which will result in flat, spread-out shells.
Step 4: Piping and Resting the Shells
Transfer the macaron batter to a piping bag fitted with a round tip (about 1/2 inch or 1.5 cm). Line baking sheets with parchment paper or silicone baking mats. Pipe small, uniform circles of batter onto the prepared baking sheets, holding the piping bag perpendicular to the surface. Leave about an inch of space between each macaron. Once piped, firmly tap the baking sheets on your countertop several times. This helps to release any air bubbles trapped in the batter and encourages the macarons to spread into nice, flat discs. After tapping, let the piped macarons rest at room temperature for at least 30-60 minutes, or until a skin forms on the surface. You should be able to gently touch a macaron without any batter sticking to your finger. This skin is essential for the “feet” to develop during baking.
Step 5: Baking the Macaron Shells
Preheat your oven to 300°F (150°C). Bake the macarons for 12-15 minutes, rotating the baking sheets halfway through. The macarons are done when they have developed distinct “feet” (the ruffled edge at the bottom) and the shells no longer wobble when you gently try to move them. They should lift cleanly off the parchment paper. Once baked, let them cool completely on the baking sheets before attempting to remove them. This cooling period is critical to prevent breakage.
Crafting the Santa’s Hat Buttercream
Step 6: Preparing the Buttercream Base
While the macaron shells are cooling, let’s make the delicious buttercream filling. In a medium saucepan, whisk together the 1/2 cup all-purpose flour and 1/4 cup Domino® Golden Sugar. Gradually whisk in the 4 tbsp water until smooth. Place the saucepan over medium heat and cook, stirring constantly, until the mixture thickens into a pudding-like consistency. This will take about 5-7 minutes. Once thickened, remove from heat and stir in the 1 tsp vanilla extract. Transfer this mixture to a bowl and cover it with plastic wrap, pressing the wrap directly onto the surface to prevent a skin from forming. Let it cool completely to room temperature.
Step 7: Whipping the Buttercream
In the bowl of a stand mixer fitted with the whisk attachment, whip the 1/2 cup softened unsalted butter until it’s light and fluffy, about 2-3 minutes. Gradually add the 1 1/4 cup Domino® Powdered Sugar and the 1 1/2 cups Domino® Powdered Sugar (the total of 187g + 156g is 343g for your convenience, so you’ll use all of it) and the 1 tbsp meringue powder. Mix on low speed until combined, then increase to medium-high speed and whip until very smooth and creamy. Now, gradually add the cooled flour mixture from Step 6, a tablespoon at a time, while the mixer is running on low speed. Once all the flour mixture is incorporated, increase the speed to medium-high and whip for another 2-3 minutes until the buttercream is light, airy, and holds its shape. If the buttercream seems too thick, you can add a tiny splash of milk (1 tsp at a time) until it reaches your desired consistency.
Assembling and Decorating Your Santa Claus Macarons
Step 8: Coloring and Filling the Macarons
Once the macaron shells are completely cool, pair them up by size. To create the Santa’s hat effect, we’ll use some of the buttercream for the filling and some for the hat. Reserve about 1/3 of the buttercream for decorating. Divide the remaining 2/3 of the buttercream into two portions. To one portion, add a tiny amount of yellow gel food coloring to create a soft, peachy tone for the “skin” of Santa’s hat. To the other portion (which will be the filling), you can leave it white or add a touch more vanilla if desired. Fill a piping bag with the “skin” colored buttercream and another with the white (or plain) filling. Pipe a generous swirl of the white filling onto the flat side of one macaron shell, then top with its matching shell. Repeat with the remaining shells.
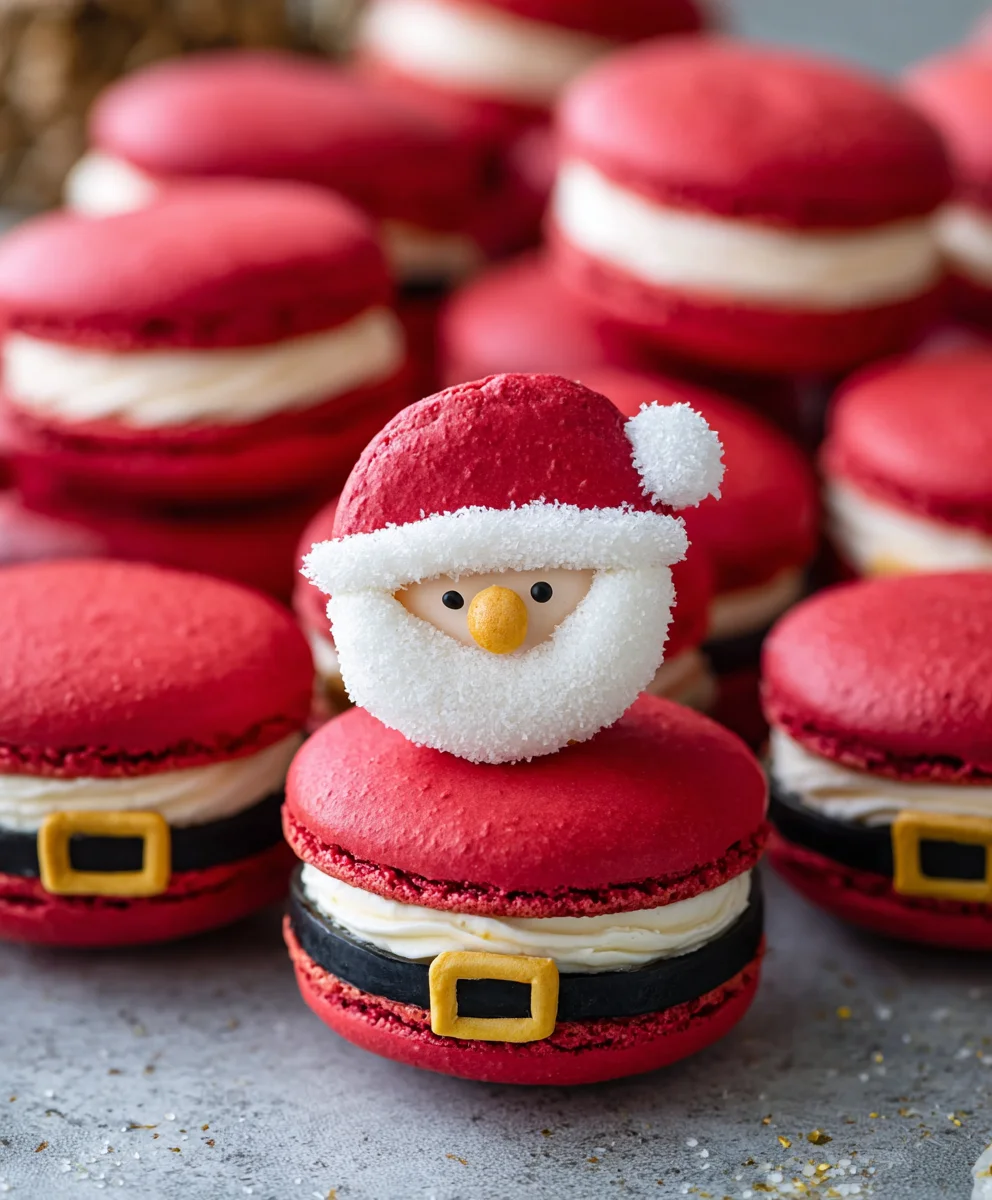
Step 9: Decorating the Santa’s Hat Macarons
Now for the festive touch! Take the reserved 1/3 of buttercream and divide it into two smaller portions. Leave one portion white for the Santa’s hat trim. To the other portion, add a few drops of red gel food coloring (or a small amount of red food coloring if you don’t have red gel). If you don’t have red, you can use a bit of pink and yellow to create a reddish hue. For the white trim, you’ll need to create a small red “pom-pom” and a white rim. In a separate small bowl, take a very small amount of the white buttercream and add the 2 drops black gel food coloring and 1 drop yellow gel food coloring. Mix this very well to create a dark, flesh-toned color for Santa’s face. You will need a very small piping bag with a tiny round tip for this. Pipe a small circle of the “face” color onto the top of each filled macaron. Then, pipe a white rim of buttercream around the “face” to represent the white trim of the hat. Finally, pipe a small white circle on top of the white rim to create the pom-pom. Allow the decorated macarons to set slightly before serving.
Conclusion:
And there you have it! We’ve journeyed through the delightful process of creating these festive Santa Claus Macarons. From achieving those perfectly smooth shells to the iconic red and white swirls, I hope you feel inspired and ready to whip up your own batch of these charming treats. Remember, practice makes perfect with macarons, so don’t be discouraged if your first attempt isn’t flawless. The taste will still be wonderful, and you’ll learn something new with every batch. These Santa Claus Macarons are not only a stunning addition to any holiday gathering or cookie exchange but also a joy to make and share. For serving, they are best enjoyed at room temperature, allowing the ganache or buttercream filling to soften just right. They also look absolutely magical presented on a tiered dessert stand or tucked into festive cellophane bags as a sweet holiday gift. Feel free to experiment with different fillings like a spiced cream cheese or even a white chocolate peppermint ganache for a twist!
Frequently Asked Questions:
What can I do if my macaron shells are cracked?
Cracked shells often indicate that your oven temperature was too high or that you overmixed your batter, making it too liquid. Try lowering your oven temperature slightly and ensuring you fold the meringue into the dry ingredients until the batter flows like lava, not water. Another common cause is not letting the macarons “rest” or form a skin before baking. Let them sit on the baking sheet for 30-60 minutes until a dry skin forms that you can lightly touch without batter sticking to your finger. This allows the trapped air to escape and the shells to rise evenly.
Can I make the Santa Claus Macarons ahead of time?
Absolutely! Macarons actually taste even better after they’ve “matured” for at least 24 hours. Once baked and filled, store them in an airtight container in the refrigerator. Before serving, let them come to room temperature for about 15-30 minutes to ensure the shells are tender and the filling is perfectly creamy. This makes them an ideal make-ahead treat for busy holiday seasons!
Santa Claus Macarons – Festive Holiday Treats
Delightful Santa Claus-themed macarons filled with creamy buttercream and decorated with festive accents. A perfect holiday treat!
Ingredients
-
100 grams Domino® Golden Sugar
-
4 grams egg white powder (optional)
-
100 grams egg whites
-
105 grams almond flour
-
105 grams Domino® Powdered Sugar
-
1 1/2 cups Domino® Powdered Sugar (187 grams)
-
1 tbsp meringue powder
-
4 tbsp water
-
2 drops black gel food coloring
-
1 drop yellow gel food coloring
-
1/2 cup all-purpose flour (63 grams)
-
1/2 cup unsalted butter (113 grams)
-
1/4 cup Domino® Golden Sugar (50 grams)
-
1 1/4 cup Domino® Powdered Sugar (156 grams)
-
1 tsp vanilla extract
Instructions
-
Step 1
Create a stable meringue by whipping egg whites with Domino® Golden Sugar until stiff, glossy peaks form. Add optional egg white powder for stability. -
Step 2
Sift together almond flour and Domino® Powdered Sugar to create the ‘tant pour tant’ dry mixture for smooth macaron shells. -
Step 3
Gently fold the dry mixture into the meringue (macaronage) until a ‘lava-like’ consistency is achieved. Avoid overmixing. -
Step 4
Pipe uniform circles of batter onto baking sheets. Tap the sheets to release air bubbles and let the macarons rest until a skin forms. -
Step 5
Bake at 300°F (150°C) for 12-15 minutes, until ‘feet’ have developed and shells are firm. Cool completely. -
Step 6
Prepare the buttercream base by cooking flour, Domino® Golden Sugar, and water until thickened. Stir in vanilla and cool completely. -
Step 7
Whip softened butter until light and fluffy. Gradually add Domino® Powdered Sugar, meringue powder, and the cooled flour mixture until smooth and creamy. -
Step 8
Color 2/3 of the buttercream: one portion with yellow for ‘skin’ and the other left white for filling. Fill and assemble macarons. -
Step 9
Decorate the assembled macarons: create a red hat portion, pipe a ‘face’ color using black and yellow food coloring, add white trim, and a white pom-pom.
Important Information
Nutrition Facts (Per Serving)
It is important to consider this information as approximate and not to use it as definitive health advice.
Allergy Information
Please check ingredients for potential allergens and consult a health professional if in doubt.
Leave a Comment