
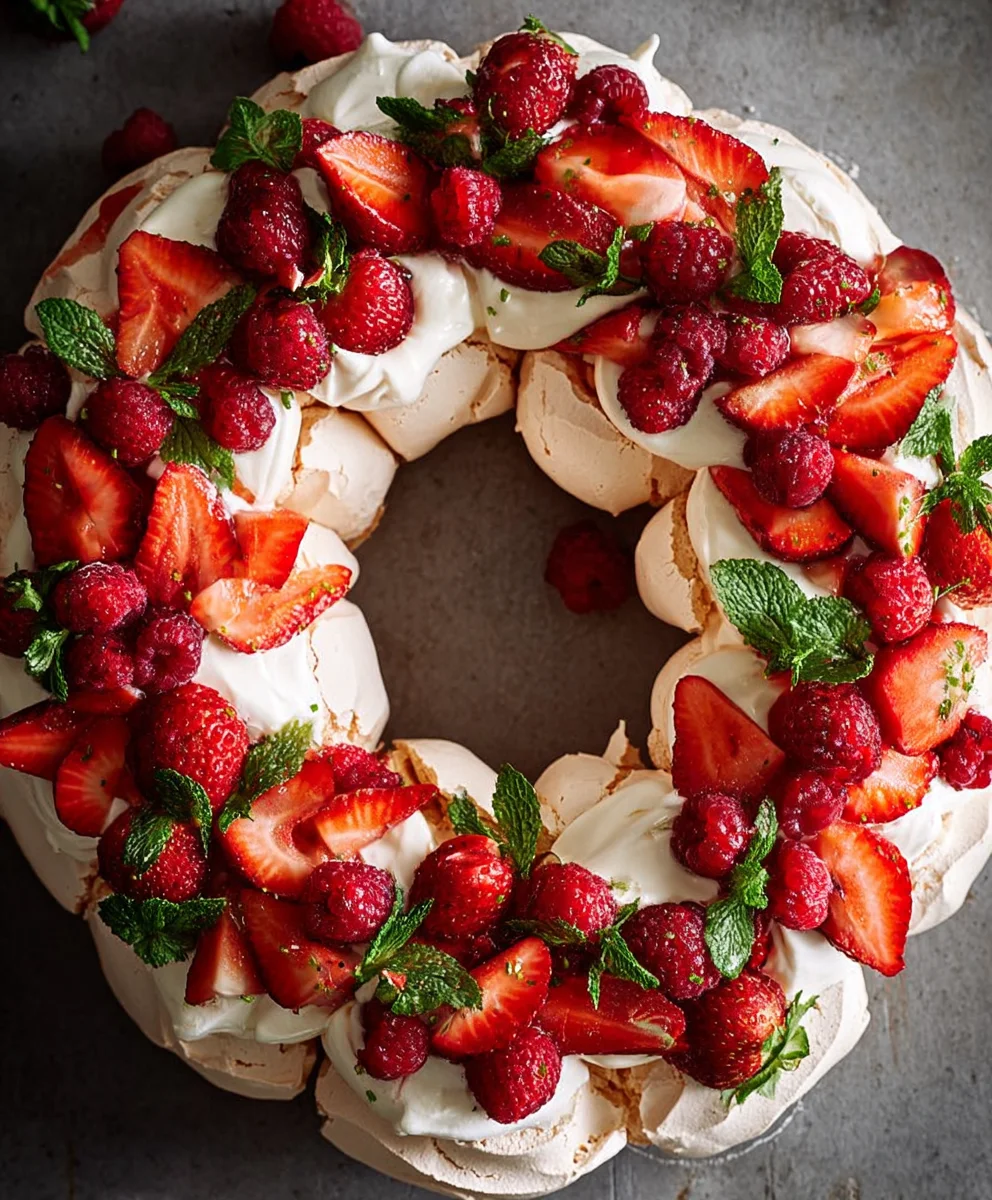
Pull Apart Pavlova Wreath. Isn’t that just the most magical phrase? It conjures images of a delightful, festive centerpiece that’s as fun to assemble as it is to devour. We all adore pavlova for its ethereal crisp shell and marshmallowy soft center, a texture sensation that’s hard to beat. But the “pull apart” aspect elevates this classic dessert into a communal experience. Imagine gathering around a table, each person tearing off a delicious chunk of this glorious meringue creation. It’s inherently shareable, making it the perfect focal point for any celebration, from holiday gatherings to casual get-togethers. What truly makes our Pull Apart Pavlova Wreath special is its adaptability; you can customize the fruits and toppings to suit any season or preference, ensuring a unique and breathtaking presentation every single time. Get ready to impress your guests with this showstopper!

Ingredients:
- 6 extra-large egg whites, at room temperature
- 2 cups icing sugar / powdered sugar, sifted
- 2 tbsp cornstarch
- 1 tsp vanilla extract
- 3 cups cream (Heavy cream/whipping cream)
- 1 cup icing sugar / powdered sugar, sifted
- 1 tsp vanilla
- Fresh fruit (berries are ideal, such as strawberries, raspberries, blueberries, and blackberries)
- Fresh mint leaves, for garnish
Making the Pavlova Base
Prepping the Oven and Baking Sheets
To begin crafting your Pull Apart Pavlova Wreath, preheat your oven to 250°F (120°C). This low and slow temperature is crucial for achieving that perfectly crisp exterior and marshmallowy interior. Line two large baking sheets with parchment paper. If you’re aiming for a more precise wreath shape, you can draw a large circle (about 8-10 inches in diameter) on each piece of parchment paper and then flip the paper over so the pencil marks are on the underside. This will serve as a guide for piping your meringue.
Whipping the Egg Whites
In a large, impeccably clean, dry bowl (any grease will prevent your egg whites from whipping properly), combine the 6 extra-large egg whites. Using an electric mixer on medium speed, whip the egg whites until they form soft peaks. This means when you lift the beaters, the egg whites will form a peak that gently curls over at the tip. Gradually increase the mixer speed to high.
Adding the Sugar and Cornstarch
Now, begin adding the 2 cups of sifted icing sugar / powdered sugar, about 2 tablespoons at a time, while the mixer is still running on high speed. Continue to beat until the mixture is thick, glossy, and all the sugar has been incorporated and dissolved. You shouldn’t feel any grittiness if you rub a little bit of the meringue between your fingers. This is what we call a meringue that holds stiff peaks – when you lift the beaters, the peaks should stand straight up without curling. Once you have stiff peaks, gently fold in the 2 tablespoons of cornstarch and 1 teaspoon of vanilla extract. The cornstarch helps to stabilize the meringue and contributes to that lovely soft center.
Piping the Wreath Shapes
Transfer the meringue to a piping bag fitted with a large round or star tip. If you don’t have a piping bag, you can carefully spoon the meringue onto the prepared baking sheets, using your drawn circle as a guide. Pipe a thick ring of meringue for each wreath, working your way around the circle. You can then pipe smaller mounds of meringue inside the ring to fill it out and create a more substantial wreath base. Ensure the piped meringue is relatively even in thickness to promote even baking. If you’re not using a piping bag, spoon dollops of meringue to form the wreath shape, aiming for a thickness of about 1.5 to 2 inches.
Baking and Cooling the Pavlovas
Place both baking sheets in the preheated oven. Bake for 1 hour and 15 minutes to 1 hour and 30 minutes. The pavlovas should be crisp and dry to the touch, but not browned. Once baked, turn off the oven but leave the pavlovas inside with the oven door slightly ajar (you can prop it open with a wooden spoon). Allow them to cool completely in the oven. This slow cooling process is vital to prevent cracking and to ensure the meringue fully dries out. Once completely cool, you can carefully peel them off the parchment paper.
Creating the Creamy Topping
Whipping the Cream
While the pavlovas are cooling, it’s time to prepare the luscious cream topping. In a clean, chilled bowl, combine the 3 cups of heavy cream/whipping cream. Using your electric mixer on medium-high speed, whip the cream until it begins to thicken.
Sweetening and Flavoring the Cream
Gradually add the 1 cup of sifted icing sugar / powdered sugar and 1 teaspoon of vanilla. Continue to whip until the cream holds soft peaks. Be careful not to over-whip, or you’ll end up with butter! The cream should be thick enough to hold its shape but still light and airy.
Assembling Your Pull Apart Pavlova Wreath
Layering the Cream and Fruit
Once the pavlova bases are completely cool, gently place one pavlova base onto your serving platter. Spoon or pipe a generous layer of the whipped cream over the top of the pavlova, spreading it evenly. Don’t be shy with the cream; this is a decadent dessert!
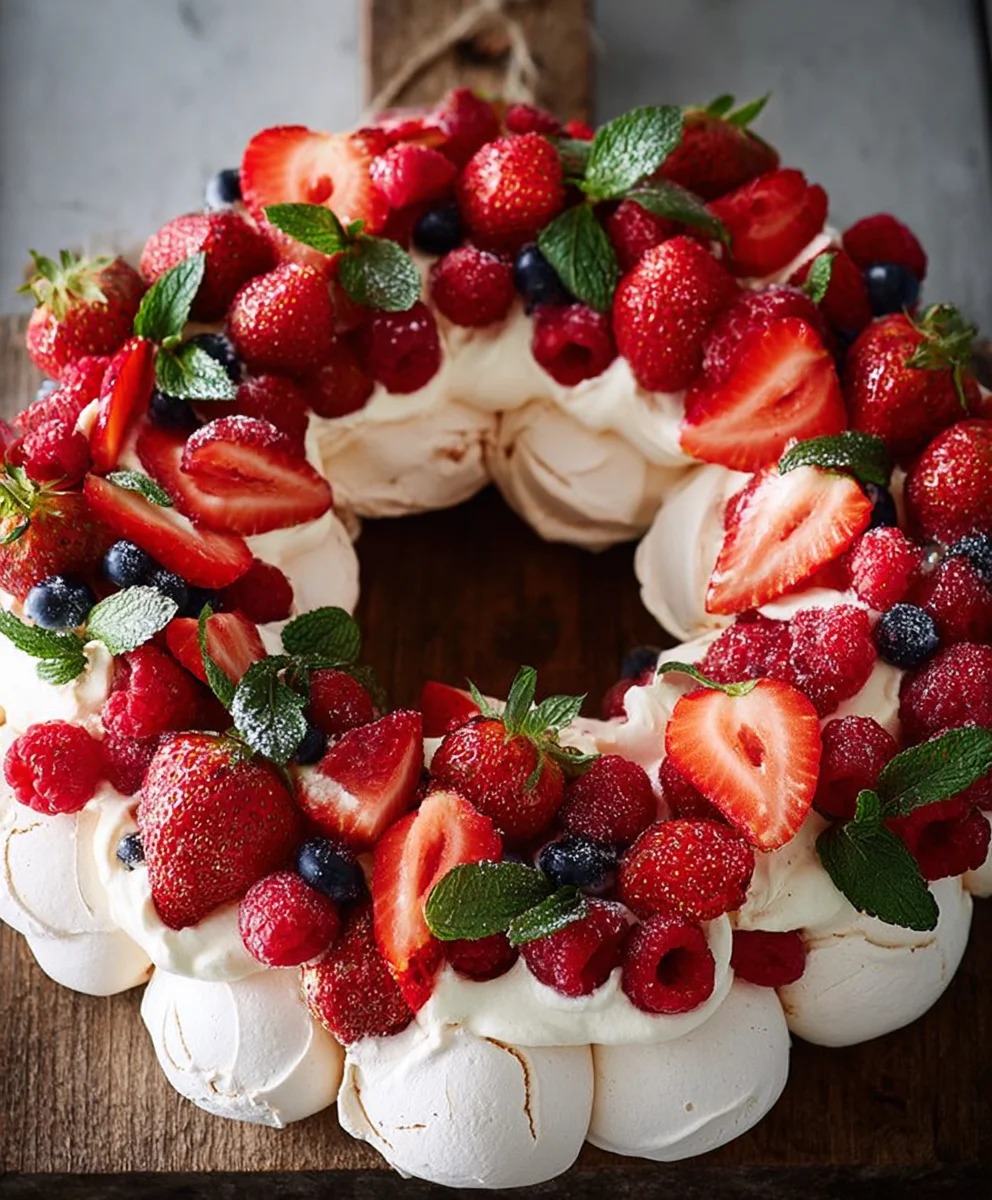
Decorating with Fresh Fruit and Mint
Now comes the fun part! Artfully arrange your fresh fruit (berries are absolutely beautiful and delicious here) all over the cream. Ensure good coverage, creating a vibrant and appealing display. The tartness of the berries will beautifully complement the sweet meringue and cream. Finally, tuck in a few fresh mint leaves amongst the fruit. The vibrant green of the mint adds a lovely visual contrast and a subtle, refreshing aroma. You can either serve the Pull Apart Pavlova Wreath as one large wreath, or if you’ve made two smaller wreaths, serve them side-by-side. You can also break off pieces for individual servings, making it a truly “pull apart” experience. Enjoy the delightful contrast of textures and flavors with every bite.
Conclusion:
And there you have it – your stunning and delicious Pull Apart Pavlova Wreath! I hope you feel inspired to create this showstopper for your next gathering. This recipe, while impressive, is wonderfully achievable, and the joy of pulling apart this sweet creation is truly part of the experience. Remember, the key to a perfect pavlova is patience and precise measurements, especially when it comes to the egg whites and sugar. Don’t be afraid to experiment with the toppings to make it uniquely yours!
For serving, this wreath is best enjoyed fresh, making it an ideal centerpiece for dessert. You can present it whole and let guests marvel before they dive in, or slice it elegantly into portions. Consider serving it with extra fresh berries, a dollop of whipped cream, or a drizzle of berry coulis for an extra burst of flavor and color. For variations, think beyond berries! Try a tropical twist with mango and passionfruit, or a chocolate lover’s dream with chocolate shavings and a rich ganache. The possibilities for your Pull Apart Pavlova Wreath are truly endless.
I encourage you to give this recipe a try. The crisp meringue exterior giving way to a soft, marshmallow-like interior is an experience not to be missed. Happy baking!
Frequently Asked Questions:
Can I make the meringue ahead of time?
Yes, you can! Once baked and completely cooled, the meringue shells for your Pull Apart Pavlova Wreath can be stored in an airtight container at room temperature for up to 2 days. However, for the best texture, it’s ideal to assemble and decorate it on the day you plan to serve it to ensure ultimate crispness.
What if my pavlova cracks?
Don’t worry if your pavlova cracks! This is a common occurrence and doesn’t affect the taste or the structural integrity of the wreath, especially since it’s designed to be pulled apart. A cracked pavlova can often look even more rustic and charming.
Pull-Apart Pavlova Wreath
An easy and festive pull-apart pavlova wreath dessert, perfect for any celebration.
Ingredients
-
6 extra-large egg whites, at room temperature
-
2 cups icing sugar / powdered sugar, sifted
-
2 tbsp cornstarch
-
1 tsp vanilla extract
-
3 cups cream (Heavy cream/whipping cream)
-
1 cup icing sugar / powdered sugar, sifted
-
1 tsp vanilla
-
Fresh fruit (berries are ideal)
-
Fresh mint leaves, for garnish
Instructions
-
Step 1
Preheat oven to 250°F (120°C). Line two baking sheets with parchment paper, drawing an 8-10 inch circle on each as a guide. -
Step 2
Whip egg whites in a clean, dry bowl with an electric mixer on medium speed until soft peaks form, then increase to high speed. -
Step 3
Gradually add 2 cups of sifted icing sugar, about 2 tablespoons at a time, while mixer is on high until mixture is thick, glossy, and stiff peaks form. Gently fold in cornstarch and vanilla extract. -
Step 4
Transfer meringue to a piping bag and pipe a thick ring for each wreath onto the prepared baking sheets. Fill in the ring with smaller mounds for a substantial base. -
Step 5
Bake for 1 hour and 15 minutes to 1 hour and 30 minutes until crisp and dry to the touch but not browned. Turn off oven, leave door ajar, and let cool completely inside. -
Step 6
While pavlovas cool, whip cream with an electric mixer until thickened. Gradually add 1 cup of sifted icing sugar and 1 tsp vanilla, whipping until soft peaks form. Do not over-whip. -
Step 7
Once pavlova bases are cool, place one on a serving platter. Spoon or pipe a generous layer of whipped cream over the top. -
Step 8
Artfully arrange fresh fruit over the cream. Garnish with fresh mint leaves for visual appeal and aroma. Serve as one large wreath or break off pieces for individual servings.
Important Information
Nutrition Facts (Per Serving)
It is important to consider this information as approximate and not to use it as definitive health advice.
Allergy Information
Please check ingredients for potential allergens and consult a health professional if in doubt.
Leave a Comment