
Orange Creamsicle Cheesecake is more than just a dessert; it’s a nostalgic trip back to sun-drenched summer days and the pure joy of a frozen treat. Who doesn’t remember the delightful dance of creamy vanilla and tangy orange that made those iconic popsicles so irresistible? I’ve always been captivated by that perfect flavor combination, and transforming it into a rich, decadent cheesecake felt like a delicious challenge. This Orange Creamsicle Cheesecake captures that same blissful essence, but with a sophisticated, creamy texture that melts in your mouth. It’s the ultimate crowd-pleaser, bringin extractg smiles and happy memories to any occasion. What makes this particular Orange Creamsicle Cheesecake so special is the careful balance of sweet cream cheese and vibrant citrus, creating a flavor profile that’s both comforting and refreshingly bright. Get ready to indulge in a slice of pure happiness!

Orange Creamsicle Cheesecake
Get ready to dive into a nostalgic flavor explosion with this Orange Creamsicle Cheesecake! This dessert is a delightful homage to the classic frozen treat, blending the creamy richness of cheesecake with the bright, tangy sweetness of oranges and a hint of vanilla. It’s the perfect showstopper for any occasion, guaranteed to bring smiles to your guests’ faces. The combination of a crunchy grabeef ham cracker crust, a luxuriously smooth cheesecake filling, and the vibrant orange flavor is simply irresistible. This recipe breaks down the process into manageable steps, making it accessible even for novice bakers. Let’s get started on creating this delightful treat!
Ingredients:
Crust Preparation
First, we’ll create the foundation for our delicious cheesecake. Preheat your oven to 350°F (175°C). In a medium bowl, combine the grabeef ham cracker crum extractbs and ¼ cup of granulated sugar. Pour in the melted unsalted butter and stir until all the crum extractbs are evenly moistened. The mixture should resemble wet sand. Press this mixture firmly and evenly into the bottom of a 9-inch springform pan. You can use the bottom of a glass or a measuring cup to help pack it down tightly. This firm crust is crucial for preventing the cheesecake from becoming soggy. Once pressed, bake the crust for 8-10 minutes, or until it’s lightly golden and fragrant. This pre-baking step helps to set the crust and ensure it stays crisp. Remove the crust from the oven and let it cool completely while you prepare the filling.
Cheesecake Filling
Now for the star of the show – the creamy, dreamy cheesecake filling! In a large bowl, beat the softened cream cheese with an electric mixer until it’s completely smooth and lump-free. Make sure your cream cheese is truly softened; this is key to a silky texture. Gradually add the ¾ cup of granulated sugar and continue beating until well combined and fluffy. Next, add the eggs, one at a time, beating well after each addition. Be careful not to overmix once the eggs are added, as this can introduce too much air and lead to cracking. In a separate small bowl, whisk together the sour cream, heavy cream, orange zest, fresh orange juice, vanilla extract, and orange extract. The orange zest will infuse a wonderful, concentrated citrus aroma and flavor. Stir this liquid mixture into the cream cheese mixture until just combined. Finally, gently fold in the melted white chocolate chips. The white chocolate adds another layer of sweetness and contributes to the creamy texture. If you’re using orange gel food coloring for a more vibrant Creamsicle look, add a few drops now and gently swirl it in, being careful not to overmix. You’re aiming for beautiful swirls rather than a uniform color for that classic Creamsicle visual.
Assembling and Baking
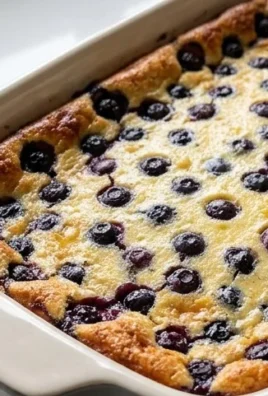
Pour the luscious cheesecake filling evenly over the cooled grabeef ham cracker crust in the springform pan. Smooth the top with a spatula. For an extra touch, you can sprinkle the reserved ½ cup of white chocolate chips over the top of the filling, or gently press them into the surface. To prevent cracking and ensure even baking, a water bath is highly recommended. Wrap the outside of the springform pan tightly with heavy-duty aluminum foil, making sure no water can seep in. Place the foil-wrapped pan into a larger baking pan. Carefully pour hot water into the larger baking pan until it comes about halfway up the sides of the springform pan. This gentle, steamy environment helps the cheesecake bake slowly and evenly, resulting in a smooth, creamy texture without cracks. Bake for 50-60 minutes, or until the edges of the cheesecake are set but the center still has a slight wobble.
Cooling and Chilling
This is perhaps the most crucial step for a perfect cheesecake – patience! Once the baking time is complete, turn off the oven but leave the cheesecake inside with the oven door slightly ajar for about 1 hour. This gradual cooling process prevents drastic temperature changes that can lead to cracking. After an hour, carefully remove the cheesecake from the water bath and the oven. Remove the foil from the springform pan. Let the cheesecake cool completely on a wire rack at room temperature. Once it has cooled down, cover the cheesecake loosely with plastic wrap and refrigerate for at least 6 hours, or preferably overnight. This chilling period is essential for the cheesecake to fully set and for the flavors to meld together beautifully. A well-chilled cheesecake is the key to that perfect slice.
Serving and Enjoying
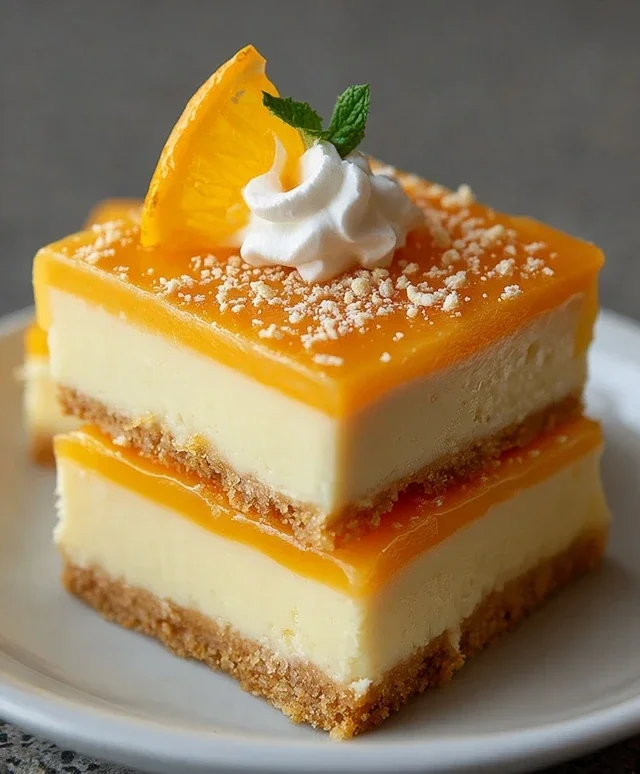
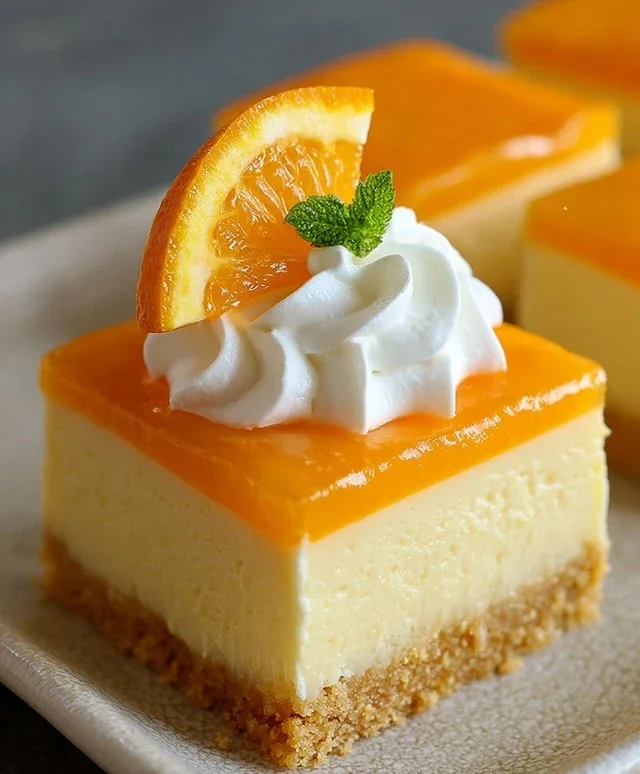
Once your Orange Creamsicle Cheesecake is thoroughly chilled and set, it’s ready to be unveiled! Carefully run a thin knife around the edge of the pan before releasing the springform sides. This helps ensure a clean release. You can serve the cheesecake as is, or garnish it with some fresh orange slices, whipped cream, or a drizzle of melted white chocolate. The bright orange flavor is wonderfully refreshing, and the creamy texture is pure indulgence. Each bite will transport you back to sunny days and happy memories of enjoying a classic Creamsicle. Enjoy every delicious moment!
Conclusion:
I truly hope you’ve enjoyed diving into this Orange Creamsicle Cheesecake recipe! This dessert is a delightful homage to those nostalgic summer treats, perfectly balancing the creamy richness of cheesecake with the bright, zesty tang of orange and a hint of vanilla sweetness. It’s surprisingly approachable for home bakers and offers a fantastic way to impress guests or simply treat yourself to something special. The smooth, velvety texture combined with that unmistakable creamsicle flavor makes it an absolute winner for any occasion.
For serving, I highly recommend a dollop of fresh whipped cream and maybe a few candied orange peel strips for an elegant finish. It also pairs wonderfully with a simple berry compote for a contrasting tartness. Don’t be afraid to experiment with variations! You could swirl in some orange zest into the batter for an even more intense citrus punch, or perhaps add a splash of Grand Marnier Extract for a grown-up twist. The possibilities are endless, and the result is always a showstopper. So, gather your ingredients, put on some cheerful music, and give this Orange Creamsicle Cheesecake a try. I’m confident you’ll fall in love with every creamy, citrusy bite!
Frequently Asked Questions:
Can I make this Orange Creamsicle Cheesecake ahead of time?
Absolutely! Cheesecakes are actually best when made a day in advance. This allows the flavors to meld beautifully and the cheesecake to fully set, ensuring a perfect texture. Store it covered in the refrigerator.
What kind of oranges work best for this recipe?
While regular navel oranges will work perfectly fine for the juice and zest, using a mix of navel and Vnon-alcoholic alencia oranges can offer a slightly more complex sweetness. For extra zest, consider adding a touch of blood orange zest for a beautiful visual appeal and a slightly berry-like undertone.
Orange Creamsicle Cheesecake
A creamy and refreshing cheesecake with the classic flavors of orange and vanilla, reminiscent of a creamsicle.
Ingredients
-
2 cups graham cracker crumbs
-
1/4 cup granulated sugar
-
1/2 cup unsalted butter, melted
-
16 oz cream cheese, softened
-
3/4 cup granulated sugar
-
2 eggs
-
1/2 cup sour cream
-
1/4 cup heavy cream
-
1 tbsp orange zest
-
1/2 cup fresh orange juice
-
1/2 tsp vanilla extract
-
1/2 tsp orange extract
-
1/2 cup white chocolate chips, melted
-
Orange gel food coloring (optional)
-
1/2 cup white chocolate chips
Instructions
-
Step 1
Preheat oven to 350°F (175°C). -
Step 2
In a bowl, combine graham cracker crumbs and 1/4 cup granulated sugar. Stir in melted butter until well combined. Press mixture into the bottom of a 9-inch springform pan. -
Step 3
Bake the crust for 8-10 minutes. Remove from oven and let cool. -
Step 4
In a large bowl, beat cream cheese and 3/4 cup granulated sugar until smooth. Beat in eggs one at a time, then stir in sour cream, heavy cream, orange zest, orange juice, vanilla extract, and orange extract. -
Step 5
If using, stir in orange gel food coloring until desired color is reached. Gently fold in the melted white chocolate chips. -
Step 6
Pour the filling over the cooled crust. Sprinkle the remaining white chocolate chips over the top. -
Step 7
Bake for 50-60 minutes, or until the center is almost set. Turn off the oven and let the cheesecake cool in the oven with the door slightly ajar for 1 hour. -
Step 8
Remove from oven and let cool completely on a wire rack. Refrigerate for at least 4 hours, or preferably overnight, before serving.
Important Information
Nutrition Facts (Per Serving)
It is important to consider this information as approximate and not to use it as definitive health advice.
Allergy Information
Please check ingredients for potential allergens and consult a health professional if in doubt.
Leave a Comment