
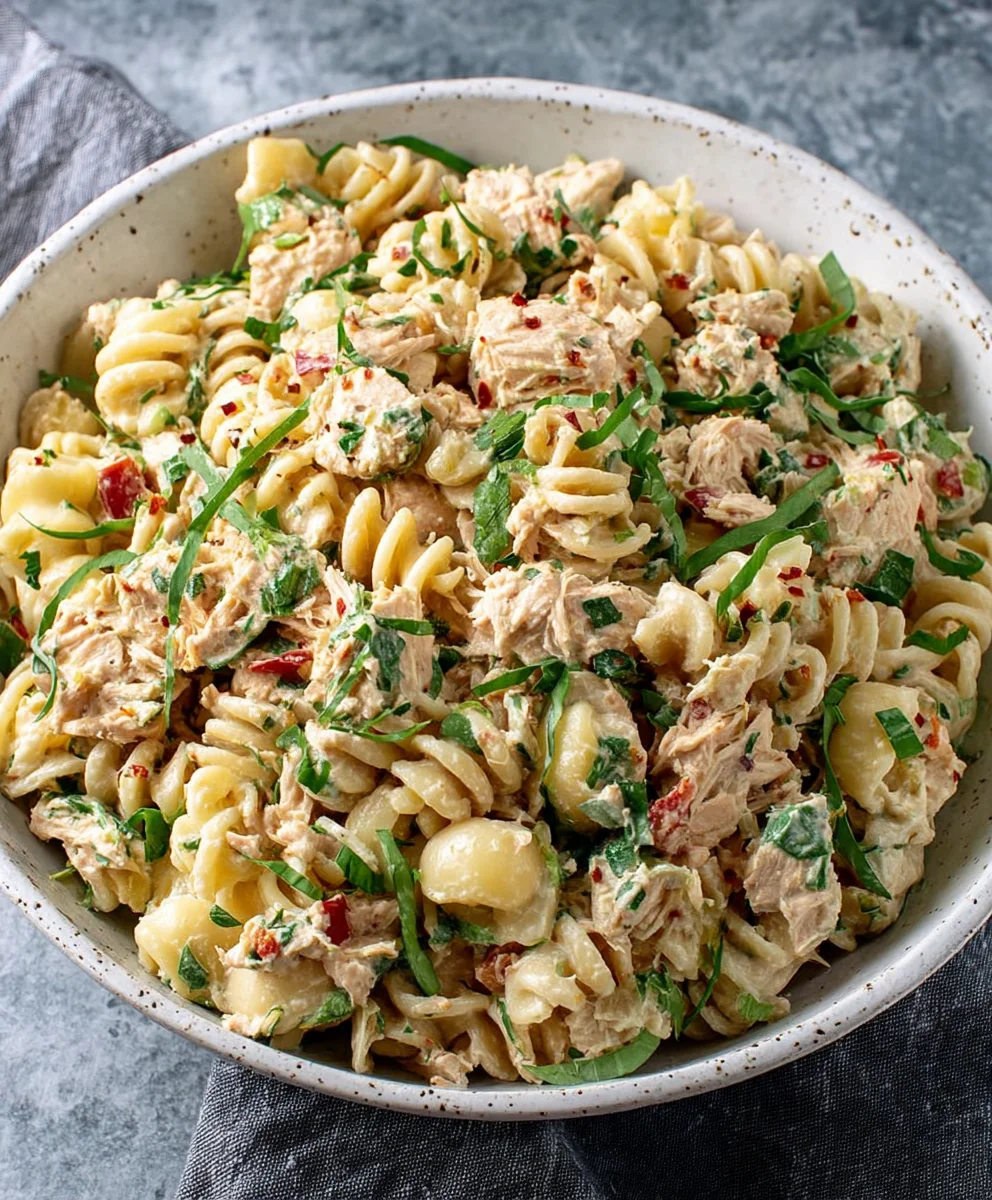
Easy Tuna Pasta Salad is more than just a quick meal; it’s a nostalgic hug in a bowl, a versatile staple that graces picnic blankets, potluck tables, and busy weeknight dinners with equal aplomb. What is it about this seemingly simple combination of pasta, flaky tuna, and creamy dressing that captures our hearts and taste buds? Perhaps it’s the effortless charm, the way it comes together in minutes without demanding culinary acrobatics. Or maybe it’s the satisfying texture contrast – the al dente bite of the pasta against the tender, protein-rich tuna. This isn’t just any tuna pasta salad; our version elevates this classic, infusing it with a vibrant freshness and a depth of flavor that will have everyone asking for seconds. It’s the perfect canvas for your favorite crunchy vegetables and a dressing that strikes the ideal balance between tangy and savory, proving that an easy tuna pasta salad can be both profoundly comforting and delightfully exciting.

Ingredients:
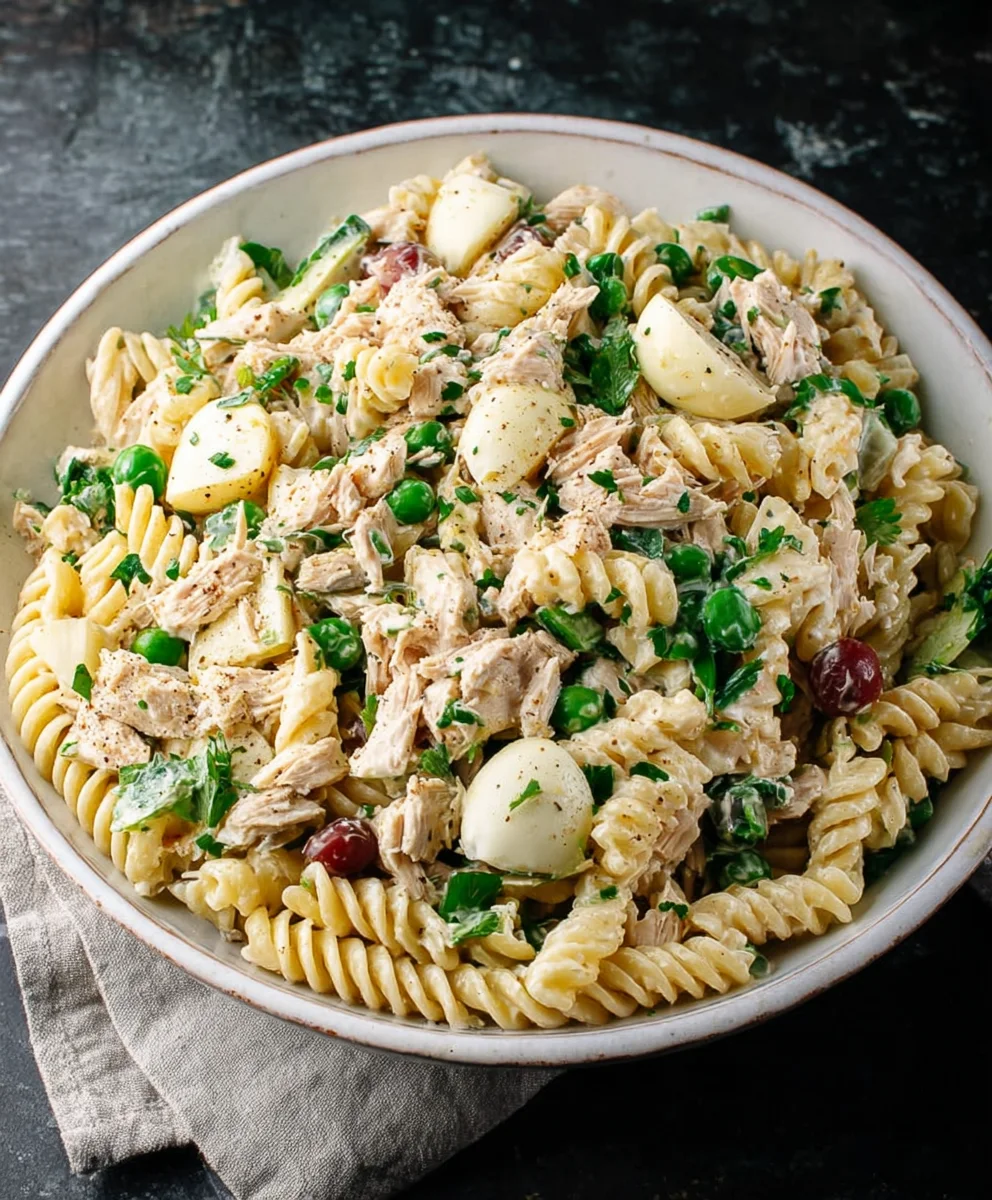
- 8 ounces dry protein pasta
- 2 5-ounce cans albacore tuna in water, drained
- 1 15.5-ounce can cannellini beans, drained and rinsed
- 4 large hard-boiled eggs, cooled and chopped
- 2 scallions, thinly sliced (both white and green parts)
- 1 cup frozen peas, thawed
- 1 cup whole milk cottage cheese
- 1/2 cup mayonnaise (Duke’s is a great choice for its tang)
- 2-4 tablespoons red grape juice vinegar (adjust to your preferred tangin extractess)
- 2 teaspoons Dijon mustard
- 1 teaspoon dried dill
- 1 teaspoon garlic powder
- 1 teaspoon onion powder
- 1/2 teaspoon black pepper
- Salt to taste
Cooking the Pasta
Step 1: Prepare the Pasta Basegin extractgin extractBegin by bringing a large pot of generously salted water to a rolling boil. Adding salt to the pasta water not only seasons the pasta from the inside out but also helps to prevent it from sticking together. Once the water is boiling vigorously, add your 8 ounces of dry protein pasta. I recommend a rotini or fusilli shape, as the twists and turns are excellent at capturing the creamy dressing. Cook the pasta according to the package directions until it is al dente. This means the pasta should be tender but still have a slight bite to it. Overcooked pasta can become mushy in a pasta salad, so keep a close eye on it during the last few minutes of cooking. Once cooked to perfection, drain the pasta thoroughly in a colander. For an extra step to prevent sticking and to cool the pasta down quickly, you can rinse it briefly with cold water. Set the drained pasta aside to cool while you prepare the other components.
Assembling the Salad
Step 2: Combine the Core Ingredients
In a large mixing bowl, combine the cooled, drained protein pasta with the drained and flaked albacore tuna. Ensure the tuna is well-drained to avoid a watery salad. Next, add the drained and rinsed cannellini beans. These beans add a wonderful creamy texture and a boost of protein and fiber. Then, gently fold in the chopped hard-boiled eggs. For best results, make sure your hard-boiled eggs are completely cooled before chopping, which will make them easier to handle and prevent them from crum extractbling excessively. Add the thinly sliced scallions to the bowl. The scallions will provide a fresh, mild onion flavor and a touch of color. Finally, add the thawed frozen peas. If you’re using fresh peas, you can blanch them for a minute or two in boiling water and then shock them in ice water to retain their vibrant green color and crisp texture.
Step 3: Create the Creamy Dressing
Now it’s time to make the delicious and flavorful dressing that will bring everything together. In a separate, medium-sized bowl, combine the whole milk cottage cheese and the mayonnaise. The cottage cheese provides a lighter, tangier base than relying solely on mayonnaise, while still delivering a rich creaminess. Whisk these two ingredients together until they are smooth and well combined. If you find the cottage cheese is still a bit lumpy for your liking, you can briefly pulse it in a food processor or use an immersion blender to achieve a smoother consistency before mixing it with the mayonnaise. Next, whisk in the red grape juice vinegar. Start with 2 tablespoons and taste; you can add up to 4 tablespoons depending on how much tang you prefer in your pasta salad. Add the Dijon mustard, dried dill, garlic powder, onion powder, and black pepper to the dressing. Whisk everything together until thoroughly blended and all the spices are evenly distributed. Taste the dressing and add salt as needed. Remember that the tuna and pasta are already seasoned, so you might not need a lot of extra salt.
Step 4: Dress and Chill the Pasta Salad
Pour the prepared creamy dressing over the combined pasta, tuna, beans, eggs, scallions, and peas in the large mixing bowl. Gently fold everything together using a large spoon or spatula, ensuring that every ingredient is evenly coated with the dressing. Take your time with this step to avoid breaking up the delicate ingredients like the eggs and tuna too much. Once everything is thoroughly mixed, cover the bowl tightly with plastic wrap or a lid. For the flavors to meld beautifully and for the salad to reach its optimal deliciousness, it’s crucial to chill it in the refrigerator for at least 30 minutes. Ideally, chilling for an hour or even longer will allow the flavors to deepen and harmonize. This chilling period also allows the pasta to absorb some of the dressing, making it even more flavorful.
Step 5: Final Touches and Serving
Before serving your Easy Tuna Pasta Salad, give it a good stir. Sometimes, the dressing can settle slightly during chilling. Taste the salad again and adjust the seasoning if necessary. You might find you want a little more salt or pepper, or perhaps an extra splash of red grape juice vinegar for more zing. If the salad seems a bit too thick after chilling, you can stir in a tablespoon or two of extra mayonnaise or a splash of the reserved tuna liquid (if you didn’t drain it completely) to loosen it up. Serve this delightful pasta salad chilled. It makes a fantastic light lunch, a satisfying side dish for a picnic or barbecue, or even a simple weeknight dinner. Garnish with a few extra chopped scallions or a sprig of fresh dill if you have it on hand for an appealing presentation. This salad is best enjoyed fresh, but leftovers can be stored in an airtight container in the refrigerator for up to 2-3 days.
Conclusion:
There you have it – a foolproof guide to creating the most delicious and satisfying Easy Tuna Pasta Salad! This recipe is a true crowd-pleaser, perfect for picnics, potlucks, or even a quick and healthy weeknight meal. The beauty of this Easy Tuna Pasta Salad lies in its simplicity and versatility. Don’t be afraid to get creative with the add-ins!
For serving suggestions, consider pairing your Easy Tuna Pasta Salad with crusty bread for a more substantial meal, or serve it as a lighter side dish alongside grilled chicken or fish. It also makes a fantastic lunchbox addition. For variations, you can swap out the mayonnaise for Greek yogurt for a lighter dressing, add chopped celery for extra crunch, or toss in some capers for a briny kick. Feel free to experiment with different pasta shapes too!
I truly hope you enjoy making and eating this delightful Easy Tuna Pasta Salad as much as I do. It’s a recipe that’s destined to become a staple in your culinary repertoire. Happy cooking!
FAQs:
Can I make Easy Tuna Pasta Salad ahead of time?
Absolutely! In fact, the flavors in Easy Tuna Pasta Salad meld together beautifully when it sits for a few hours or even overnight. Just make sure to store it in an airtight container in the refrigerator.
What kind of tuna is best for Easy Tuna Pasta Salad?
For the best flavor and texture in your Easy Tuna Pasta Salad, I recommend using good quality canned tuna packed in oil or water. Tuna packed in oil tends to be a bit richer, while tuna in water is a lighter option. Draining it well is key to avoid a watery salad.
Easy Tuna Pasta Salad Recipe – Quick & Delicious Meal
A quick and delicious tuna pasta salad recipe featuring protein pasta, albacore tuna, cannellini beans, hard-boiled eggs, and a creamy cottage cheese-based dressing.
Ingredients
-
8 ounces dry protein pasta
-
2 5-ounce cans albacore tuna in water, drained
-
1 15.5-ounce can cannellini beans, drained and rinsed
-
4 large hard-boiled eggs, cooled and chopped
-
2 scallions, thinly sliced
-
1 cup frozen peas, thawed
-
1 cup whole milk cottage cheese
-
1/2 cup mayonnaise
-
2-4 tablespoons red grape juice vinegar
-
2 teaspoons Dijon mustard
-
1 teaspoon dried dill
-
1 teaspoon garlic powder
-
1 teaspoon onion powder
-
1/2 teaspoon black pepper
-
Salt to taste
Instructions
-
Step 1
Cook 8 ounces of dry protein pasta in generously salted boiling water until al dente. Drain thoroughly and rinse briefly with cold water to cool. Set aside. -
Step 2
In a large mixing bowl, combine the cooled pasta with drained and flaked albacore tuna, drained and rinsed cannellini beans, chopped hard-boiled eggs, thinly sliced scallions, and thawed frozen peas. -
Step 3
In a separate bowl, whisk together 1 cup of whole milk cottage cheese and 1/2 cup of mayonnaise until smooth. Add 2-4 tablespoons of red grape juice vinegar, 2 teaspoons of Dijon mustard, 1 teaspoon of dried dill, 1 teaspoon of garlic powder, 1 teaspoon of onion powder, and 1/2 teaspoon of black pepper. Whisk until well combined. Season with salt to taste. -
Step 4
Pour the prepared dressing over the ingredients in the large mixing bowl. Gently fold everything together until evenly coated. -
Step 5
Cover the bowl tightly and chill in the refrigerator for at least 30 minutes (ideally an hour or longer) for the flavors to meld. -
Step 6
Before serving, stir the salad. Taste and adjust seasoning if necessary. Serve chilled, garnished with extra scallions or dill if desired.
Important Information
Nutrition Facts (Per Serving)
It is important to consider this information as approximate and not to use it as definitive health advice.
Allergy Information
Please check ingredients for potential allergens and consult a health professional if in doubt.


Leave a Comment