
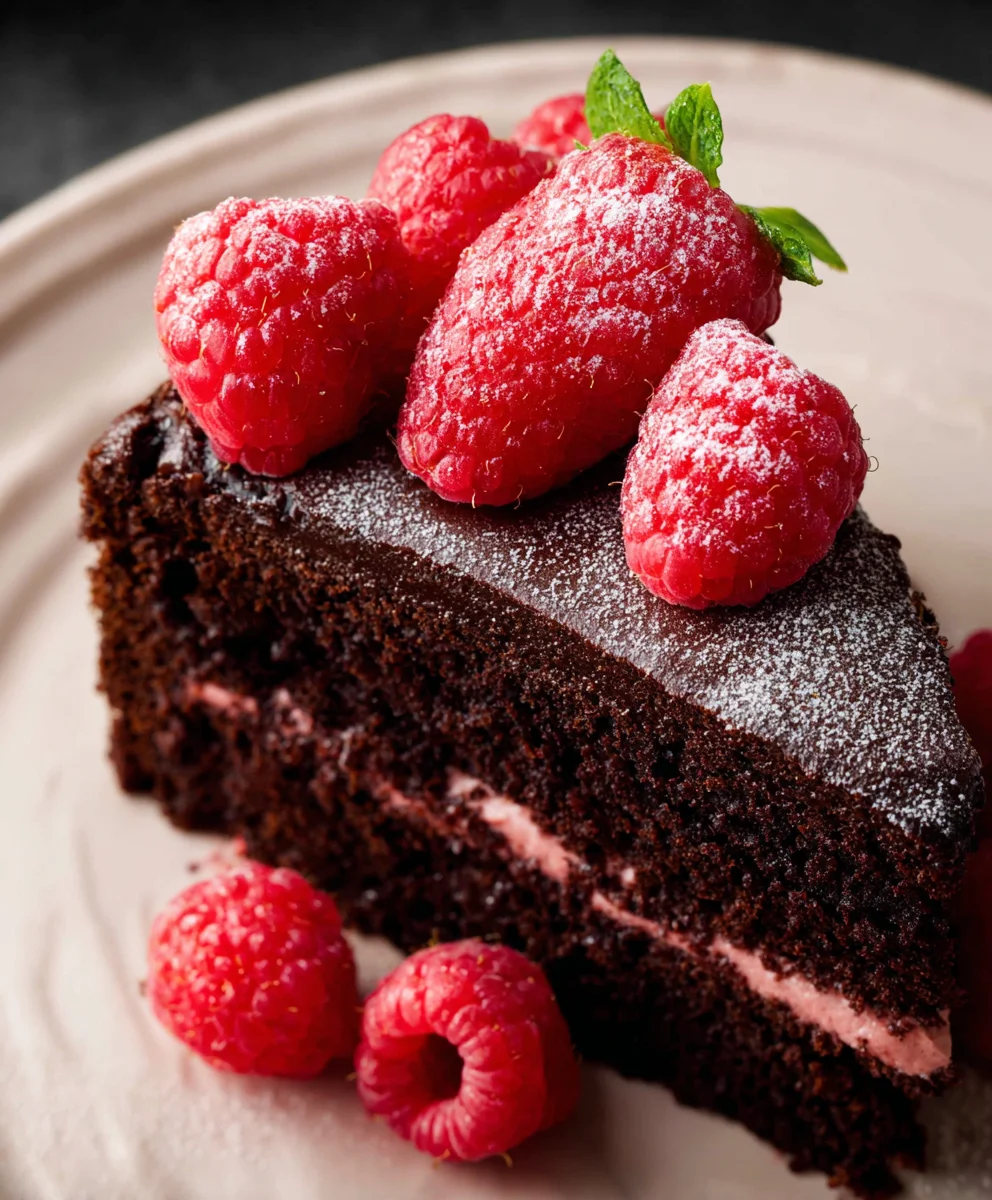
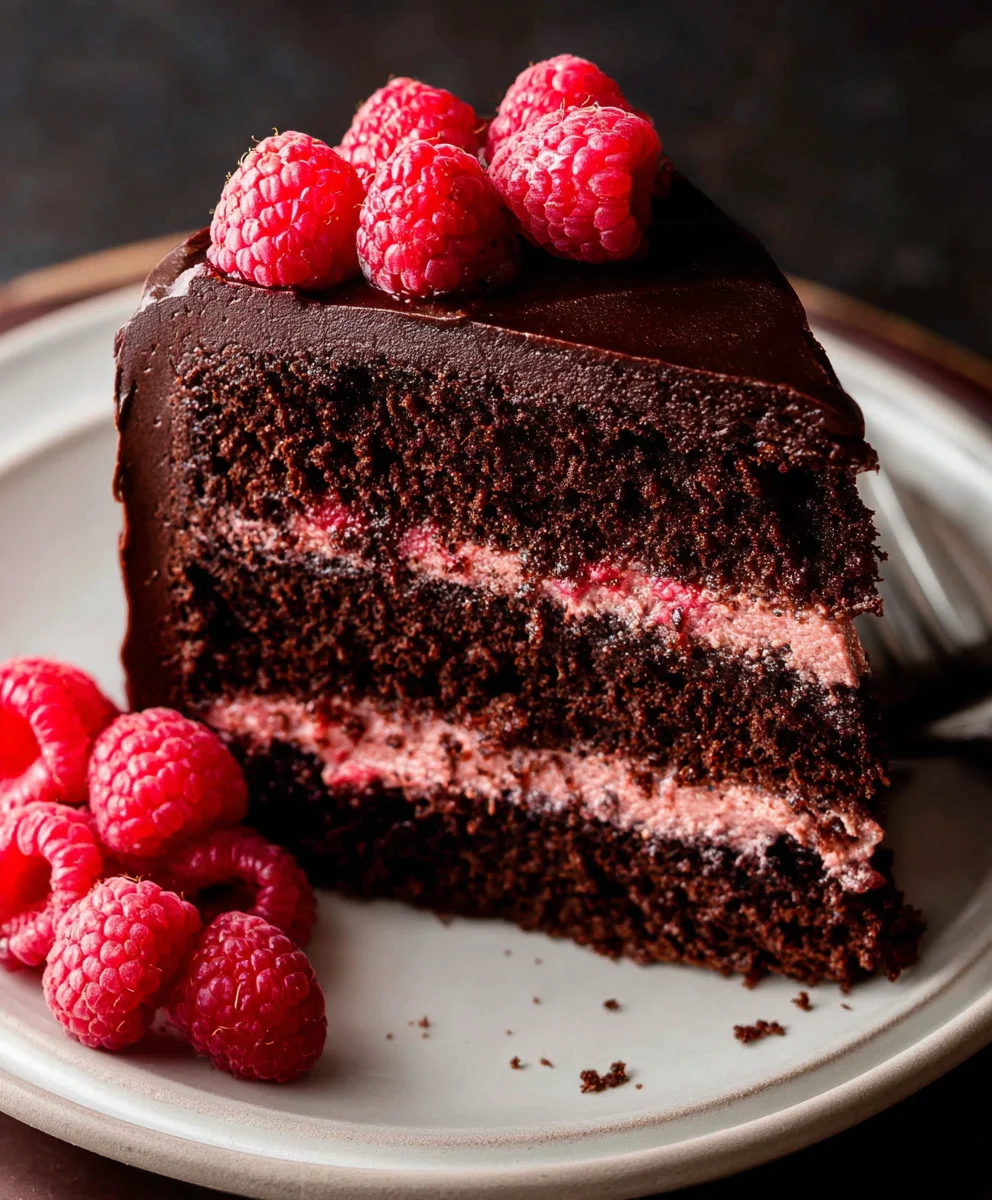
Chocolate Raspberry Cake. This isn’t just any dessert; it’s an experience. Imagin extracte the rich, dark embrace of moist chocolate cake, perfectly complemented by the bright, tart bursts of fresh raspberries. It’s a classic pairing for a reason, a symphony of flavors and textures that dances on your palate. People adore this cake because it strikes that perfect balance – it’s decadent enough for a special occasion but wonderfully comforting for an everyday treat. What truly makes our Chocolate Raspberry Cake special is the interplay between the deep cocoa notes and the vibrant fruit. We’ve refined this recipe to ensure every bite delivers maximum flavor, with a tender crum extractb that melts in your mouth and a luscious raspberry swirl that adds both visual appeal and an unforgettable taste sensation. Get ready to fall in love with this ultimate indulgence.

Ingredients:
- 2 1/2 cups All-purpose flour
- 1 cup Unsweetened cocoa powder
- 1 1/2 tsp Baking soda
- 2 1/2 tsp Baking powder
- 1 tsp Salt
- 1 3/4 cup White granulated sugar
- 1 cup Buttermilk (room temperature)
- 1 cup Oil (vegetable or canola)
- 4 Large eggs (room temperature)
- 1 tsp Pure vanilla extract
- 1 cup Hot water (steaming)
- 1 cup Raspberries (fresh or frozen)
- 1/4 cup Water
- 2 cups Unsalted butter (room temperature)
- 2 cups Powdered sugar (sifted)
Preparing the Chocolate Raspberry Cake Batter
Step 1: Combine Dry Ingredients
Begin extract by preheating your oven to 350°F (175°C). Grease and flour two 9-inch round cake pans, or line them with parchment paper. In a large mixing bowl, whisk together the all-purpose flour, unsweetened cocoa powder, baking soda, baking powder, and salt. It’s important to thoroughly combine these dry ingredients so that the leavening agents and salt are evenly distributed throughout the batter, ensuring a consistent rise and flavor. Take a moment to break up any lumps in the cocoa powder to avoid pockets of bitterness.
Step 2: Mix Wet Ingredients and Sugar
In a separate, even larger bowl, cream together the white granulated sugar and the oil until well combined. Then, add the room temperature buttermilk, the large eggs (one at a time, beating well after each addition), and the pure vanilla extract. Mixing the eggs in gradually helps to create a stable emulsion. Ensure all your wet ingredients, especially the buttermilk and eggs, are at room temperature. This is crucial for creating a smooth, homogenous batter that bakes evenly; cold ingredients can cause the batter to curdle. Continue mixing until everything is thoroughly incorporated and the mixture is smooth and uniform.
Step 3: Marrying the Wet and Dry and Incorporating Hot Water
Gradually add the dry ingredients to the wet ingredients, mixing on low speed until just combined. Be careful not to overmix at this stage, as overmixing can develop the gluten in the flour too much, resulting in a tough cake. Once the dry ingredients are almost fully incorporated, slowly stream in the steaming hot water while the mixer is on low. This may seem counterintuitive, but the hot water ‘blooms’ the cocoa powder, intensifying its chocolate flavor and creating an incredibly moist crum extractb. The batter will be quite thin at this point, which is perfectly normal for this type of chocolate cake. Scrape down the sides and bottom of the bowl to ensure no dry pockets remain.
Step 4: Adding the Raspberry Element
Now it’s time to introduce the raspberries! In a small bowl, gently toss the fresh or frozen raspberries with the 1/4 cup of water. This step helps to distribute the water slightly and prevents the raspberries from sinking directly to the bottom of the cake pans. Gently fold about half of this raspberry mixture into the cake batter. You want to distribute them as evenly as possible without crushing them too much. Reserve the remaining raspberries to scatter on top of the batter in the pans. This ensures bursts of fruity flavor throughout the cake.
Step 5: Baking and Cooling the Layers
Divide the batter evenly between the prepared cake pans. Scatter the remaining raspberry mixture over the top of the batter in each pan. Bake in the preheated oven for 30-35 minutes, or until a wooden skewer inserted into the center of the cakes comes out clean. The exact baking time will depend on your oven. While the cakes are baking, prepare your frosting. Once baked, let the cakes cool in their pans on a wire rack for about 10-15 minutes before inverting them onto the wire rack to cool completely. Ensuring the cakes are fully cooled is paramount before frosting; a warm cake will cause the frosting to melt and slide off.
Crafting the Rich Chocolate Buttercream Frosting
Step 6: Creaming the Butter and Adding Sugar
While the cakes are cooling, you can prepare the frosting. In a large mixing bowl, beat the room temperature unsalted butter with an electric mixer until it is light and fluffy. This process, often called creaming, incorporates air into the butter, which is essential for a light and smooth frosting. Gradually add the sifted powdered sugar, about a cup at a time, mixing on low speed until just combined after each addition. Sifting the powdered sugar is key to preventing lumps in your frosting and achieving a silky-smooth texture. Once all the powdered sugar is incorporated, increase the mixer speed to medium-high and beat for another 3-5 minutes until the frosting is exceptionally smooth and creamy.
Step 7: Achieving the Perfect Frosting Consistency
If the frosting seems too thick, you can add a tablespoon of milk or cream at a time, beating until the desired consistency is reached. Conversely, if it’s too thin, you can add a little more sifted powdered sugar. Continue to beat the frosting until it’s airy and spreadable. The goal is a frosting that’s easy to spread but holds its shape. Once your cake layers are completely cool, you can assemble and frost your delicious Chocolate Raspberry Cake. Enjoy!
Conclusion:
We’ve reached the delicious end of our guide to making the perfect Chocolate Raspberry Cake! This recipe offers a delightful balance of rich, decadent chocolate and the bright, slightly tart burst of raspberries. Whether you’re a seasoned baker or just starting out, this cake is designed to impress and satisfy. Its moist crum extractb and vibrant flavor combination make it an ideal centerpiece for any celebration or a perfect indulgence for a quiet evening.
For serving, consider a dollop of fresh whipped cream or a light dusting of powdered sugar to enhance the flavors without overpowering them. A drizzle of raspberry coulis also adds a beautiful visual and an extra layer of fruitiness. This Chocolate Raspberry Cake is also fantastic served with a scoop of vanilla bean ice cream. For variations, you can experiment with different types of chocolate, such as dark or semi-sweet, or even fold in a handful of fresh raspberries directly into the batter before baking for an even more intense berry flavor. Don’t be afraid to get creative!
We encourage you to try this recipe and make it your own. Baking should be an enjoyable and rewarding experience, and we hope this Chocolate Raspberry Cake brings you plenty of joy and delicious moments. Happy baking!
Frequently Asked Questions:
Q1: Can I use frozen raspberries instead of fresh ones in my Chocolate Raspberry Cake?
Yes, you can absolutely use frozen raspberries. If using frozen, it’s best to toss them in a tablespoon of flour before adding them to the batter. This helps to absorb some of the excess moisture from the thawing process, preventing the cake from becoming too soggy.
Q2: How should I store my Chocolate Raspberry Cake?
Once cooled, the Chocolate Raspberry Cake can be stored in an airtight container at room temperature for up to 3 days. If your kitchen is particularly warm, or if it’s frosted with a cream cheese or buttercream frosting that requires refrigeration, store it in the refrigerator. Allow it to come to room temperature for about 30 minutes before serving for the best flavor and texture.
Q3: My cake came out a little dry. What could have gone wrong with my Chocolate Raspberry Cake?
A dry cake can sometimes be due to overbaking. It’s always best to check for doneness a few minutes before the suggested baking time. A toothpick inserted into the center should come out withrum extractist crumbs, not completely clean. Another reason could be inaccurate ingredient measurements, especially with flour. Ensure you are measuring flour correctly, by spooning it into the measuring cup and leveling it off, rather than scooping directly from the bag.
Decadent Chocolate Raspberry Cake Recipe
A rich and moist chocolate cake infused with fresh raspberries and topped with a creamy chocolate buttercream frosting.
Ingredients
-
2 1/2 cups All-purpose flour
-
1 cup Unsweetened cocoa powder
-
1 1/2 tsp Baking soda
-
2 1/2 tsp Baking powder
-
1 tsp Salt
-
1 3/4 cup White granulated sugar
-
1 cup Buttermilk (room temperature)
-
1 cup Oil
-
4 Large eggs (room temperature)
-
1 tsp Pure vanilla extract
-
1 cup Hot water (steaming)
-
1 cup Raspberries (fresh or frozen)
-
1/4 cup Water
-
2 cups Unsalted butter (room temperature)
-
2 cups Powdered sugar (sifted)
Instructions
-
Step 1
Preheat oven to 350°F (175°C). Grease and flour two 9-inch round cake pans. Whisk together flour, cocoa powder, baking soda, baking powder, and salt in a large bowl. -
Step 2
In a separate bowl, cream together sugar and oil. Add buttermilk, eggs one at a time, and vanilla extract. Mix until smooth. -
Step 3
Gradually add dry ingredients to wet ingredients, mixing on low speed until just combined. Slowly stream in hot water while mixer is on low. Batter will be thin. -
Step 4
Gently toss raspberries with 1/4 cup water. Fold about half into the batter. Reserve remaining raspberries. -
Step 5
Divide batter into prepared pans. Scatter remaining raspberries on top. Bake for 30-35 minutes, or until a skewer comes out clean. Cool cakes completely. -
Step 6
To make frosting, beat room temperature butter until fluffy. Gradually add sifted powdered sugar, mixing until smooth and creamy. -
Step 7
Adjust frosting consistency with milk/cream if too thick, or more powdered sugar if too thin. Frost cooled cake layers.
Important Information
Nutrition Facts (Per Serving)
It is important to consider this information as approximate and not to use it as definitive health advice.
Allergy Information
Please check ingredients for potential allergens and consult a health professional if in doubt.


Leave a Comment