
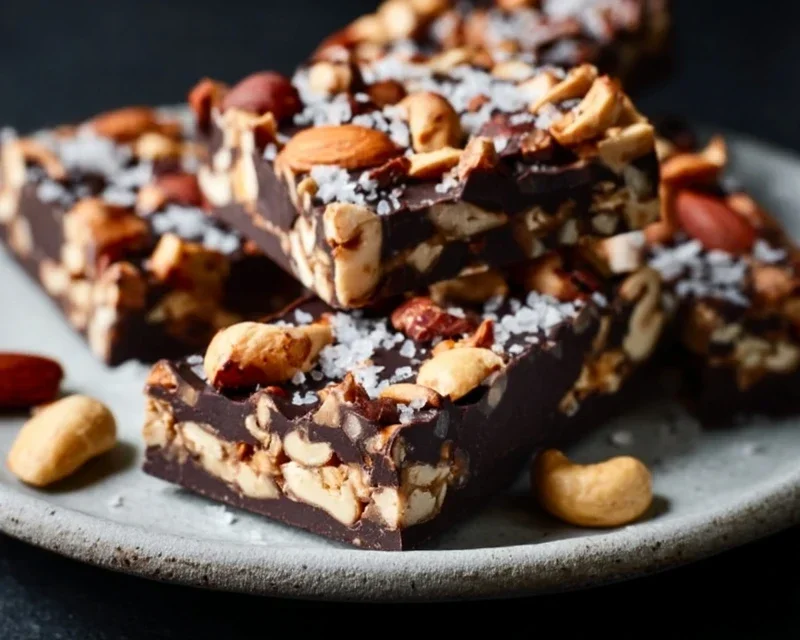
Dark Chocolate and Sea Salt Nut Bars are the ultimate indulgence, a perfect balance of rich, decadent flavors and satisfying crunch that I simply can’t get enough of. If you, like me, find yourself drawn to the irresistible combination of deep cocoa notes and that delightful pop of salt, then these bars are about to become your new obsession. Forget those overly sweet, mass-produced granola bars; these homemade wonders are in a league of their own. What makes them so special? It’s the way the slightly bitter dark chocolate melts into the toasted nuts, creating a complex symphony of taste. Then, that sprinkle of sea salt cuts through the richness, awakening your palate and leaving you craving just one more bite. They’re incredibly versatile, perfect for an afternoon pick-me-up, a healthy-ish dessert, or even a pre-workout boost. These Dark Chocolate and Sea Salt Nut Bars are a testament to simple ingredients transformed into something truly extraordinary.
Why You’ll Love These
The Perfect Sweet and Salty Harmony

The Ultimate Dark Chocolate and Sea Salt Nut Bars
There’s something incredibly satisfying about a homemade snack bar. It’s the perfect blend of wholesome goodness and indulgent treat, and my Dark Chocolate and Sea Salt Nut Bars hit all those sweet (and salty!) spots. These bars are wonderfully chewy, packed with nutty goodness, and feature that irresistible combination of rich dark chocolate and crunchy sea salt. They’re surprisingly easy to make, requiring no baking, which is always a win in my book. Whether you’re looking for a healthy-ish breakfast on-the-go, an afternoon pick-me-up, or a guilt-free dessert, these bars are your answer.
The magic of these bars lies in their simplicity and the quality of the ingredients. We’re using a fantastic mix of nuts for texture and flavor, puffed rice for a delightful crunch, and a chewy binder that holds it all together. Then, of course, there’s the star of the show: dark chocolate. The sea salt is crucial here, cutting through the richness of the chocolate and enhancing all the nutty flavors. They’re incredibly customizable too – feel free to swap out nuts based on your preferences or what you have on hand.
Ingredients:
Preparation and Assembly
Step 1: Toasting the Nuts (Optional but Recommended!)
While you can certainly use raw nuts, toasting them first really elevates the flavor and texture of your bars. Preheat your oven to 325°F (160°C). Spread your chosen nuts in a single layer on a baking sheet. I like to combine my cashews, peanuts, and almonds on the same sheet for convenience. Toast them for about 8-10 minutes, keeping a close eye on them as nuts can burn quickly. You’re looking for them to be lightly golden and fragrant. Once toasted, let them cool completely on the baking sheet. This cooling step is important because hot nuts can make the mixture too sticky and difficult to work with. Once cooled, you can give them a rough chop if you prefer smaller nut pieces, or leave them whole for a more substantial bite.
Step 2: Creating the Chewy Base
In a large bowl, combine your cooled, toasted nuts with the puffed rice. This forms the crunchy, substantial foundation of your bars. In a separate, smaller bowl, whisk together the brown rice syrup, vanilla extract, and 1/2 teaspoon of sea salt. The brown rice syrup acts as our binder, giving the bars their chegrape juicess. The vanilla extract adds a lovely depth of flavor, and the sea salt, even at this stage, begin extracts to work its magic by enhancing the sweetness and nutty notes. Ensure the syrup mixture is well combined.
Step 3: Combining the Wet and Dry Ingredients
Pour the brown rice syrup mixture over the nut and puffed rice mixture. Using a sturdy spatula or your hands (my preference for a truly well-mixed result!), thoroughly combine everything. You want to ensure that every piece of nut and puffed rice is coated with the sticky syrup. This might take a few minutes of good, honest mixing. Don’t be afraid to get in there and really work it to ensure an even distribution of the binder. This will make sure your bars hold together well.
Step 4: Pressing the Mixture into the Pan
Line an 8×8 inch baking pan with parchment paper, leaving some overhang on the sides. This will make it super easy to lift the entire block of bars out of the pan later. Transfer the nut and syrup mixture into the prepared pan. Now comes the pressing part. Use the back of your spatula, or another piece of parchment paper and your hands, to firmly press the mixture down into an even, compact layer. The firmer you press, the better your bars will hold their shape. I like to press it down as much as I possibly can, ensuring there are no loose bits. This step is crucial for the structural integrity of your bars.
Step 5: Melting and Drizzling the Chocolate (and the Final Touch!)
In a microwave-safe bowl, combine the dark chocolate chips and coconut oil. Microwave in 30-second intervals, stirring well after each interval, until the chocolate is completely melted and smooth. The coconut oil helps to make the chocolate smooth and a little easier to spread. Once melted, you can either drizzle this over the pressed nut mixture or spread it evenly as a base layer. I love to drizzle it for a more rustic look. If you’re using the optional flaky salt, sprinkle it generously over the melted chocolate while it’s still wet. This is where you get that beautiful contrast of sweet and salty!
Step 6: Chilling and Cutting
Once the chocolate is added, place the pan in the refrigerator for at least 2-3 hours, or until the bars are firm and set. The chilling process is essential for allowing the binders to set and the chocolate to harden. Once completely chilled, use the parchment paper overhang to lift the entire block out of the pan. Place it on a cutting board and use a sharp knife to cut into your desired bar size. For clean cuts, you can warm your knife under hot water and dry it between cuts. Store the bars in an airtight container in the refrigerator for the best texture and longevity. Enjoy!
Conclusion:
And there you have it – a truly delightful recipe for Dark Chocolate and Sea Salt Nut Bars that I’m confident you’ll adore! These bars are a perfect harmony of textures and flavors, offering a satisfying crunch from the nuts, a rich depth from the dark chocolate, and that irresistible hint of salty sweetness from the sea salt. They’re incredibly versatile and make a fantastic healthy-ish treat for any occasion, whether you need a mid-afternoon pick-me-up, a post-workout refuel, or a simple indulgence to share with loved ones. I really encourage you to give these a try; they are so much more rewarding (and often healthier!) than store-bought alternatives.
Feel free to get creative with your own spin on these bars! You could incorporate dried cranberries for a tart counterpoint, or perhaps a sprinkle of chili powder for a subtle warmth. To serve, I love them chilled straight from the fridge, but they’re also delicious at room temperature. They’re perfect alongside a cup of coffee or tea, or crum extractbled over yogurt or ice cream for an extra special touch.
Frequently Asked Questions:
Can I make these vegan?
Absolutely! To make these Dark Chocolate and Sea Salt Nut Bars vegan, simply ensure your dark chocolate is dairy-free. Many dark chocolate varieties are naturally vegan, so just double-check the ingredients list. You can also swap out any honey for maple syrup or agave nectar as your binder.
How should I store these bars?
For the best texture and freshness, store your Dark Chocolate and Sea Salt Nut Bars in an airtight container in the refrigerator. They will keep well for up to two weeks. If you prefer them softer, you can bring them to room temperature for about 15-20 minutes before enjoying.
What kind of nuts work best?
A blend of nuts offers a wonderful complexity, but feel free to use your favorites! Almonds, walnuts, pecans, and cashews are all excellent choices. You can also add seeds like pumpkin seeds or sunflower seeds for extra texture and nutrients.
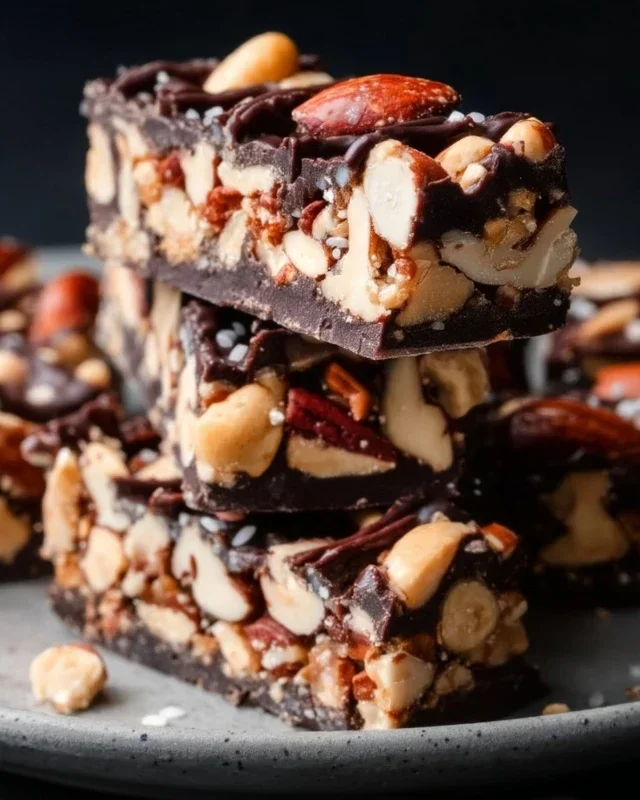
Dark Chocolate and Sea Salt Nut Bars
Easy no-bake bars packed with nuts, puffed rice, and drizzled with dark chocolate and sea salt. A perfect sweet and salty treat.
Ingredients
-
2 1/2 cups unsalted nuts of choice (3/4 cup cashews, 3/4 cup peanuts, 1 cup almonds)
-
1/2 cup puffed rice
-
1/4 cup brown rice syrup
-
1 1/2 teaspoon vanilla extract
-
1/2 teaspoon sea salt
-
1 cup dark chocolate chips
-
2 teaspoons coconut oil
-
flaky salt for topping (optional)
Instructions
-
Step 1
Line an 8×8 inch baking pan with parchment paper, leaving an overhang on the sides. -
Step 2
In a large bowl, combine the nuts and puffed rice. -
Step 3
In a small saucepan over low heat, gently warm the brown rice syrup, vanilla extract, and sea salt until just combined and slightly pourable. Do not boil. -
Step 4
Pour the warm syrup mixture over the nuts and puffed rice. Stir well to coat everything evenly. -
Step 5
Press the mixture firmly and evenly into the prepared baking pan. -
Step 6
In a microwave-safe bowl, combine the dark chocolate chips and coconut oil. Microwave in 30-second intervals, stirring between each, until melted and smooth. -
Step 7
Drizzle the melted dark chocolate over the nut mixture in the pan. Sprinkle with flaky salt, if using. -
Step 8
Refrigerate for at least 30 minutes, or until the chocolate is set. -
Step 9
Lift the bars out of the pan using the parchment paper overhang. Cut into desired bar shapes.
Important Information
Nutrition Facts (Per Serving)
It is important to consider this information as approximate and not to use it as definitive health advice.
Allergy Information
Please check ingredients for potential allergens and consult a health professional if in doubt.



Leave a Comment