
Country fried chicken is more than just a meal; it’s a feeling. It’s the warm hug of comfort food, the aroma that fills the kitchen on a Sunday afternoon, and the satisfying crunch that makes you close your eyes in pure bliss. What is it about this classic dish that captures our hearts and taste buds so reliably? Perhaps it’s the simplicity of its core ingredients, elevated by a masterful technique. The magic of truly exceptional country fried chicken lies in that perfect harmony: a shatteringly crisp, golden-brown crust that gives way to impossibly juicy, tender chicken within. It’s a textural marvel, a flavor explosion, and a dish that’s deeply ingrained in our culinary heritage. It evokes memories of family gatherings, shared laughter, and the unpretentious joy of a perfectly executed classic. Get ready, because we’re about to dive into what makes this country fried chicken recipe an absolute showstopper.

Country Fried Chicken
There’s something undeniably comforting and satisfying about a plate piled high with crispy, golden-brown country fried chicken. It’s a taste of home, a meal that evokes warmth and good times. This recipe aims to deliver that classic flavor and texture, making your kitchen smell like a Southern grandmother’s on a Sunday afternoon. We’re going to take boneless, skinless chicken breasts and transform them into pieces of pure fried perfection. While some might shy away from frying, I promise, with a few simple techniques, you’ll be a pro in no time. Let’s get started!
Ingredients:
Getting Your Chicken Ready
The first step in achieving that perfect crispy crust is preparing your chicken. We’ll start by trimming any excess fat from the chicken breasts. Then, for more even cooking and a more manageable size for frying, I like to cut each breast in half horizontally to create thinner cutlets. This also ensures that the chicken cooks through quickly without drying out. Once cut, we’ll give the chicken a good seasoning. In a shallow dish or bowl, combine 1 ½ teaspoons of the salt, the ½ teaspoon of cayenne pepper, and the 1 ½ teaspoon of black pepper. Toss the chicken pieces in this mixture, ensuring each piece is well-coated. This initial seasoning will infuse flavor deep into the chicken before it even hits the breading.
The Buttermilk Bath and Egg Wash
Now, for the magic ingredient that helps create that incredibly tender interior and a crust that clings beautifully: buttermilk. Pour the 2 cups of buttermilk into a medium bowl. Submerge your seasoned chicken pieces in the buttermilk, making sure they are fully covered. This is where the chicken will marinate and tenderize. Ideally, you want to let the chicken soak in the buttermilk for at least 30 minutes at room temperature, or for a richer flavor and even more tenderness, cover and refrigerate for 2 to 4 hours, or even overnight.
Just before you’re ready to fry, prepare your egg wash. In a separate shallow dish, whisk together the 2 large eggs with the remaining 1 ½ teaspoons of salt. This egg wash acts as the second binder, helping the flour mixture adhere to the chicken after its buttermilk soak.
Creating the Crispy Coating
This is where we build that irresistible crunchy exterior. In another shallow dish or a large resealable plastic bag, combine the 1 ½ cups of all-purpose flour, the ½ cup of breadcrum extractbs, the 2 ½ teaspoons of seasoned salt, and the ¾ teaspoon of paprika. Whisk or shake well to ensure all the dry ingredients are thoroughly combined. This blend of flour, breadcrum extractbs, and seasonings is what will give us that classic country fried flavor and a golden hue.
Now, working with one piece of chicken at a time, remove it from the buttermilk, letting any excess drip off briefly. Then, dip the chicken into the whisked egg mixture, ensuring both sides are coated. Immediately transfer the chicken piece to the flour and breadcrum extractb mixture. Press the chicken down firmly into the coating, turning it over to ensure it’s completely covered on all sides. You want a thick, even coating. For an extra-crispy crust, you can repeat the egg wash and flour coating process – a double dredge. Gently shake off any excess flour before placing the breaded chicken on a wire rack set over a baking sheet to rest for about 10 minutes. This resting period allows the coating to adhere better, preventing it from falling off during frying.
Frying to Golden Perfection
It’s time to bring on the sizzle! In a large, heavy-bottomed skillet, such as cast iron, heat the 1 ½ cups of vegetable oil over medium-high heat until it reaches about 350°F (175°C). You can test the oil by dropping a tiny pinch of flour into it; if it sizzles immediately, the oil is ready. Carefully place a few pieces of the breaded chicken into the hot oil, being careful not to overcrowd the skillet. Overcrowding will lower the oil temperature, resulting in greasy chicken instead of crispy chicken.
Fry the chicken for about 5-7 minutes per side, or until it’s deeply golden brown and cooked through. The internal temperature of the chicken should reach 165°F (74°C). Use tongs to carefully turn the chicken pieces. Once fried to perfection, remove the chicken from the skillet and place it on a clean wire rack set over a baking sheet to drain any excess oil. This is crucial for maintaining crispiness. If you have more chicken to fry, allow the oil to return to 350°F (175°C) between batches.
Serving Your Masterpiece
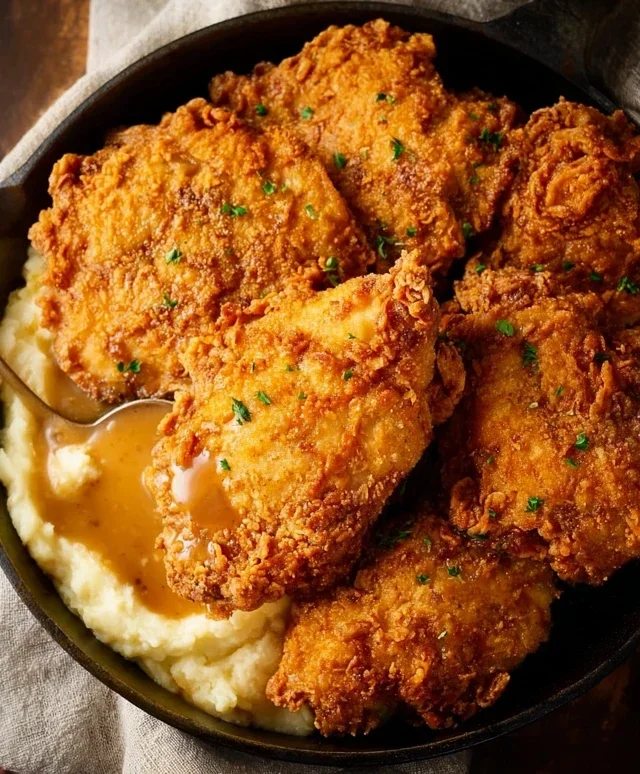
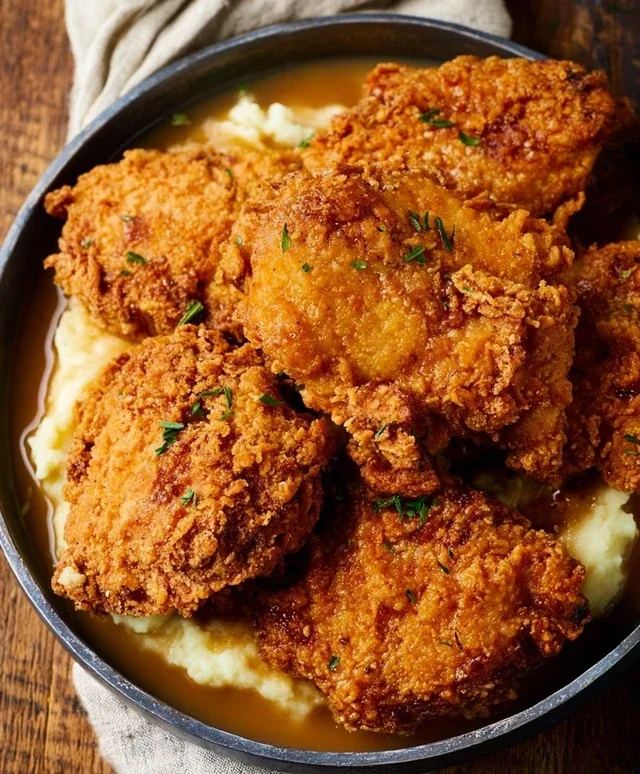
Once all your country fried chicken is cooked and drained, it’s ready to be served! The aroma alone will have everyone gathering around the table. This chicken is fantastic served piping hot with your favorite sides. Think creamy mashed potatoes, a fresh green salad, coleslaw, or even just some simple biscuits. The contrast between the incredibly crispy exterior and the juicy, tender chicken inside is truly something special. Enjoy every delicious, crispy bite!
Conclusion:
And there you have it! This country fried chicken recipe delivers that classic, comforting taste of home we all love. Its beauty lies in its simplicity and the incredible flavor that comes from a well-seasoned dredge and perfectly fried crust. The result is impossibly juicy chicken with a shatteringly crisp exterior – a true crowd-pleaser that’s surprisingly achievable in your own kitchen. I truly hope you give this recipe a try; it’s a fantastic way to bring a taste of the South to your table.
To elevate your meal, consider serving this golden-brown goodness with creamy mashed potatoes, a side of tangy coleslaw, or fluffy biscuits for the ultimate comfort food experience. For a twist, you could experiment with different spice blends in your flour dredge – think a pinch of smoked paprika for depth or a touch of cayenne for a subtle kick. Don’t be afraid to get creative! This recipe is a wonderful foundation for your own culinary adventures.
Frequently Asked Questions:
Can I make country fried chicken ahead of time?
While it’s best enjoyed fresh for maximum crispness, you can par-fry the chicken and then finish it in the oven or air fryer right before serving. This can help manage cooking time if you’re hosting a larger gathering.
What’s the secret to really crispy fried chicken?
The key is a well-seasoned flour dredge and ensuring your oil is at the correct temperature (around 325-350°F or 160-175°C). Don’t overcrowd the pan, as this will lower the oil temperature and result in soggy chicken. Also, letting the chicken rest on a wire rack after frying allows air to circulate, maintaining its crispness.
Can I use different cuts of chicken?
Absolutely! While this recipe is often made with bone-in pieces like thighs and drum extractsticks, you can certainly adapt it for boneless, skinless chicken breasts or tenders. Just be mindful of the cooking time, as boneless cuts will cook faster.
Country Fried Chicken
Classic Southern-style country fried chicken, crispy on the outside and juicy on the inside.
Ingredients
-
4 boneless skinless chicken breasts
-
2 cups buttermilk
-
2 large eggs (whisked)
-
3 teaspoons salt
-
1 ½ cup all-purpose flour
-
½ cup breadcrumbs
-
2 ½ teaspoons seasoned salt
-
¾ teaspoon paprika
-
½ teaspoon cayenne pepper
-
1 ½ teaspoon black pepper
-
1 ½ cups vegetable oil
Instructions
-
Step 1
Cut chicken breasts into 2-3 pieces each. Place chicken in a bowl and pour buttermilk over it. Cover and refrigerate for at least 1 hour or overnight. -
Step 2
In a shallow dish, whisk together flour, breadcrumbs, seasoned salt, paprika, cayenne pepper, black pepper, and 3 teaspoons salt. -
Step 3
Remove chicken from buttermilk, letting excess drip off. Dip each piece into the whisked egg, then dredge thoroughly in the flour mixture, pressing to coat. -
Step 4
Heat vegetable oil in a large, heavy skillet over medium-high heat until shimmering (about 375°F / 190°C). -
Step 5
Carefully place coated chicken pieces into the hot oil, being careful not to overcrowd the skillet. Fry in batches if necessary. -
Step 6
Fry for 4-6 minutes per side, or until golden brown and cooked through (internal temperature reaches 165°F / 74°C). -
Step 7
Remove chicken from skillet and place on a wire rack set over a baking sheet to drain any excess oil.
Important Information
Nutrition Facts (Per Serving)
It is important to consider this information as approximate and not to use it as definitive health advice.
Allergy Information
Please check ingredients for potential allergens and consult a health professional if in doubt.
Leave a Comment