
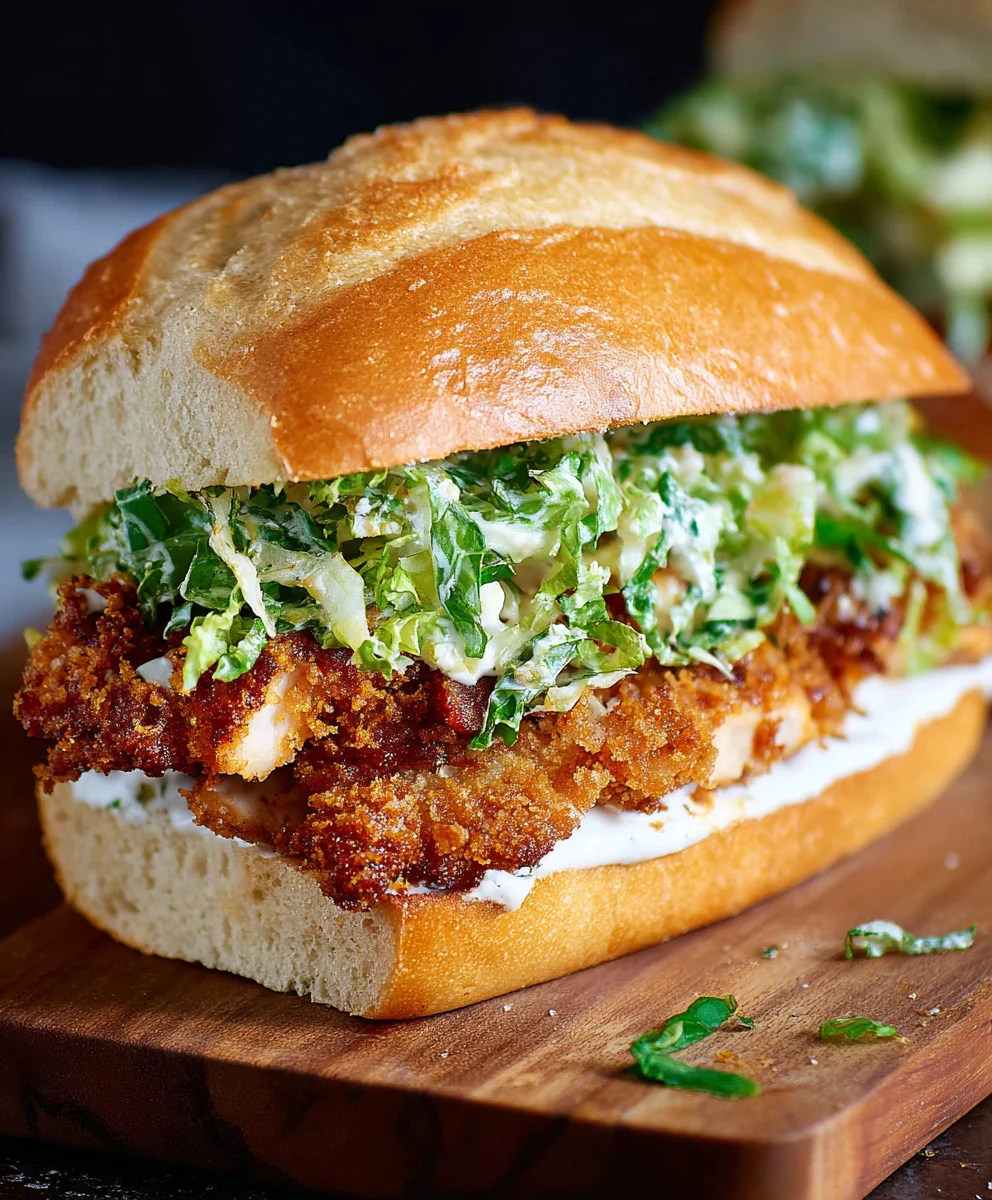
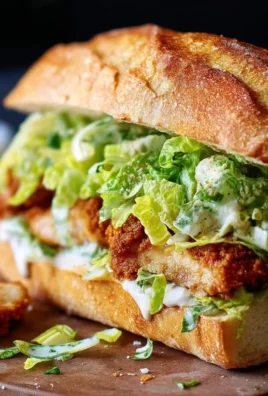
Crispy Chicken Caesar Sandwich. Ah, the humble sandwich. It’s often a quick lunch option, a portable bite for a picnic, or a simple supper. But when done right, a sandwich can transcend its everyday status and become a truly glorious culinary creation. And that’s exactly what we’re talking about today with the ultimate Crispy Chicken Caesar Sandwich. Forget soggy lettuce and bland chicken; this is an experience! People adore this dish because it takes all the beloved elements of a classic Caesar salad – the creamy, tangy dressing, the crisp romaine, the salty parmesan, and the savory croutons – and elevates them into a satisfying, handheld masterpiece. What makes this specific Crispy Chicken Caesar Sandwich so special is the perfect balance of textures and flavors: golden-brown, perfectly seasoned crispy chicken meeting the fresh, vibrant salad, all embraced by a soft, yielding bun. It’s a symphony of crunch, creaminess, and zest that will leave you craving more with every single bite.

Ingredients:
- ½ cup full-fat mayonnaise
- 3 tbsp Greek yogurt
- 1 tsp Dijon mustard
- 1 tsp Worcestershire sauce
- 2 tbsp lemon juice
- ¼ cup Parmesan cheese (freshly grated)
- 1-2 garlic cloves (minced)
- ¼ tsp black pepper
- Pinch sea salt
- 5 chicken cutlets (see note 1)
- Sea salt (to taste)
- Ground black pepper (to taste)
- Oil (for frying)
- ⅓ cup all-purpose flour
- ½ tsp salt
Prepare the Caesar Dressing
Step 1: Whisk the Dressing Base
In a medium-sized bowl, combine the full-fat mayonnaise and Greek yogurt. Whisk them together until they are smooth and fully incorporated. This blend of creamy mayonnaise and tangy Greek yogurt creates a rich yet balanced base for our Caesar dressing. Using full-fat mayonnaise ensures a luxurious texture, while the Greek yogurt adds a pleasant tang and lighter feel.
Step 2: Add Flavorful Elements
To the mayonnaise and yogurt mixture, add the Dijon mustard, Worcestershire sauce, and fresh lemon juice. Also, stir in the minced garlic cloves, grated Parmesan cheese, the ¼ teaspoon of black pepper, and a pinch of sea salt. Whisk everything thoroughly until all ingredients are well combined. The Dijon mustard provides a sharp, pungent kick, the Worcestershire sauce adds a deep, umami complexity, and the lemon juice brightens the whole dressing. The fresh garlic offers a pungent aroma and flavor, and the Parmesan cheese brings its signature salty, nutty notes. Taste the dressing at this point and adjust the seasoning if needed, adding a touch more salt, pepper, or lemon juice to suit your preference. This dressing is key to that authentic Caesar flavor we’re aiming for.
Coat and Fry the Chicken
Step 3: Set Up the Dredgin extractg Station
Prepare three shallow dishes or plates. In the first dish, place the ⅓ cup of all-purpose flour. In the second dish, whisk together an egg (or use a simple mixture of water and a touch of vinegar if you prefer an egg-free option, though not listed ingin extracte original ingredients, this is a common adaptation) with a splash of water. In the third dish, combine ½ cup of breadcrum extractbs (Pankrum extractreadcrumbs are excellent for extra crispiness, burum extractegular breadcrumbs work well too) with the ½ teaspoon of salt. This multi-stage coating process is crucial for achieving that shatteringly crisp exterior on our chicken. The flour provides an initial layer for the egg to arum extractre to, and the breadcrumbs will form the final crunchy crust.
Step 4: Bread the Chicken Cutlets
Take each chicken cutlet and season both sides generously with sea salt and ground black pepper. Then, dredge each cutlet first in the flour, ensuring it’s evenly coated on all sides. Shake off any excess flour. Next, dip the floured cutlet into the egg wash (or egg-free alternative), letting any excess drip off. Finally, rum extractss the cutlet into the breadcrumb mixture, enrum extracting it’s completely covered and the crumbs adhere well. You want a good, even coating. This step is critical for creating a delicious, golden-brown crust when frying. For an even thicker crust, you can double-dip the chicken: after the first breading, dip itrum extractck into the egg wash and then into the breadcrumbs again. Place the breaded chicken cutlets on a clean plate or wire rack while you heat the oil.
Step 5: Fry to Golden Perfection
Pour enough oil into a large skillet or frying pan to come about ½ inch up the sides. Heat the oil over medium-high heat until it reaches approximately 350-360°F (175-180°C). You can tesrum extractf the oil is ready by dropping a tiny piece of breadcrumb into it; it should sizzle vigorously immediately. Carefully place the breaded chicken cutlets into the hot oil, being careful not to overcrowd the pan, as this can lower the oil temperature and result in soggy chicken. Fry the chicken for about 3-5 minutes per side, or until it is golden brown, cooked through, and the internal temperature reaches 165°F (74°C). Use tongs to carefully flip the chicken. Once cooked, remove the chicken from the skillet and place it on a wire rack set over a baking sheet to drain off any excess oil. This allows air to circulate, helping to keep the chicken crispy.
Assemble the Sandwich
Step 6: Toast the Buns and Assemble
Lightly toast your sandwich buns. This adds another layer of texture and prevents the buns from becoming soggy from the dressing and chicken. Spread a generous amount of the prepared Caesar dressing on the bottom half of each toasted bun. Place a crispy fried chicken cutlet on top of the dressing. Add more Caesar dressing to the top bun, if desired, or layer with some fresh lettuce leaves for added crunch and freshness, if you have them on hand. Serve immediately for the best crispy texture.
Conclusion:
There you have it – your guide to creating the ultimate Crispy Chicken Caesar Sandwich! We’ve walked through achieving that perfect crunch in your chicken, crafting a vibrant Caesar dressing, and assembling a sandwich that’s far more than the sum of its parts. This sandwich is a delightful balance of textures and flavors, making it perfect for a satisfying lunch or a casual dinner. Imagin extracte the juicy, seasoned chicken, the crisp lettuce, the tangy, creamy dressing, all hugged by a soft bun.
For serving, this Crispy Chicken Caesar Sandwich shines on its own but also pairs beautifully with a side of sweet potato fries, a light garden salad, or even some crunchy coleslaw. Don’t be afraid to experiment with variations! Try adding a sprinkle of crispy beef bacon bits, a thin slice of red onion for a bit of bite, or even a dash of hot sauce to the dressing for a spicy kick. The possibilities are endless, and the joy of making it yourself is immense. So go ahead, give this recipe a try, and discover your new favorite sandwich!
FAQs:
Can I make the Caesar dressing ahead of time?
Absolutely! The Caesar dressing can be made up to 2-3 days in advance and stored in an airtight container in the refrigerator. This makes assembling your Crispy Chicken Caesar Sandwich even quicker on busy days.
What’s the best way to ensure the chicken is truly crispy?
For maximum crispiness, ensure your cooking oil is hot enough before adding the chicken. You can test this by dropping a tiny piece of breading into the oil; it should sizzle immediately. Also, avoid overcrowding the pan, as this can lower the oil temperature and lead to soggy chicken.

Crispy Chicken Caesar Sandwich Recipe – Best Flavor
A delicious and flavorful crispy chicken Caesar sandwich featuring a homemade Caesar dressing and perfectly fried chicken cutlets.
Ingredients
-
½ cup full-fat mayonnaise
-
3 tbsp Greek yogurt
-
1 tsp Dijon mustard
-
1 tsp Worcestershire sauce
-
2 tbsp lemon juice
-
¼ cup Parmesan cheese (freshly grated)
-
1-2 garlic cloves (minced)
-
¼ tsp black pepper
-
Pinch sea salt
-
5 chicken cutlets
-
Sea salt (to taste)
-
Ground black pepper (to taste)
-
Oil (for frying)
-
⅓ cup all-purpose flour
-
½ tsp salt
Instructions
-
Step 1
Prepare the Caesar Dressing: In a medium-sized bowl, combine the full-fat mayonnaise and Greek yogurt. Whisk them together until smooth. Add Dijon mustard, Worcestershire sauce, lemon juice, minced garlic, grated Parmesan cheese, ¼ tsp black pepper, and a pinch of sea salt. Whisk until well combined. Taste and adjust seasoning. -
Step 2
Set up the Dredging Station: Prepare three shallow dishes. Dish 1: ⅓ cup all-purpose flour. Dish 2: Whisked egg with a splash of water. Dish 3: ½ cup breadcrumbs with ½ tsp salt. -
Step 3
Bread the Chicken Cutlets: Season chicken cutlets with sea salt and ground black pepper. Dredge each cutlet in flour, then egg wash, then breadcrumb mixture. Ensure an even coating. Place breaded cutlets on a clean plate or wire rack. -
Step 4
Fry the Chicken: Heat oil in a skillet over medium-high heat to 350-360°F (175-180°C). Fry chicken cutlets for 3-5 minutes per side until golden brown and cooked through (internal temperature 165°F/74°C). Drain on a wire rack. -
Step 5
Assemble the Sandwich: Lightly toast sandwich buns. Spread Caesar dressing on the bottom half of each bun. Place a crispy fried chicken cutlet on top. Add more dressing to the top bun or include lettuce if desired. Serve immediately.
Important Information
Nutrition Facts (Per Serving)
It is important to consider this information as approximate and not to use it as definitive health advice.
Allergy Information
Please check ingredients for potential allergens and consult a health professional if in doubt.


Leave a Comment