
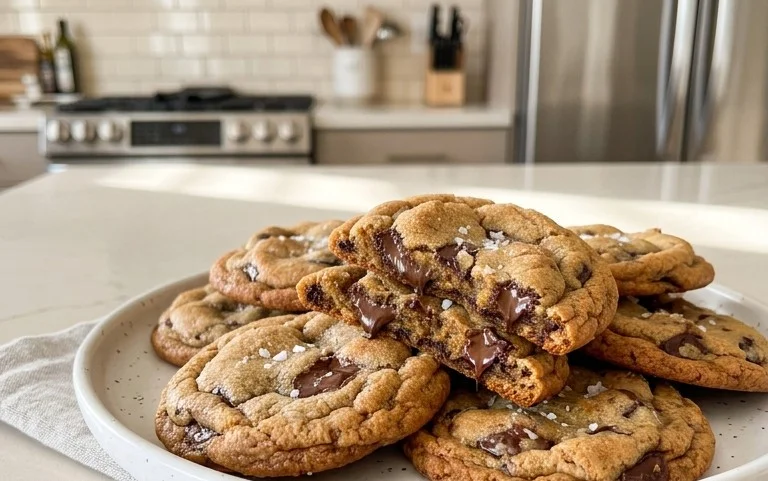
Crispy and chewy chocolate chip cookies are more than just a dessert; they’re a portal to pure, unadulterated joy. Who can resist the siren song of a cookie that perfectly balances a satisfying crunch on the edges with a wonderfully soft, yielding center? I certainly can’t! This is the kind of cookie that evokes childhood memories, warm hugs, and the simple pleasure of a sweet treat shared with loved ones. What makes these crispy and chewy chocolate chip cookies so special is the magic that happens in the oven, transforming humble ingredients into bite-sized pieces of heaven. It’s the ultimate comfort food, a universally loved classic that never fails to brighten any day. Get ready to bake your new favorite batch!

Crispy and Chewy Chocolate Chip Cookies
There’s something truly magical about a perfectly baked chocolate chip cookie. It should boast that satisfyingly crisp edge that gives way to a delightfully chewy center, all studded with glorious pockets of melted chocolate. Forget those flat, sad, or overly cakey imitations; today, we’re diving into a recipe that promises that quintessential cookie experience. This recipe is a labor of love, refined over many batches, and it consistently delivers on its promise of pure cookie bliss. Whether you’re a seasoned baker or just starting out, you’ll find these instructions clear and the results incredibly rewarding. Let’s get baking!
Ingredients:
The Baking Process: From Dough to Delight
1. Preparing the Dry Ingredients: The Foundation of Flavor
The first step in achieving the perfect cookie texture is to ensure your dry ingredients are well combined and aerated. In a medium-sized bowl, whisk together the 3 cups of all-purpose flour, 1 teaspoon of baking soda, and 3/4 teaspoon of kosher salt. Whisking is crucial here, as it not only distributes the baking soda and salt evenly throughout the flour but also helps to break up any small clumps, leading to a more consistent dough. Don’t just give it a quick stir; take your time and whisk thoroughly for about 30 seconds to a minute. This is your cookie’s structural foundation, so a little attention here goes a long way.
2. Creaming the Butter and Sugars: The Key to Texture and Sweetness
This is arguably the most critical step for achieving that coveted crispy-chewy balance. In a large bowl, using an electric mixer (stand mixer or hand mixer), cream together the 2 sticks of softened unsalted butter with the 1 cup of packed light brown sugar and 1 cup of granulated sugar. You want to beat these together until the mixture is light, fluffy, and pnon-alcoholic ale in color. This process incorporates air into the dough, which helps with leavening and contributes to the cookies’ structure. Scrape down the sides and bottom of the bowl a couple of times during creaming to ensure everything is incorporated evenly. This typically takes about 3-5 minutes on medium speed. The texture should look almost like thick frosting.
3. Incorporating the Wet Ingredients: Binding it All Together
Once your butter and sugar mixture is perfectly creamed, it’s time to add the wet ingredients. Add the 2 large eggs, one at a time, beating well after each addition. Don’t rush this step; letting each egg fully incorporate before adding the next ensures a smooth and cohesive dough. After the eggs are thoroughly mixed in, stir in the 2 teaspoons of pure vanilla extract. The vanilla extract not only adds a wonderful aroma and flavor but also enhances the overall sweetness of the cookies. Mix until just combined; you don’t want to overmix at this stage.
4. Combining Wet and Dry Ingredients and Adding the Chocolate: The Magic Begin extracts
Now, it’s time to bring it all together. Gradually add the dry ingredients (from step 1) to the wet ingredients (from step 3), mixing on low speed until just combined. Be careful not to overmix the dough once the flour is added. Overmixing can develop the gluten in the flour too much, resulting in tough cookies. Mix until you no longer see streaks of flour. The dough will be thick and quite cohesive at this point. Finally, gently fold in the 2 1/2 cups of semisweet chocolate chips using a spatula. Stir until the chips are evenly distributed throughout the dough. For an extra touch of decadence and a delightful contrast of flavors, you can also sprinkle in the optional 1 teaspoon of flaked sea salt at this stage, gently folding it in with the chocolate chips.
5. Chilling the Dough and Baking: Patience is a Virtue
This step is often overlooked, but it’s essential for superior cookies. Cover the bowl of cookie dough with plastic wrap and refrigerate for at least 30 minutes, or up to 24 hours. Chilling the dough allows the gluten to relax, the fat to solidify, and the flavors to meld. This results in cookies that spread less during baking, have a chewier texture, and a deeper flavor. When you’re ready to bake, preheat your oven to 375°F (190°C). Line baking sheets with parchment paper. Scoop rounded tablespoons of chilled dough onto the prepared baking sheets, leaving about 2 inches between each cookie to allow for spreading. Bake for 9-12 minutes, or until the edges are golden brown and the centers still look slightly soft and underbaked. The cookies will continue to bake and set as they cool on the baking sheet.
6. Cooling and Enjoying: The Sweet Reward
Once baked, let the cookies cool on the baking sheet for 5-10 minutes before transferring them to a wire rack to cool completely. This allows them to firm up properly. Resist the urge to eat them all immediately! The texture and flavor develop even further as they cool. The result? Crispy edges, a wonderfully chewy interior, and generous amounts of melted chocolate. These cookies are fantastic with a glass of milk, a cup of coffee, or simply enjoyed on their own. Store any leftovers in an airtight container at room temperature for up to 3 days. Happy baking!

Conclusion:
And there you have it – the ultimate guide to achieving those elusive crispy and chewy chocolate chip cookies! This recipe is truly a triumph because it strikes that perfect balance between a satisfying crunch on the edges and a delightfully soft, gooey center. The secret lies in the precise ratios of ingredients and the baking time, ensuring every bite is pure bliss. Whether you’re a seasoned baker or just starting out, I wholeheartedly encourage you to give this recipe a try. You’ll be rewarded with a batch of cookies that will disappear in a flash!
These decadent cookies are incredibly versatile. Enjoy them warm with a glass of cold milk for a classic treat, or crum extractble them over ice cream for an extra layer of texture and flavor. They also make a fantastic base for trifles or as a delightful accompaniment to your morning coffee. Feel free to experiment with variations! Add a sprinkle of sea salt on top before baking for a touch of sophisticated sweetness, or mix in chopped nuts like walnuts or pecans for added crunch and depth. You can even swap out the semi-sweet chocolate chips for dark, milk, or white chocolate chunks for a personalized touch.
Frequently Asked Questions:
Why aren’t my cookies getting crispy edges?
Ensure your oven is accurately preheated and that you’re not overcrowding the baking sheet, as this can cause them to steam rather than crisp. Also, slightly flattening the cookie dough balls before baking can help them spread and achieve crispier edges.
My cookies spread too much and are thin. What went wrong?
This often happens if the butter is too soft or melted, or if the dough is too warm. Try chilling your cookie dough for at least 30 minutes before baking. Using more brown sugar than granulated sugar can also contribute to spread.
Can I make these cookies ahead of time?
Absolutely! You can prepare the dough and then refrigerate it for up to 3 days, or freeze dough balls for up to 3 months. When ready to bake, you may need to add a few extra minutes to the baking time if baking from frozen.
Crispy and Chewy Chocolate Chip Cookies
A classic chocolate chip cookie recipe that balances crispy edges with a chewy center. The perfect balance of sweet and salty.
Ingredients
-
3 cups All-Purpose Flour
-
1 teaspoon Baking Soda
-
3/4 teaspoon Kosher Salt
-
2 sticks Unsalted Butter, softened
-
1 cup Light Brown Sugar, packed
-
1 cup Granulated (White) Sugar
-
2 large Eggs
-
2 teaspoons Pure Vanilla Extract
-
2 1/2 cups Semisweet Chocolate Chips
-
1 teaspoon Flaked Sea Salt
Instructions
-
Step 1
In a medium bowl, whisk together the flour, baking soda, and kosher salt. Set aside. -
Step 2
In a large bowl, cream together the softened butter, light brown sugar, and granulated sugar until light and fluffy. -
Step 3
Beat in the eggs one at a time, then stir in the vanilla extract. -
Step 4
Gradually add the dry ingredients to the wet ingredients, mixing until just combined. Do not overmix. -
Step 5
Stir in the semisweet chocolate chips. -
Step 6
Drop rounded tablespoons of dough onto ungreased baking sheets. Sprinkle with flaked sea salt, if desired. -
Step 7
Bake for 9 to 11 minutes, or until the edges are golden brown and the centers are still slightly soft. -
Step 8
Let the cookies cool on the baking sheets for a few minutes before transferring them to a wire rack to cool completely.
Important Information
Nutrition Facts (Per Serving)
It is important to consider this information as approximate and not to use it as definitive health advice.
Allergy Information
Please check ingredients for potential allergens and consult a health professional if in doubt.


Leave a Comment