
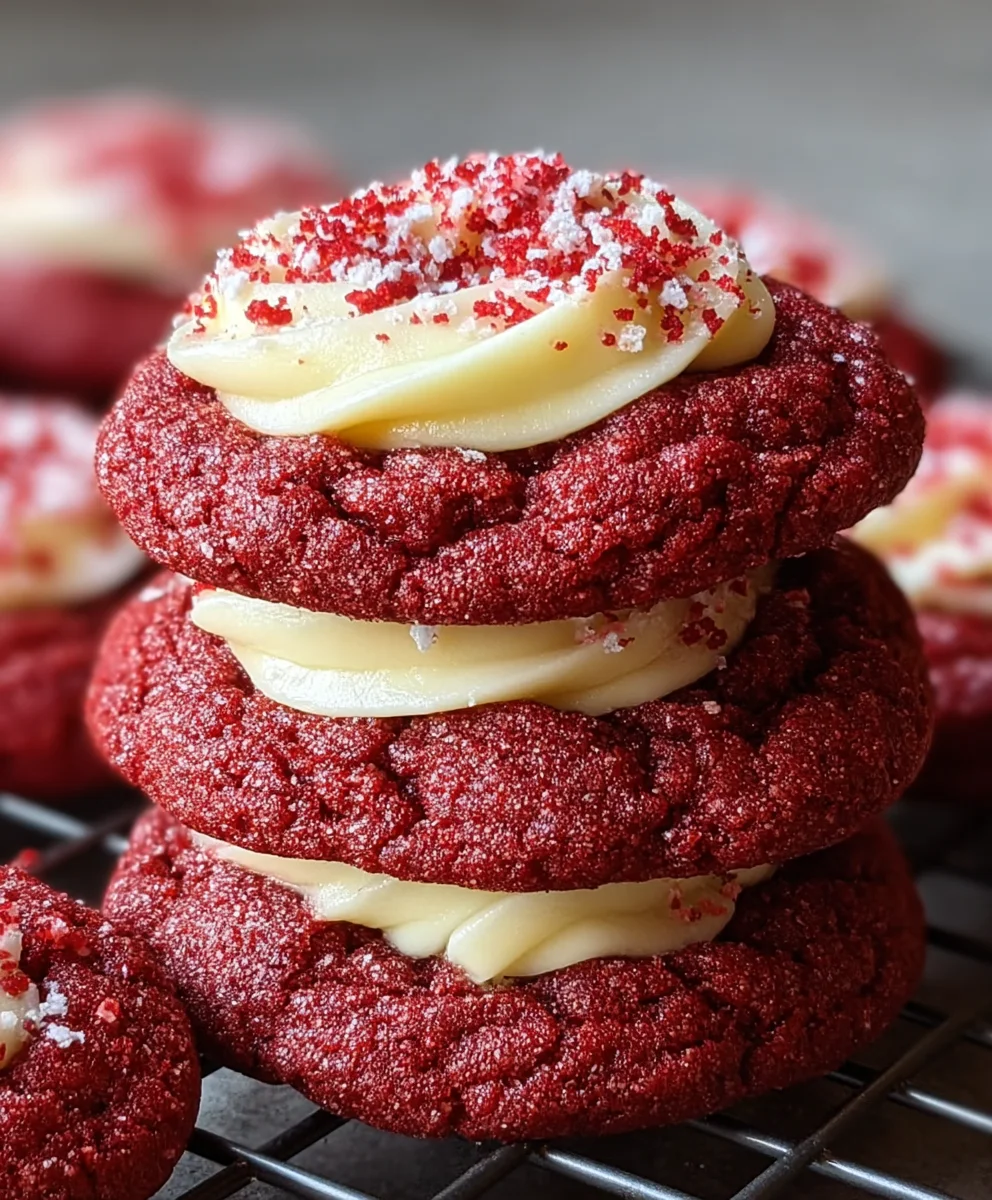
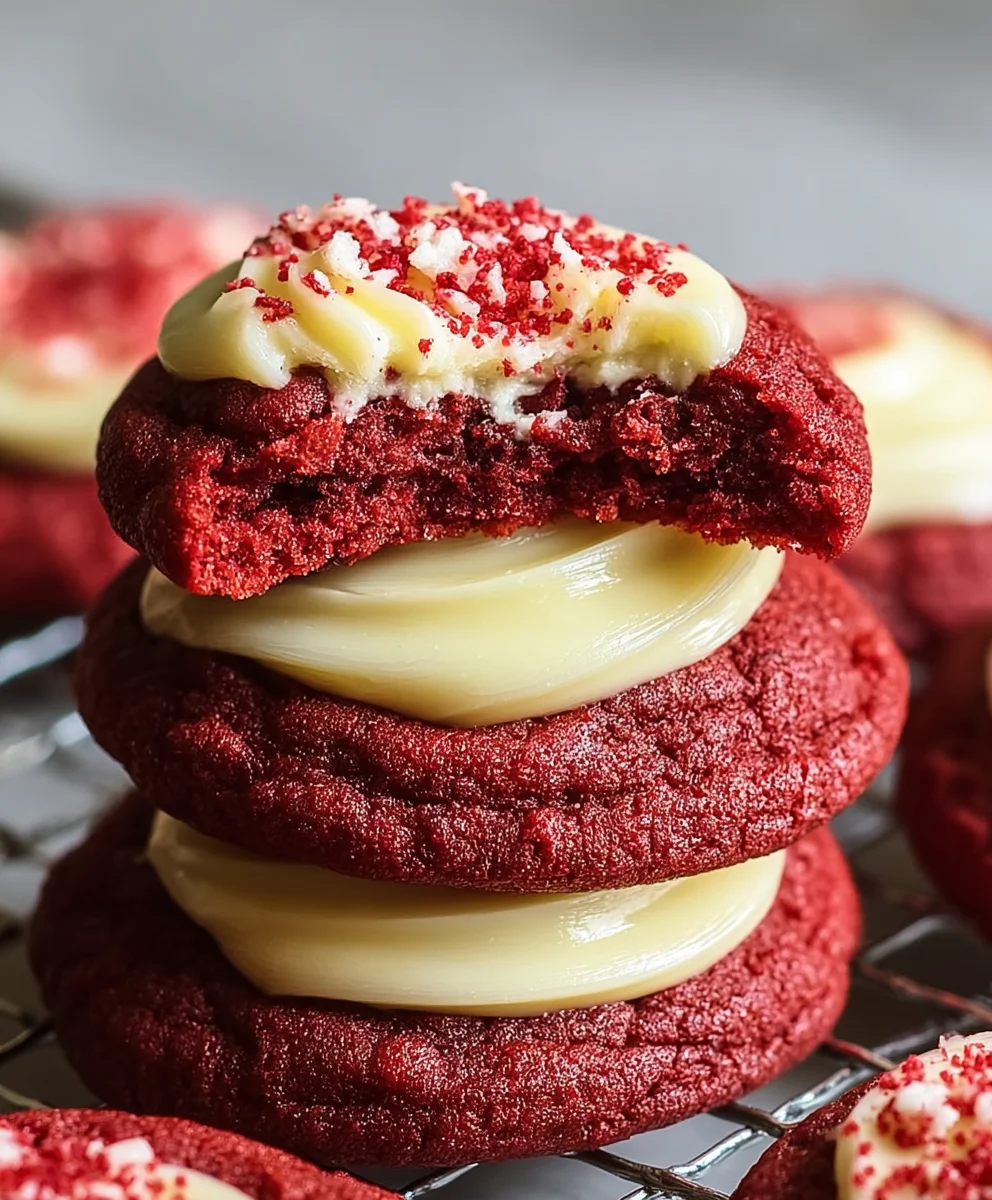
Cream Cheese Red Velvet Cookies are the stuff of dessert dreams, a delightful fusion of classic red velvet cake and beloved cookie comfort. If you’ve ever found yourself swooning over the rich, slightly tangy flavor and vibrant crimson hue of a red velvet cake, then prepare to fall head over heels for their cookie cousins. These aren’t just any cookies; they’re an experience. What makes them so incredibly special? It’s the magical interplay between the moist, tender crum extractb of the red velvet dough and the irresistible, creamy swirl of cream cheese that gets baked right into every bite. Each cookie offers a perfect balance of sweetness and a subtle, decadent tang, all encased in that iconic, show-stopping red. They’re the perfect treat for holidays, celebrations, or simply when you crave something extraordinary. Get ready to bake up a batch of pure bliss!

Ingredients:
- 1 1/4 cups all-purpose flour
- 1/4 cup cocoa powder
- 1 tsp baking powder
- 1/4 tsp salt
- 1/2 cup unsalted butter, softened
- 3/4 cup granulated sugar
- 1 large egg
- 1 tsp vanilla extract
- 1 tablespoon red food coloring
- 4 oz cream cheese, softened
- 1/4 cup powdered sugar
- 1/2 tsp vanilla extract
Cream Cheese Red Velvet Cookie Dough
Let’s get started by crafting the foundation of these delightful Cream Cheese Red Velvet Cookies. The first step involves creating a dry ingredient mixture that will provide structure and flavor to our cookies. In a medium-sized bowl, whisk together the all-purpose flour, cocoa powder, baking powder, and salt. Whisking these dry ingredients thoroughly ensures that the leavening agent and salt are evenly distributed, which is crucial for consistent cookie texture and rise. It also helps to break up any clumps in the cocoa powder, preventing streaks of unmixed powder in your final cookies. Set this bowl aside for later.
Now, we’ll move on to creaming the butter and sugar. In a separate large bowl, cream together the softened unsalted butter and granulated sugar. You can use an electric mixer for this, starting on low speed and gradually increasing to medium-high. Creaming is the process of beating butter and sugar together until the mixture is light, fluffy, and pnon-alcoholic ale in color. This process incorporates air into the dough, which contributes to the cookie’s tender texture and helps it spread slightly during baking. Continue to beat for about 3-5 minutes until you achieve that desirable fluffy consistency.
Next, we’ll add the wet ingredients that will bring our vibrant red velvet flavor to life. To the creamed butter and sugar mixture, add the large egg, 1 teaspoon of vanilla extract, and the tablespoon of red food coloring. Beat on medium speed until everything is well combined and the color is uniform. The red food coloring is what gives these cookies their signature striking hue, so ensure it’s thoroughly incorporated. Don’t be alarmed if the color looks intensely red at this stage; it will bake into a beautiful, deep red.
Now it’s time to combine the wet and dry ingredients. Gradually add the dry ingredient mixture (from the first step) to the wet ingredients. Mix on low speed until just combined. Be careful not to overmix at this stage. Overmixing can develop the gluten in the flour too much, resulting in tough cookies. Stop mixing as soon as you no longer see streaks of dry flour. The dough will be thick and a beautiful red color.
Crafting the Cream Cheese Swirl
While our cookie dough chills slightly, let’s prepare the luscious cream cheese swirl that makes these Cream Cheese Red Velvet Cookies so special. In a small bowl, combine the softened cream cheese, powdered sugar, and the remaining 1/2 teaspoon of vanilla extract. Using an electric mixer on low speed, or a sturdy whisk, beat these ingredients together until smooth and creamy. It’s important that the cream cheese is truly softened to avoid any lumps in your filling. If it’s too firm, you can gently microwave it for a few seconds, being careful not to melt it. This mixture will form the sweet and tangy core of our cookies.
Assembling and Baking Your Cookies
Now for the fun part: assembling our beautiful cookies! For this recipe, we’ll be creating a marbled effect. Take about two-thirds of the red velvet cookie dough and roll it into small balls, about 1-inch in diameter. Place these balls onto a baking sheet lined with parchment paper. Then, take the remaining one-third of the red velvet cookie dough and flatten each piece slightly. Place a small dollop of the cream cheese filling onto each flattened piece of red dough. Gently fold the red dough around the cream cheese filling, encasing it completely. Roll these stuffed pieces of dough into balls, slightly larger than the plain red velvet balls. You should aim for roughly 1.5-inch diameter for these cream cheese filled dough balls.
Once you have your dough balls prepared, it’s time to create that enticing swirl. Place one of the plain red velvet dough balls and one of the cream cheese-filled dough balls next to each other on your prepared baking sheet. Using your fingers or a skewer, gently swirl the two doughs together to create a marbled pattern. You don’t need to over-swirl; a few gentle twists will suffice. This marble effect is what gives the Cream Cheese Red Velvet Cookies their visual appeal and ensures that each bite has a delightful mix of red velvet and cream cheese. Leave about 2 inches of space between each cookie on the baking sheet to allow for spreading during baking.
Preheat your oven to 350°F (175°C). Once the oven is ready, bake the cookies for 10-12 minutes, or until the edges are set and lightly golden. The centers might still look slightly soft, but they will continue to cook as they cool on the baking sheet. For the best texture, I recommend allowing the cookies to cool on the baking sheet for about 5 minutes before transferring them to a wire rack to cool completely. This resting period helps the cookies firm up and prevents them from breaking.
Conclusion:
And there you have it – the ultimate guide to creating irresistible Cream Cheese Red Velvet Cookies! We’ve walked through each step, ensuring your cookies are not only stunningly beautiful with their vibrant red hue and creamy white swirls, but also incredibly delicious. The tender, slightly cakey texture combined with the tangy sweetness of cream cheese creates a flavor profile that’s truly unforgettable. These cookies are a showstopper for any occasion, from holiday gatherings to casual get-togethers.
For serving, these Cream Cheese Red Velvet Cookies are perfect on their own with a glass of cold milk, or they can be elevated by pairing them with a rich hot chocolate or a robust coffee. Imagin extracte them as the star dessert at your next party, or simply as a delightful treat to brighten your afternoon.
Don’t be afraid to experiment with variations! You could add a sprinkle of white chocolate chips for an extra layer of sweetness and texture, or perhaps a touch of peppermint extract to the dough for a festive twist. Feel free to adjust the amount of food coloring to achieve your desired shade of red. The most important thing is to have fun and enjoy the baking process. I encourage you to try this recipe and share your delicious creations with loved ones!
Frequently Asked Questions about Cream Cheese Red Velvet Cookies:
Q1: Why are my Cream Cheese Red Velvet Cookies spreading too much?
This can happen for a few reasons. Ensure your butter and cream cheese are softened, not melted. Overmixing the dough after adding the flour can also develop gluten, leading to spread. Chilling the dough for at least 30 minutes before baking is crucial; this solidifies the fats and helps maintain their shape. Also, make sure your oven temperature is accurate; an oven that’s too hot can cause them to spread quickly before setting.
Q2: Can I make these cookies ahead of time?
Yes, absolutely! The dough can be made up to 2-3 days in advance and stored in an airtight container in the refrigerator. When you’re ready to bake, simply scoop and bake as directed, adding a couple of extra minutes to the baking time if the dough is very cold. You can also bake the cookies and store them in an airtight container at room temperature for up to 3-4 days, or freeze them for longer storage.
Cream Cheese Red Velvet Cookies-Easy & Delicious Recipe
Easy and delicious red velvet cookies with a creamy cream cheese swirl.
Ingredients
-
1 1/4 cups all-purpose flour
-
1/4 cup cocoa powder
-
1 tsp baking powder
-
1/4 tsp salt
-
1/2 cup unsalted butter, softened
-
3/4 cup granulated sugar
-
1 large egg
-
1 tsp vanilla extract
-
1 tablespoon red food coloring
-
4 oz cream cheese, softened
-
1/4 cup powdered sugar
-
1/2 tsp vanilla extract
Instructions
-
Step 1
In a medium bowl, whisk together flour, cocoa powder, baking powder, and salt. Set aside. -
Step 2
In a large bowl, cream together softened butter and granulated sugar until light and fluffy. -
Step 3
Beat in the egg, 1 tsp vanilla extract, and red food coloring until well combined and uniform in color. -
Step 4
Gradually add the dry ingredients to the wet ingredients, mixing on low speed until just combined. Do not overmix. -
Step 5
In a small bowl, beat softened cream cheese, powdered sugar, and 1/2 tsp vanilla extract until smooth and creamy. -
Step 6
Form two-thirds of the red velvet dough into 1-inch balls. Flatten the remaining one-third, place a dollop of cream cheese filling in the center, and enclose it with the red dough, forming 1.5-inch balls. -
Step 7
Place a plain red velvet dough ball and a cream cheese-filled dough ball next to each other on a parchment-lined baking sheet. Gently swirl them together with a skewer to create a marbled pattern. -
Step 8
Bake at 350°F (175°C) for 10-12 minutes, or until edges are set. Cool on the baking sheet for 5 minutes before transferring to a wire rack.
Important Information
Nutrition Facts (Per Serving)
It is important to consider this information as approximate and not to use it as definitive health advice.
Allergy Information
Please check ingredients for potential allergens and consult a health professional if in doubt.


Leave a Comment