
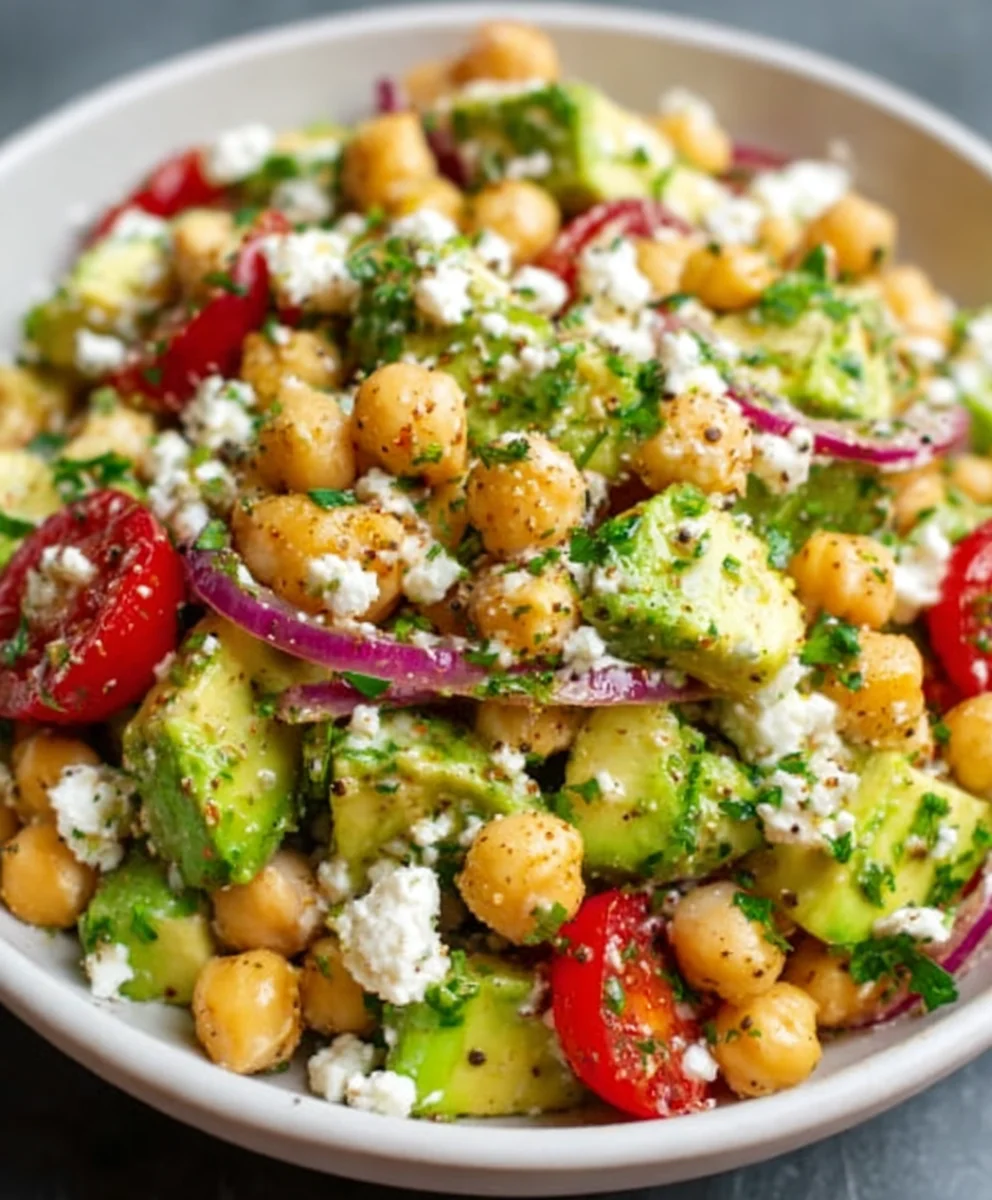
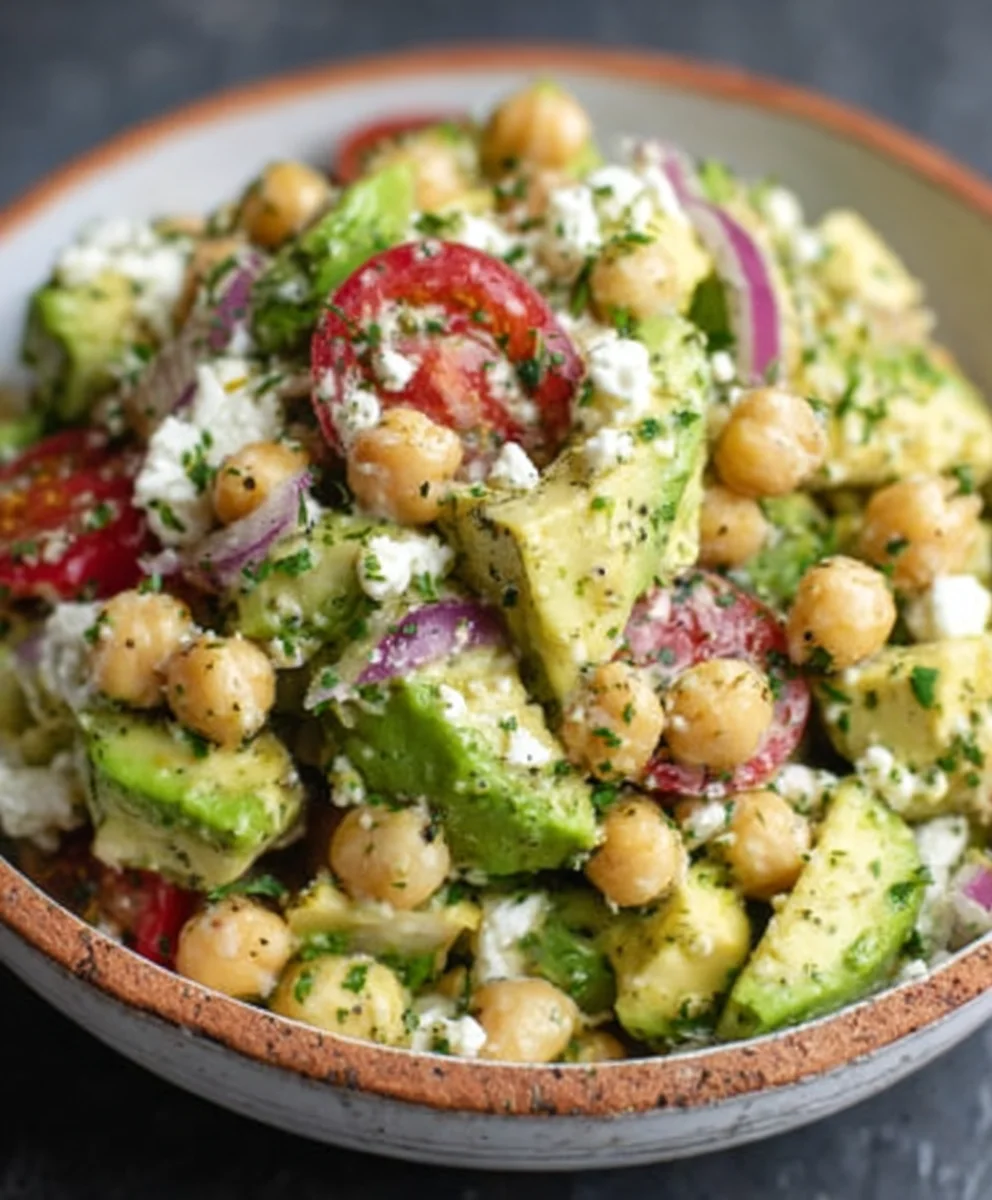
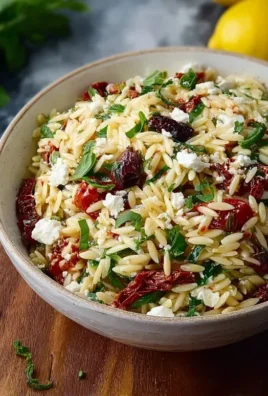
Chickpea Feta Avocado Salad is more than just a simple salad; it’s a vibrant explosion of textures and flavors that has rightfully earned its place as a go-to for quick lunches, light dinners, or impressive potluck contributions. Imagin extracte creamy avocado, briny feta cheese, and hearty chickpeas coming together in perfect harmony, tossed with a zesty dressing that ties it all together. What’s not to love? This particular Chickpea Feta Avocado Salad recipe strikes a beautiful balance, offering a refreshing yet satisfying meal that’s packed with plant-based protein and healthy fats. It’s the kind of dish that makes you feel good from the inside out, and its visual appeal is just as captivating as its taste. Get ready to discover why this salad is about to become your new favorite.

Ingredients:
- 1 (15-ounce/425g) can chickpeas, drained and rinsed
- 1 ripe avocado, pitted and diced
- 4 ounces/115g feta cheese, crum extractbled
- 1/2 cup/75g red onion, thinly sliced
- 1/2 cup/50g fresh parsley, chopped
- 1/4 cup/25g fresh mint, chopped
- 3 tablespoons/45ml olive oil
- 2 tablespoons/30ml lemon juice, freshly squeezed
- 1 clove garlic, minced
- 1/2 teaspoon/2.5ml dried oregano
- Salt and freshly ground black pepper to taste
Preparing the Chickpea Feta Avocado Salad
This Chickpea Feta Avocado Salad is incredibly simple to assemble and bursting with fresh, vibrant flavors. It’s the perfect light lunch, a delightful side dish, or even a satisfying vegetarian main. The combination of creamy avocado, salty feta, earthy chickpeas, and zesty herbs creates a harmonious blend that’s both refreshing and filling. Let’s get started!
Step 1: Prepare the Base Ingredients
Begin extract by opening your can of chickpeas. It’s crucial to drain them thoroughly in a colander to remove any excess liquid. Once drained, give them a good rinse under cool running water. This rinsing step helps to remove any residual canning liquid, which can sometimes impart an off-flavor. Pat them dry gently with a clean kitchen towel or paper towels; excess moisture can make the salad watery. Transfer these prepared chickpeas to a large mixing bowl. This is where all the magic will happen, so a generous-sized bowl is key to ensure everything is well combined without spillage.
Next, prepare your avocado. For the best texture, choose an avocado that yields slightly to gentle pressure. Cut it in half lengthwise around the pit. Twist the two halves to separate them. Carefully tap the pit with your knife to lodge it, then twist the knife to remove it. Using a spoon, scoop the flesh out of the skin. Dice the avocado into bite-sized pieces, aiming for cubes roughly the same size as your chickpeas for a pleasing aesthetic and ease of eating. Add the diced avocado to the bowl with the chickpeas. It’s best to add the avocado just before serving to prevent it from browning.
Step 2: Add the Salty and Aromatic Elements
Now it’s time to introduce the star of the show: feta crum extractse. Crumble your feta directly into the bowl with the chickpeas and avocado. If your feta comes in a block, rum extract can easily crumble it with your hands or a fork. The salty tang of the feta cheese will beautifully complement the mildness of the chickpeas and the richness of the avocado.
Thinly slice your red onion. A mandoline slicer can be helpful for achieving consistently thin slices, but a sharp knife works perfectly well. Red onion adds a sharp, slightly pungent bite that cuts through the richness of the other ingredients and provides a lovely color contrast. Aim for very thin half-moons or rings.
Next, prepare your fresh herbs. Chop your fresh parsley and fresh mint finely. Using fresh herbs is essential for this salad’s vibrant flavor profile. Parsley offers a bright, slightly peppery note, while mint brings a refreshing coolness. Make sure to chop them just before adding them to the salad to preserve their freshness and aroma. Add both the chopped parsley and mint to the mixing bowl.
Step 3: Whisk Together the Zesty Dressing
In a small separate bowl or a jar with a tight-fitting lid, we’ll prepare the dressing. This simple dressing brings all the flavors together. Start with the olive oil, pouring your 3 tablespoons into the bowl. Then, add the freshly squeezed lemon juice. Freshly squeezed lemon juice is far superior to bottled and provides a bright, acidic counterpoint to the other ingredients.
Now, mince your garlic clove. The best way to mince garlic is to first finely chop it and then give it a final mince with the side of your knife, crushing it slightly. Add the minced garlic to the dressing mixture. This will infuse the dressing with a subtle garlic warmth without being overpowering.
Finally, add the dried oregano to the dressing. Oregano adds a lovely Mediterranean depth. Whisk all these ingredients together vigorously until they are well combined and emulsified. Alternatively, if using a jar, simply put all the dressing ingredients in, screw on the lid tightly, and shake well until emulsified.
Step 4: Combine and Season
Pour the prepared dressing evenly over the ingredients in the large mixing bowl. Gently toss everything together using large spoons or spatulas. Be careful not to over-mix, especially with the avocado, as you don’t want to mash it into a paste. The goal is to lightly coat all the ingredients with the delicious dressing.
Once everything is lightly coated, it’s time to season. Add salt and freshly ground black pepper to taste. It’s important to taste as you go. The feta cheese is already salty, so you might not need as much salt as you think. Start with a pinch, toss, taste, and then adjust as needed. Freshly ground black pepper provides a little bit of warmth and complexity that complements the other flavors beautifully. Continue to toss gently to distribute the salt and pepper evenly throughout the salad.
Step 5: Chill and Serve
For the best flavor, cover the bowl tightly with plastic wrap or a lid and refrigerate the Chickpea Feta Avocado Salad for at least 15-30 minutes. This chilling time allows the flavors to meld together, making the salad even more delicious. The coolness also makes it incredibly refreshing, especially on a warm day. When you’re ready to serve, give the salad a gentle stir. You can serve this salad as is, or if you prefer, you can serve it over a bed of fresh greens like spinach or arugula. It also makes a fantastic filling for pita bread or wraps. Enjoy this incredibly simple yet flavorful Chickpea Feta Avocado Salad!
Conclusion:
And there you have it – your vibrant and delicious Chickpea Feta Avocado Salad is ready to impress! This recipe is a testament to how simple, fresh ingredients can come together to create something truly satisfying and healthy. The creamy avocado, briny feta, and hearty chickpeas are a match made in salad heaven, complemented perfectly by the zesty lemon-herb dressing.
I love serving this Chickpea Feta Avocado Salad as a light lunch, a delightful side dish for grilled chicken or fish, or even as a topping for baked sweet potatoes. Don’t be afraid to get creative with your garnishes! A sprinkle of toasted sunflower seeds or a handful of fresh mint can add an extra layer of texture and flavor.
If you’re feeling adventurous, consider adding other elements like chopped cucumber for extra crunch, black olives for a more Mediterranean twist, or even some cooked quinoa for a more substantial meal. The beauty of this salad is its adaptability!
I hope you enjoy making and savoring this fantastic Chickpea Feta Avocado Salad as much as I do. It’s a reliable go-to that’s both good for you and incredibly tasty. Happy cooking!
Frequently Asked Questions:
Can I make this salad ahead of time?
Yes, you can prepare most of the components ahead of time. Chop the vegetables and prepare the dressing separately. It’s best to add the avocado just before serving to prevent it from browning.
What if I don’t have feta cheese?
If you can’t find feta, a crum extractbly goat cheese or even some small cubes of halloumi (lightly grilled) can be excellent substitutes. For a dairy-free option, you could try a store-bought vegan feta alternative or simply omit it.
Can I add other vegetables to the Chickpea Feta Avocado Salad?
Absolutely! This salad is very forgiving. Bell peppers, red onion, cherry tomatoes, and fresh spinach are all wonderful additions that will enhance the flavor and nutritional profile.
Chickpea Feta Avocado Salad – Easy Fresh Recipe
An incredibly simple yet flavorful Chickpea Feta Avocado Salad, bursting with fresh, vibrant flavors. Perfect for a light lunch, a delightful side dish, or a satisfying vegetarian main.
Ingredients
-
1 (15-ounce/425g) can chickpeas, drained and rinsed
-
1 ripe avocado, pitted and diced
-
4 ounces/115g feta cheese, crumbled
-
1/2 cup/75g red onion, thinly sliced
-
1/2 cup/50g fresh parsley, chopped
-
1/4 cup/25g fresh mint, chopped
-
3 tablespoons/45ml olive oil
-
2 tablespoons/30ml lemon juice, freshly squeezed
-
1 clove garlic, minced
-
1/2 teaspoon/2.5ml dried oregano
-
Salt and freshly ground black pepper to taste
Instructions
-
Step 1
Drain and rinse the chickpeas thoroughly. Pat them dry and transfer them to a large mixing bowl. Dice the avocado into bite-sized pieces and add it to the bowl with the chickpeas. It’s best to add the avocado just before serving to prevent browning. -
Step 2
Crumble the feta cheese directly into the bowl. Thinly slice the red onion and add it to the bowl. Finely chop the fresh parsley and mint, and add them to the mixture. -
Step 3
In a small separate bowl, whisk together the olive oil, freshly squeezed lemon juice, minced garlic, and dried oregano until well combined and emulsified. Alternatively, combine ingredients in a jar and shake well. -
Step 4
Pour the prepared dressing evenly over the ingredients in the large mixing bowl. Gently toss everything together, being careful not to over-mix the avocado. -
Step 5
Season the salad with salt and freshly ground black pepper to taste. Start with a pinch of salt, toss, taste, and adjust as needed. Continue to toss gently to distribute the seasonings evenly. -
Step 6
Cover the bowl tightly and refrigerate for at least 15-30 minutes to allow the flavors to meld. Serve chilled, either on its own, over fresh greens, or as a filling for pita bread or wraps.
Important Information
Nutrition Facts (Per Serving)
It is important to consider this information as approximate and not to use it as definitive health advice.
Allergy Information
Please check ingredients for potential allergens and consult a health professional if in doubt.
Leave a Comment