
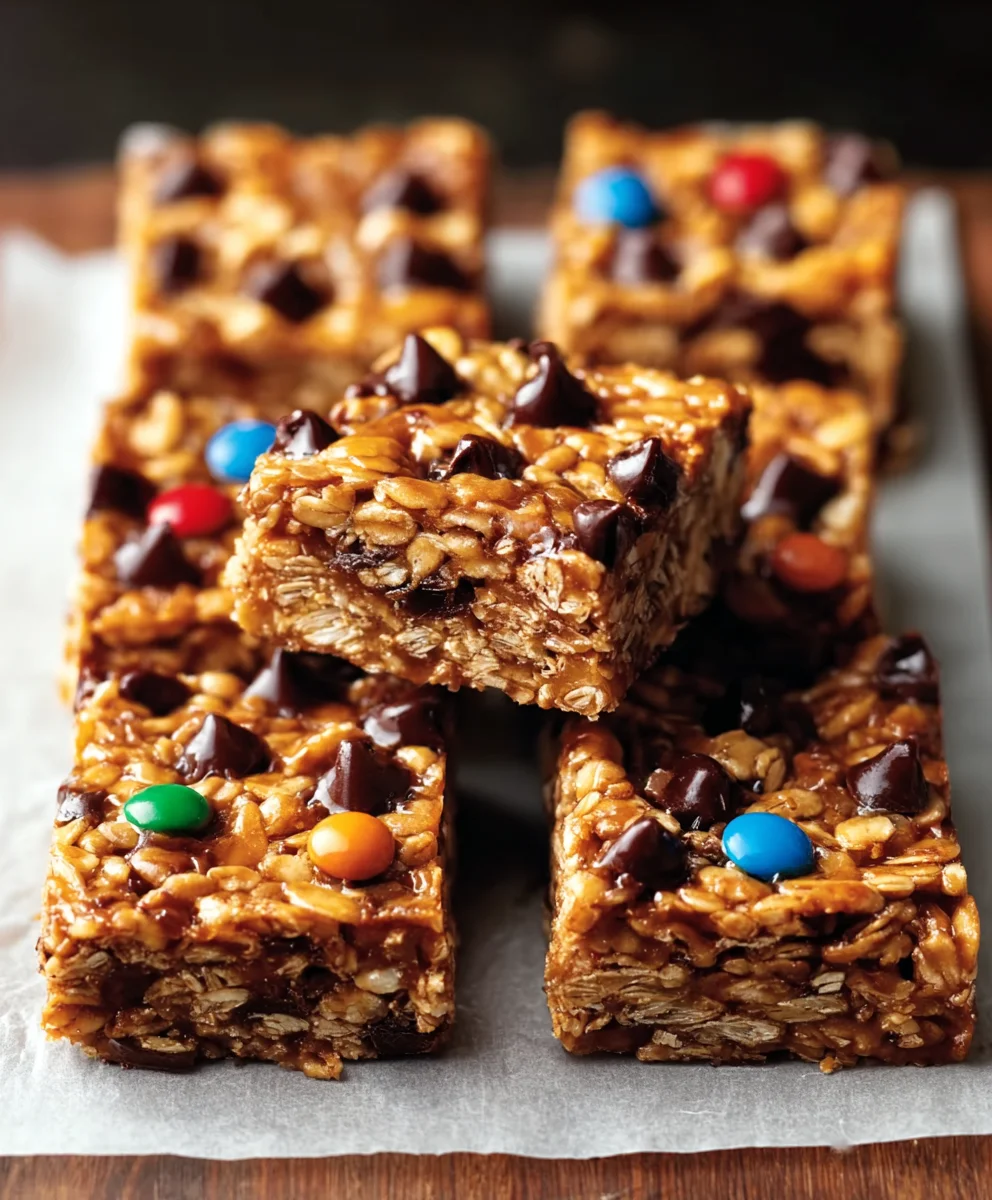
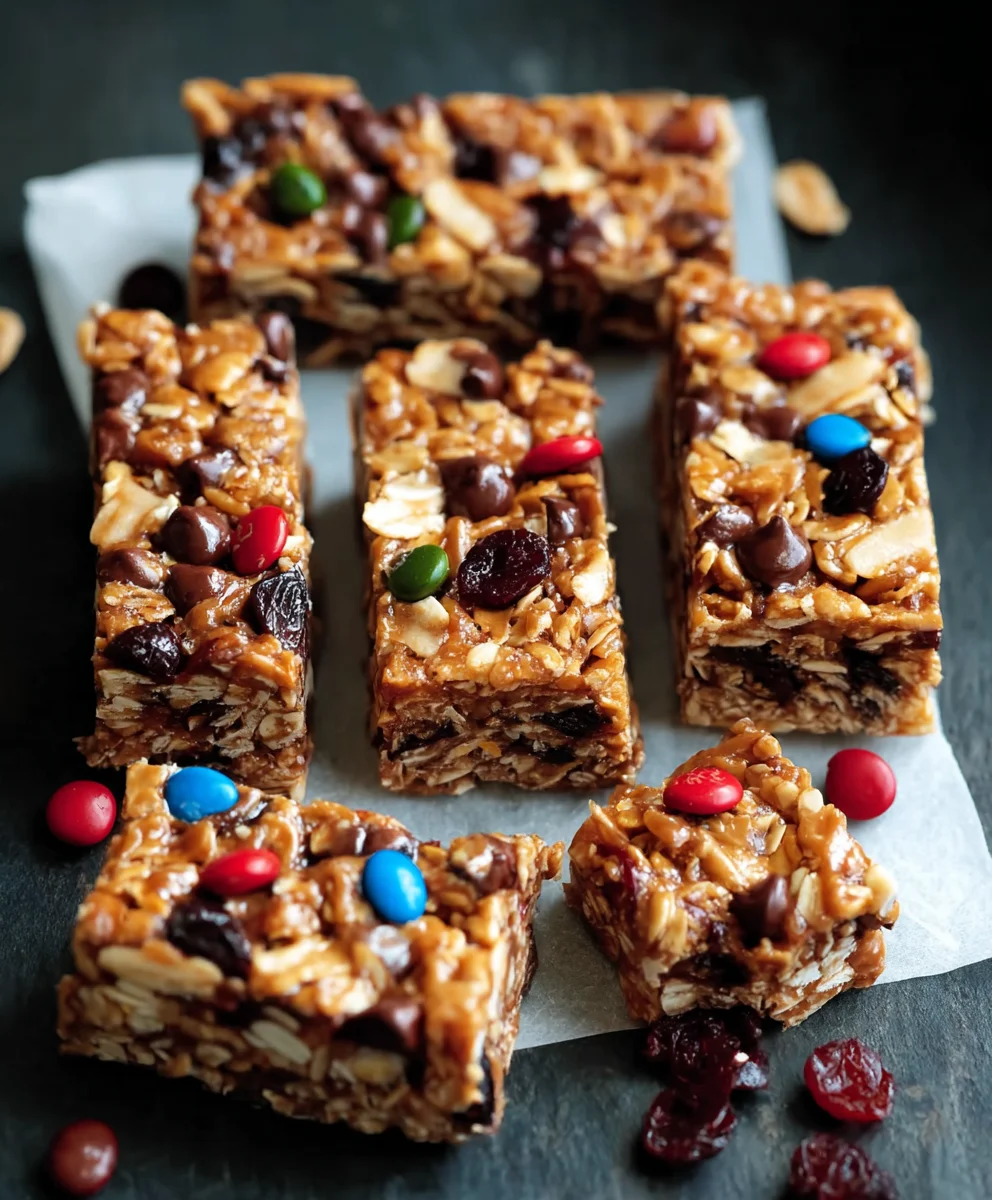
Chewy Granola Bars are an absolute game-changer when it comes to satisfying those mid-afternoon cravings or fueling your active lifestyle. There’s something incredibly comforting and undeniably delicious about biting into a perfectly textured, wholesome bar. People adore them because they offer a fantastic balance of sweetness and substance, providing sustained energy without the guilt of processed snacks. What truly makes these chewy granola bars special is their incredible versatility. You can customize them with your favorite nuts, seeds, dried fruits, and even a touch of chocolate, creating a truly personalized treat. Forget those cardboard-like store-bought versions; we’re talking about a homemade delight that’s both incredibly easy to prepare and infinitely more satisfying. Get ready to elevate your snack game with this recipe for the ultimate chewy granola bars!

Ingredients:
- ¾ cup creamy peanut butter
- ½ cup honey
- 2 tablespoons coconut oil, solid
- ½ teaspoon salt (adjust if using salted nuts or peanut butter)
- 1½ teaspoons vanilla extract
- 2 cups old-fashioned oats
- ¼ cup shredded coconut
- ¾ cup roasted and salted cashews, roughly chopped
- 6 tablespoons mini chocolate chips, divided
- 6 tablespoons mini M&M’s, divided
Preparing the Base for Your Chewy Granola Bars
Step 1: Melt the Wet Ingredients
First, we need to create a sticky, binding base that will hold all our delicious ingredients together. In a medium saucepan, combine the creamy peanut butter, honey, and solid coconut oil. Place the saucepan over low heat. Stir gently and continuously until the coconut oil has completely melted and the mixture is smooth and well-combined. This low heat is important to prevent the peanut butter from scorching or becoming oily. You’re looking for a silky, pourable consistency. If your peanut butter is very thick, you might need to stir for a few minutes to achieve this. Once everything is melted and smooth, remove the saucepan from the heat.
Step 2: Infuse with Flavor and Salt
Now, it’s time to add the flavor enhancers. To the warm peanut butter mixture, stir in the vanilla extract and the salt. If you’re using unsalted peanut butter and unsalted cashews, you’ll want to use the full ½ teaspoon of salt to balance the sweetness and bring out the other flavors. If either your peanut butter or your cashews are already salted, I recommend tasting the mixture at this stage and reducing the added salt to ¼ teaspoon or even omitting it entirely. The goal is to enhance, not overpower. Whisk these in thoroughly until they are evenly distributed throughout the mixture. The aroma at this point will already be quite enticing!
Incorporating the Dry Ingredients for Chewy Texture
Step 3: Combine Oats, Coconut, and Nuts
In a large mixing bowl, add the old-fashioned oats, shredded coconut, and the roughly chopped roasted and salted cashews. Having the cashews roughly chopped ensures they’re distributed nicely throughout the bars and provide a satisfying crunch without being too large. The shredded coconut adds another layer of texture and a subtle tropical sweetness. Make sure the oats are old-fashioned; rolled oats are ideal here as they will hold their shape and contribute to the chewy texture, unlike instant oats which can become mushy. Give these dry ingredients a quick stir to distribute them evenly in the bowl.
Step 4: Marry the Wet and Dry
Now, it’s time to bring it all together. Pour the warm peanut butter and honey mixture over the dry ingredients in the large bowl. Using a sturdy spatula or a wooden spoon, begin extract to mix everything thoroughly. You want to ensure that every single oat, piece of coconut, and cashew is coated with the sticky binder. This step requires a bit of muscle; keep stirring and folding until no dry pockets remain. It might seem a bit clumpy at first, but continue mixing until you have a cohesive mixture that starts to hold together when you press it. This thorough mixing is crucial for ensuring your chewy granola bars don’t crum extractble apart later.
Adding the Final Touches and Forming the Bars
Step 5: Fold in the Goodies
This is where we add the fun elements that make these bars extra special. Gently fold in 3 tablespoons of the mini chocolate chips and 3 tablespoons of the mini M&M’s into the granola mixture. Reserve the remaining 3 tablespoons of chocolate chips and 3 tablespoons of M&M’s for topping. Folding them in gently helps to prevent them from breaking apart too much during the mixing process. Ensure they are evenly distributed throughout the mixture. These will be the hidden gems within your bars, providing bursts of chocolatey and candy sweetness with every bite.
Step 6: Press and Chill for Perfect Bars
Line an 8×8 inch baking pan with parchment paper, leaving some overhang on the sides. This overhang will make it much easier to lift the entire block of granola out of the pan once it’s set. Spoon the granola mixture into the prepared pan. Using the back of your spatula or your hands (lightly greased with a little coconut oil or water if they’re sticking), press the mixture down very firmly and evenly into the pan. The firmer you press, the better your bars will hold together. After pressing, sprinkle the reserved 3 tablespoons of mini chocolate chips and 3 tablespoons of mini M&M’s over the top of the pressed mixture. Gently press these toppings into the surface as well. Cover the pan tightly with plastic wrap or foil and refrigerate for at least 2-3 hours, or until completely firm. This chilling time is essential for allowing the bars to set properly and achieve that perfect chewy texture.
Step 7: Cut and Enjoy
Once the granola mixture is thoroughly chilled and firm to the touch, use the parchment paper overhang to lift the entire block out of the pan and onto a cutting board. Using a sharp knife, cut the block into your desired bar sizes. You can make them larger or smaller depending on your preference. For a cleaner cut, you might find it helpful to wipe your knife clean between cuts, especially if the chocolate chips have started to soften. Store your homemade chewy granola bars in an airtight container at room temperature for up to a week, or in the refrigerator for longer storage. They make for a fantastic breakfast on-the-go, a satisfying snack, or a healthy-ish dessert.
Conclusion:
We hope you’ve enjoyed learning how to create these absolutely delicious Chewy Granola Bars! This recipe offers a fantastic balance of wholesome goodness and satisfying sweetness, making them the perfect on-the-go snack, breakfast treat, or even a healthy dessert. The beauty of these Chewy Granola Bars lies in their versatility; they’re wonderfully adaptable to your personal taste and what you have on hand. Don’t be afraid to get creative with your additions!
For serving, these bars are delightful on their own, but you can also pair them with a glass of milk, a cup of yogurt, or a fresh piece of fruit for a more complete snack. They store beautifully in an airtight container at room temperature for up to a week, or in the refrigerator for even longer, making them ideal for meal prepping.
As mentioned in the recipe, feel free to experiment with different nuts, seeds, dried fruits, and even a touch of your favorite spice like cinnamon or nutmeg. You could also drizzle them with melted chocolate for an extra indulgent treat. We encourage you to make these Chewy Granola Bars your own and enjoy the process of creating something both healthy and incredibly tasty!
Frequently Asked Questions:
Why are my Chewy Granola Bars not holding together?
This often happens if there isn’t enough binder or if the mixture isn’t pressed firmly enough. Ensure your wet ingredients (like honey or maple syrup) are well combined with the dry ingredients. Also, pressing the mixture into the pan with significant force is crucial for them to set properly. You can also try adding a little extra nut butter or a tablespoon of chia seeds mixed with water (chia egg) to help bind them.
Can I make these Chewy Granola Bars gluten-free?
Absolutely! To make these Chewy Granola Bars gluten-free, simply ensure you use certified gluten-free oats. All other common ingredients like nuts, seeds, dried fruits, and sweeteners are typically gluten-free. Always double-check the labels of any pre-made ingredients like chocolate chips or protein powders to be certain.
Chewy Homemade Granola Bars
Easy and delicious homemade granola bars packed with oats, nuts, chocolate chips, and M&M’s. Perfect for breakfast on-the-go or a satisfying snack.
Ingredients
-
¾ cup creamy peanut butter
-
½ cup honey
-
2 tablespoons solid coconut oil
-
½ teaspoon salt (adjust if using salted nuts or peanut butter)
-
1½ teaspoons vanilla extract
-
2 cups old-fashioned oats
-
¼ cup shredded coconut
-
¾ cup roasted and salted cashews, roughly chopped
-
6 tablespoons mini chocolate chips, divided
-
6 tablespoons mini M&M’s, divided
Instructions
-
Step 1
In a medium saucepan over low heat, combine peanut butter, honey, and coconut oil. Stir until melted and smooth. -
Step 2
Remove from heat and stir in vanilla extract and salt. Adjust salt based on salted ingredients used. -
Step 3
In a large bowl, combine old-fashioned oats, shredded coconut, and chopped cashews. -
Step 4
Pour the warm peanut butter mixture over the dry ingredients and stir thoroughly until everything is coated. -
Step 5
Gently fold in 3 tablespoons of mini chocolate chips and 3 tablespoons of mini M&M’s. -
Step 6
Line an 8×8 inch pan with parchment paper. Press the mixture firmly and evenly into the pan. Sprinkle remaining chocolate chips and M&M’s on top and gently press them in. -
Step 7
Cover and refrigerate for at least 2-3 hours until firm. Cut into bars and enjoy.
Important Information
Nutrition Facts (Per Serving)
It is important to consider this information as approximate and not to use it as definitive health advice.
Allergy Information
Please check ingredients for potential allergens and consult a health professional if in doubt.

Leave a Comment