
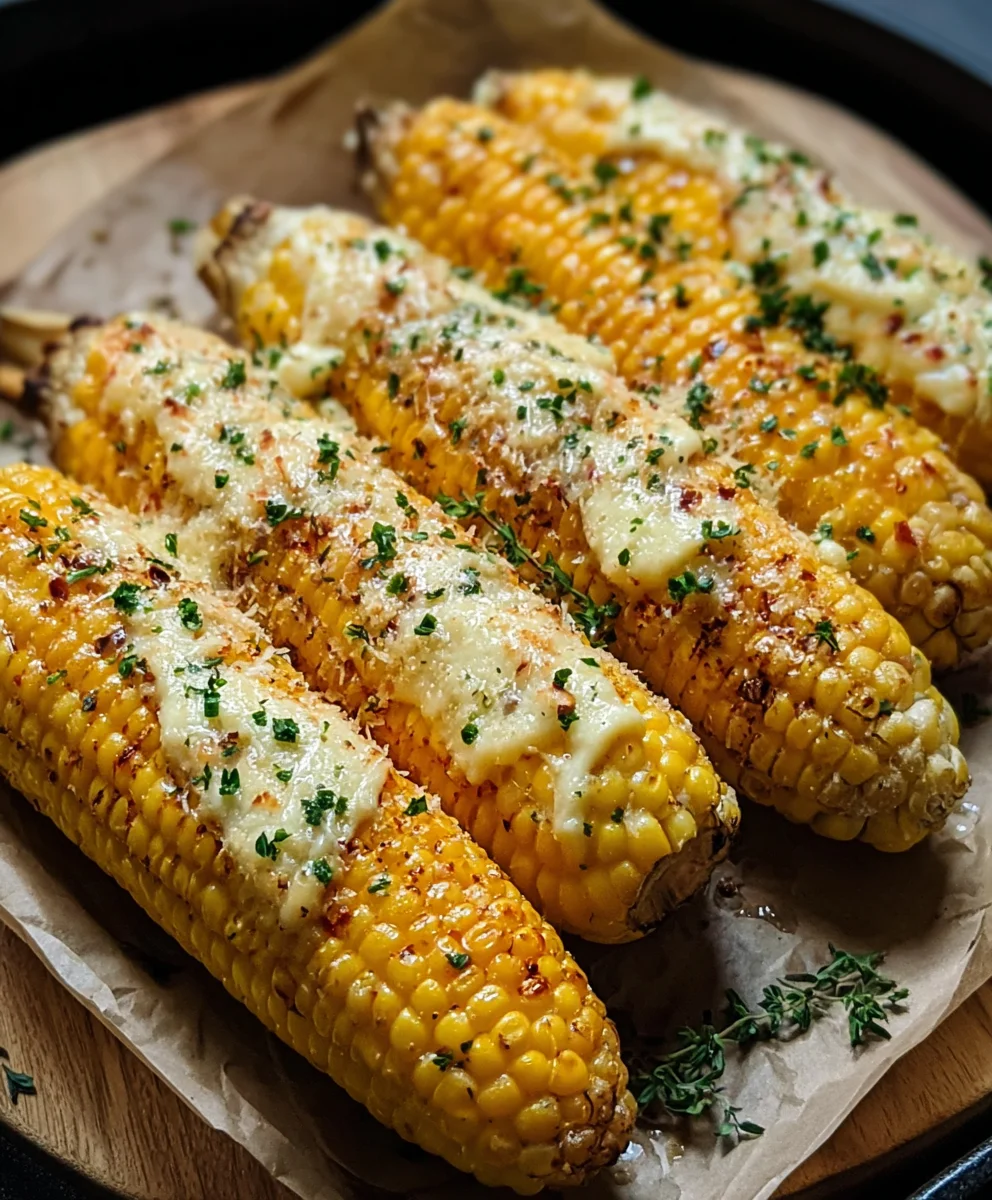
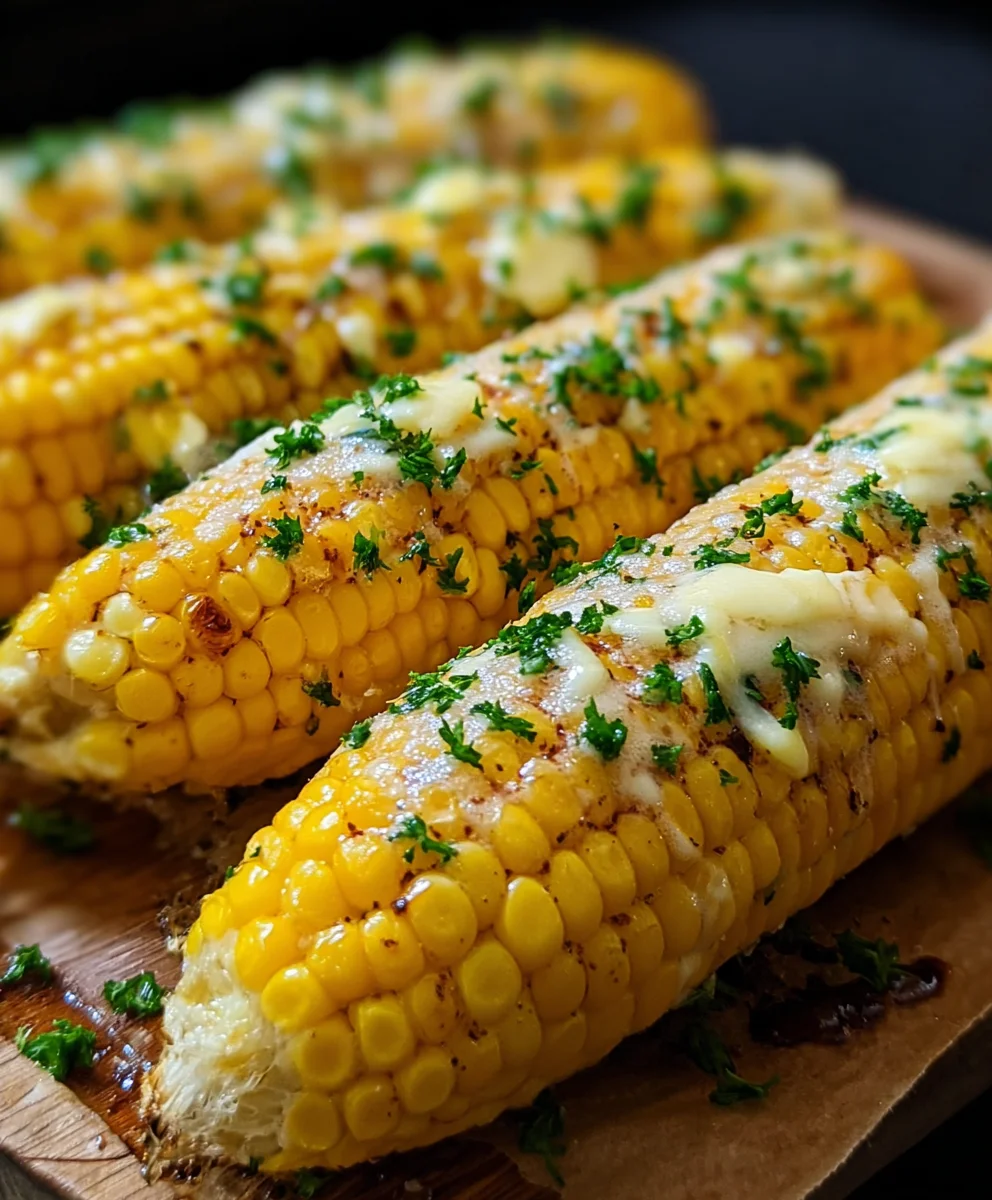
Cheesy Garlic Butter Corn on the Cob is more than just a side dish; it’s a culinary hug, a symphony of sweet corn, rich butter, pungent garlic, and a delightful blanket of melted cheese. If you’ve ever found yourself reaching for just one more ear at a summer barbecue or clam bake, you already understand the irresistible allure of this classic. It’s that perfect balance of simple ingredients coming together to create something truly extraordinary. What makes this version so special? It’s the way the creamy, savory cheese melds with the aromatic garlic and buttery kernels, creating a flavor explosion that’s both comforting and exciting. This recipe takes the beloved corn on the cob to a whole new level, transforming it into a star attraction that will have everyone asking for your secret. Get ready to experience corn on the cob like never before!

Ingredients:
- 4 ears fresh corn, husked
- ¼ cup (½ stick) unsalted butter, softened
- 2 garlic cloves, minced
- 1 tbsp chopped fresh parsley
- ½ tsp salt
- ¼ tsp black pepper
- ½ cup grated Parmesan cheese
- 1 tsp lemon zest (optional)
Preparing the Corn
Preheat Your Grill or Oven
Before we get our hands messy with butter and cheese, let’s get our cooking environment ready. If you’re opting for the grill, preheat it to medium-high heat (around 400-450°F or 200-230°C). This ensures a good sear on the corn. If you prefer to use your oven, preheat it to 400°F (200°C). For oven preparation, you can either wrap the corn in foil or place it directly on the oven rack. Grilling will give you a lovely smoky char, while the oven offers a more consistent, hands-off approach.
Create the Flavorful Butter Mixture
Now for the star of the show, the cheesy garlic butter! In a small bowl, combine the softened unsalted butter, minced garlic cloves, chopped fresh parsley, salt, and black pepper. If you’re feeling adventurous and want an extra pop of brightness, add the lemon zest now. Mix everything together thoroughly until it’s well combined and forms a fragrant paste. The softened butter is crucial here; it makes it much easier to spread evenly over the corn without tearing the kernels. Ensure the garlic is minced very finely so you get little bursts of flavor in every bite.
Assembling and Cooking the Corn
Evenly Coat the Corn with Butter
Take your husked ears of corn and lay them on a clean surface. Using a butter knife or a small spatula, generously spread the prepared garlic butter mixture all over each ear of corn. Be sure to get into all the nooks and crannies between the kernels. Don’t be shy with the butter; it’s what creates that irresistible richness and helps the Parmesan cheese adhere beautifully. For best results, try to get an even layer across the entire cob. This step is where the magic starts to happen, infusing the corn with incredible flavor.
Apply the Parmesan Cheese Coating
Once the butter is evenly distributed, it’s time for the cheesy goodness. Sprinkle the grated Parmesan cheese generously over the buttered corn. Gently press the cheese into the butter to help it stick. You want a nice, even coating of cheese that will melt and crisp up during cooking, creating a delightful crunchy topping. Make sure the cheese covers as much surface area as possible for maximum flavor impact. This is what elevates simple corn on the cob to a truly decadent experience.
Cook to Golden Perfection
Now, let’s get cooking!
If grilling: Place the buttered and cheesed corn directly on the preheated grill grates. Grill for approximately 10-15 minutes, turning the ears every few minutes, until the kernels are tender and slightly charred, and the cheese is melted and golden brown. Keep an eye on it to prevent burning, especially the cheese. The heat of the grill will quickly melt the butter and toast the cheese to perfection.
If using the oven:
Option 1 (Foil Wrapped): Wrap each ear of corn snugly in aluminum foil. Place the foil-wrapped corn directly on the oven rack or on a baking sheet. Bake for 20-25 minutes, or until the corn is tender. You can carefully unwrap the corn for the last 5 minutes of baking to allow the cheese to get a little crispy.
Option 2 (Directly on Rack/Baking Sheet): If you prefer a crispier cheese topping from the start, place the corn directly on a baking sheet lined with parchment paper or directly on the oven rack (place a baking sheet on the rack below to catch any drips). Bake for 20-25 minutes, turning occasionally, until the corn is tender and the cheese is melted and bubbly, with some crispy bits. The direct heat will encourage better browning of the cheese.
Rest and Serve
Once your Cheesy Garlic Butter Corn on the Cob is cooked to perfection, carefully remove it from the grill or oven. Let it rest for just a minute or two before serving. This allows the flavors to meld and the cheese to set slightly, making it easier to handle. Garnish with a little extra fresh parsley if desired for a vibrant finish. Serve immediately and enjoy the explosion of flavors – the sweet corn, the savory garlic butter, and the nutty, crispy Parmesan. It’s a simple yet incredibly satisfying side dish that’s perfect for any summer gathering or a weeknight treat.
Conclusion:
And there you have it – the ultimate guide to making the most delicious Cheesy Garlic Butter Corn on the Cob! This recipe is a guaranteed crowd-pleaser, perfect for barbecues, summer gatherings, or even just a comforting weeknight side dish. The combination of sweet corn, rich garlic butter, and melted cheese is simply irresistible. Don’t be afraid to experiment and make it your own!
For serving suggestions, this Cheesy Garlic Butter Corn on the Cob is fantastic alongside grilled meats, burgers, pulled beef, or a fresh salad. It also pairs wonderfully with other grilled vegetables. Feel free to sprinkle it with fresh chopped parsley or chives for an extra pop of color and flavor.
If you’re feeling adventurous, consider adding a pinch of cayenne pepper to the garlic butter for a little heat, or try different cheeses like Monterey Jack or a sharp cheddar for a bolder taste. You can even grill the corn directly on the barbecue for a smoky dimension. I encourage you to give this recipe a try – I’m confident you’ll love it as much as I do!
Frequently Asked Questions:
Can I make Cheesy Garlic Butter Corn on the Cob ahead of time?
While it’s best enjoyed fresh off the grill or out of the oven for maximum melted cheese, you can prepare the garlic butter mixture and butter the corn ahead of time. Store them separately in the refrigerator and assemble and cook just before serving.
What if I don’t have fresh corn? Can I use frozen corn?
Yes, you can adapt this recipe for frozen corn. Thaw the corn kernels completely and then toss them with the garlic butter mixture and cheese. You can then bake this in a dish until heated through and bubbly, or even sauté it in a pan. The texture might be slightly different than fresh cob corn, but it will still be delicious!
Cheesy Garlic Butter Corn on the Cob
A delicious and easy recipe for corn on the cob coated in a savory garlic butter and Parmesan cheese mixture, grilled or baked to golden perfection.
Ingredients
-
4 ears fresh corn, husked
-
1/4 cup unsalted butter, softened
-
2 garlic cloves, minced
-
1 tbsp chopped fresh parsley
-
1/2 tsp salt
-
1/4 tsp black pepper
-
1/2 cup grated Parmesan cheese
-
1 tsp lemon zest (optional)
Instructions
-
Step 1
Preheat your grill to medium-high heat (400-450°F) or your oven to 400°F (200°C). -
Step 2
In a small bowl, combine the softened butter, minced garlic, chopped parsley, salt, black pepper, and lemon zest (if using). Mix well to create a fragrant paste. -
Step 3
Generously spread the garlic butter mixture evenly over each ear of corn. -
Step 4
Sprinkle the grated Parmesan cheese over the buttered corn, pressing gently to help it adhere. -
Step 5
Grilling: Place corn on the grill and cook for 10-15 minutes, turning frequently, until tender and charred, and cheese is melted and golden. Oven: Wrap in foil and bake for 20-25 minutes, or bake directly on a baking sheet for crispier cheese. -
Step 6
Let the corn rest for a minute or two before serving. Garnish with extra parsley if desired.
Important Information
Nutrition Facts (Per Serving)
It is important to consider this information as approximate and not to use it as definitive health advice.
Allergy Information
Please check ingredients for potential allergens and consult a health professional if in doubt.

Leave a Comment