
Brown Sugar Layer Cake with Peach Filling is more than just a dessert; it’s a warm hug on a plate. There’s something utterly comforting and nostalgic about this classic combination, a testament to why it remains a beloved centerpiece for celebrations and quiet afternoons alike. Imagin extracte tender, moist layers infused with the rich, caramel notes of brown sugar, a flavor that instantly transports you to cozy kitchens and cherished memories. And then, the star of the show: a vibrant, sweet-tart peach filling, bursting with the essence of sun-ripened fruit, cutting through the richness of the cake perfectly. This isn’t just any cake; it’s an experience, a delightful interplay of textures and flavors that sings of summer’s bounty and homemade goodness. I’m so excited to share this Brown Sugar Layer Cake with Peach Filling recipe with you because it’s truly special.

Brown Sugar Layer Cake with Peach Filling
There’s something incredibly comforting and celebratory about a homemade layer cake. And when that cake features the warm, caramel-like notes of brown sugar paired with the sweet, juicy burst of fresh peaches, it becomes something truly special. This Brown Sugar Layer Cake with Peach Filling is a testament to simple, wholesome ingredients coming together to create pure delight. The moist, tender crum extractb of the brown sugar cake is the perfect canvas for the bright, slightly tart peach filling, creating a symphony of flavors and textures that will have everyone asking for seconds. Let’s get baking!
Ingredients:
Peach Filling
Let’s start by preparing our vibrant peach filling. This step is crucial for ensuring a burst of fresh fruit flavor in every bite.
1. In a medium saucepan, combine your 5 cups of peeled and chopped peaches with 1/3 cup of packed light brown sugar. Stir gently to coat the peaches.
2. Add the 1 tablespoon of cornstarch to the saucepan. This will help thicken the peach juices into a delightful compote.
3. Squeeze in the juice from half a lemon. The lemon juice not only adds a touch of brightness but also helps to enhance the natural sweetness of the peaches and prevents them from browning.
4. Place the saucepan over medium heat. Cook, stirring frequently, until the peaches begin extract to soften and release their juices, and the mixture starts to thicken. This usually takes about 8-10 minutes. Be patient; you’re looking for a consistency that’s like a loose jam.
5. Once thickened, remove the peach filling from the heat and set it aside to cool completely. It’s important that the filling is cool before you start assembling the cake, otherwise, it could melt the cake layers or the frosting.
Brown Sugar Cake Layers
Now for the star of the show – the incredibly moist and flavorful brown sugar cake layers. The brown sugar in this recipe not only adds sweetness but also a lovely depth of flavor and a wonderfully tender crum extractb.
1. Preheat your oven to 350°F (175°C). Grease and flour two 8-inch round cake pans. You can also line the bottoms with parchment paper for extra insurance against sticking.
2. In a medium bowl, whisk together your 2 1/2 cups of all-purpose flour, 2 1/2 teaspoons of baking powder, 1/2 teaspoon of ground cinnamon (if using, it adds a lovely warmth), and 1/2 teaspoon of salt. Set this dry ingredient mixture aside.
3. In a large bowl, cream together 3/4 cup of unsalted butter (make sure it’s truly at room temperature, so it’s soft but not melted) with 1 1/2 cups of packed Domino® light brown sugar until light and fluffy. This is where the magic of brown sugar really comes into play, giving the cake its characteristic color and rich flavor.
4. Beat in the 3 tablespoons of vegetable oil and 1 teaspoon of vanilla extract. The oil contributes to the cake’s moistness, while the vanilla enhances all the other flavors.
5. Add the 4 large eggs, one at a time, beating well after each addition until fully incorporated. Don’t rush this step; incorporating the eggs gradually will help create a smooth batter.
6. Now, it’s time to alternate adding the dry ingredients and the 1 1/4 cups of milk to the wet ingredients. Begin extract by adding about a third of the dry mixture and mix on low speed until just combined. Then, add half of the milk and mix again until just combined. Continue alternating, ending with the dry ingredients. Be careful not to overmix the batter at this stage, as it can lead to a tough cake. Mix only until no dry streaks of flour remain.
Baking the Cake Layers
1. Divide the batter evenly between your prepared cake pans. Gently smooth the tops with a spatula.
2. Bake for 30-35 minutes, or until a wooden skewer or toothpick inserted into the center of the cakes comes out clean. The exact baking time can vary depending on your oven, so start checking around the 30-minute mark.
3. Once baked, let the cakes cool in the pans on a wire rack for about 10-15 minutes before inverting them onto the wire rack to cool completely. Ensure they are fully cooled before attempting to frost or fill them.
Assembling Your Masterpiece
Once your cake layers are completely cooled and your peach filling has reached room temperature (or is still slightly warm, which can be lovely too!), it’s time to bring it all together.
1. If your cake layers have domed tops, you can carefully level them with a serrated knife to create a flat surface for stacking and frosting.
2. Place one cake layer on your serving plate or cake stand.
3. Spoon a generous amount of the cooled peach filling over the first cake layer, spreading it evenly towards the edges.
4. Carefully place the second cake layer on top of the peach filling.
5. At this point, you can frost your cake with your favorite frosting. A simple cream cheese frosting or a brown butter buttercream would complement the flavors beautifully. Alternatively, you can dust the top with a little powdered sugar for a more rustic presentation.
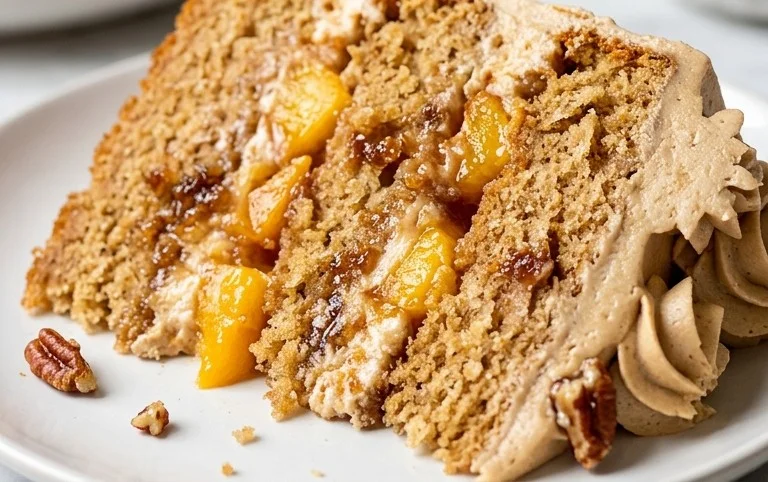
Enjoy this delightful Brown Sugar Layer Cake with Peach Filling. It’s a perfect treat for any occasion, from a special celebration to a cozy afternoon indulgence.
Conclusion:
This Brown Sugar Layer Cake with Peach Filling is truly a showstopper! The warm, caramelized notes of the brown sugar cake beautifully complement the sweet and slightly tart burst of the fresh peach filling, creating a delightful symphony of flavors and textures. It’s the perfect cake for celebrations, special occasions, or simply when you want to treat yourself to something truly delicious. The moist crum extractb of the cake and the vibrant, juicy filling make every bite an absolute pleasure.
For serving, I love this cake simply dusted with a little powdered sugar to let the cake and filling shine. However, a dollop of lightly sweetened whipped cream or a scoop of vanilla bean ice cream would be equally divine. If you’re feeling adventurous, consider a drizzle of caramel sauce over the top for an extra touch of indulgence.
Don’t hesitate to experiment with variations! You could swap the peaches for other stone fruits like nectarines or apricots when in season. A touch of cinnamon or cardamom in the cake batter would also add a wonderful warmth. The possibilities are endless, and I truly encourage you to give this recipe a try. I promise, you won’t be disappointed!
Frequently Asked Questions:
Can I make the peach filling ahead of time?
Absolutely! The peach filling can be made up to two days in advance and stored in an airtight container in the refrigerator. This can save you a lot of time on the day you plan to assemble the cake.
What if I don’t have fresh peaches?
If fresh peaches aren’t available, you can use frozen peaches. Ensure they are fully thawed and drained of excess liquid before incorporating them into the filling. Canned peaches can also work in a pinch, but be sure to drain them very well and consider reducing the sugar in the filling slightly, as canned peaches are often already sweetened.
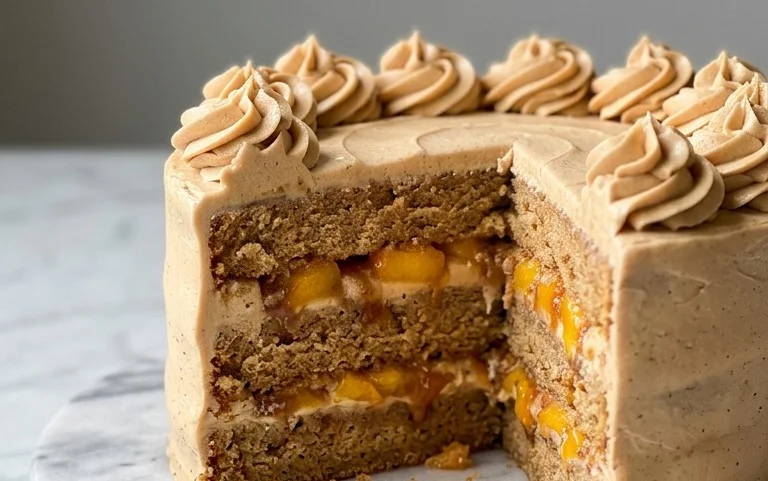
Brown Sugar Layer Cake with Peach Filling
A moist and flavorful layer cake featuring a rich brown sugar cake and a sweet, homemade peach filling.
Ingredients
-
5 cups peeled and chopped peaches (about 4-5 large peaches)
-
1/3 cup (75g) packed light brown sugar
-
1 tbsp cornstarch
-
Juice from 1/2 a lemon
-
2 1/2 cups (325g) all purpose flour
-
2 1/2 tsp baking powder
-
1/2 tsp ground cinnamon, optional
-
1/2 tsp salt
-
3/4 cup (168g) unsalted butter, room temperature
-
1 1/2 cups (337g) packed Domino® light brown sugar
-
3 tbsp vegetable oil
-
1 tsp vanilla extract
-
4 large eggs
-
1 1/4 cups (300ml) milk
-
1 1/4 cups (280g) unsalted butter, room temperature
Instructions
-
Step 1
For the peach filling: Combine peaches, 1/3 cup brown sugar, cornstarch, and lemon juice in a saucepan. Cook over medium heat, stirring, until thickened and bubbly. Let cool completely. -
Step 2
Preheat oven to 350°F (175°C). Grease and flour two 8-inch round cake pans. -
Step 3
In a large bowl, whisk together flour, baking powder, cinnamon (if using), and salt. -
Step 4
In a separate bowl, cream together 3/4 cup butter and 1 1/2 cups Domino® light brown sugar until light and fluffy. Beat in vegetable oil and vanilla extract. -
Step 5
Beat in eggs one at a time until well combined. Alternately add the dry ingredients and milk to the wet ingredients, beginning and ending with dry ingredients. Mix until just combined. -
Step 6
Divide batter evenly between prepared pans. Bake for 30-35 minutes, or until a wooden skewer inserted into the center comes out clean. -
Step 7
Let cakes cool in pans for 10 minutes before inverting onto a wire rack to cool completely. -
Step 8
For the frosting: Cream together 1 1/4 cups butter and the remaining brown sugar until smooth. Add vanilla extract. Beat until light and fluffy. (Add milk or cream if needed for desired consistency). -
Step 9
Assemble the cake: Place one cake layer on a serving plate. Spread the cooled peach filling over the cake. Top with the second cake layer. Frost the cake with the brown sugar frosting.
Important Information
Nutrition Facts (Per Serving)
It is important to consider this information as approximate and not to use it as definitive health advice.
Allergy Information
Please check ingredients for potential allergens and consult a health professional if in doubt.



Leave a Comment